Control plans
Control plans are in the Analysis › Control plans menu. Thresholds have their own page: Thresholds.
Video tutorial
The tutorial (5 min 21, in French with French subtitles) shows creating a threshold and a control plan (VR-XL rules), running it and reading its results.
Control plan
The control plan list
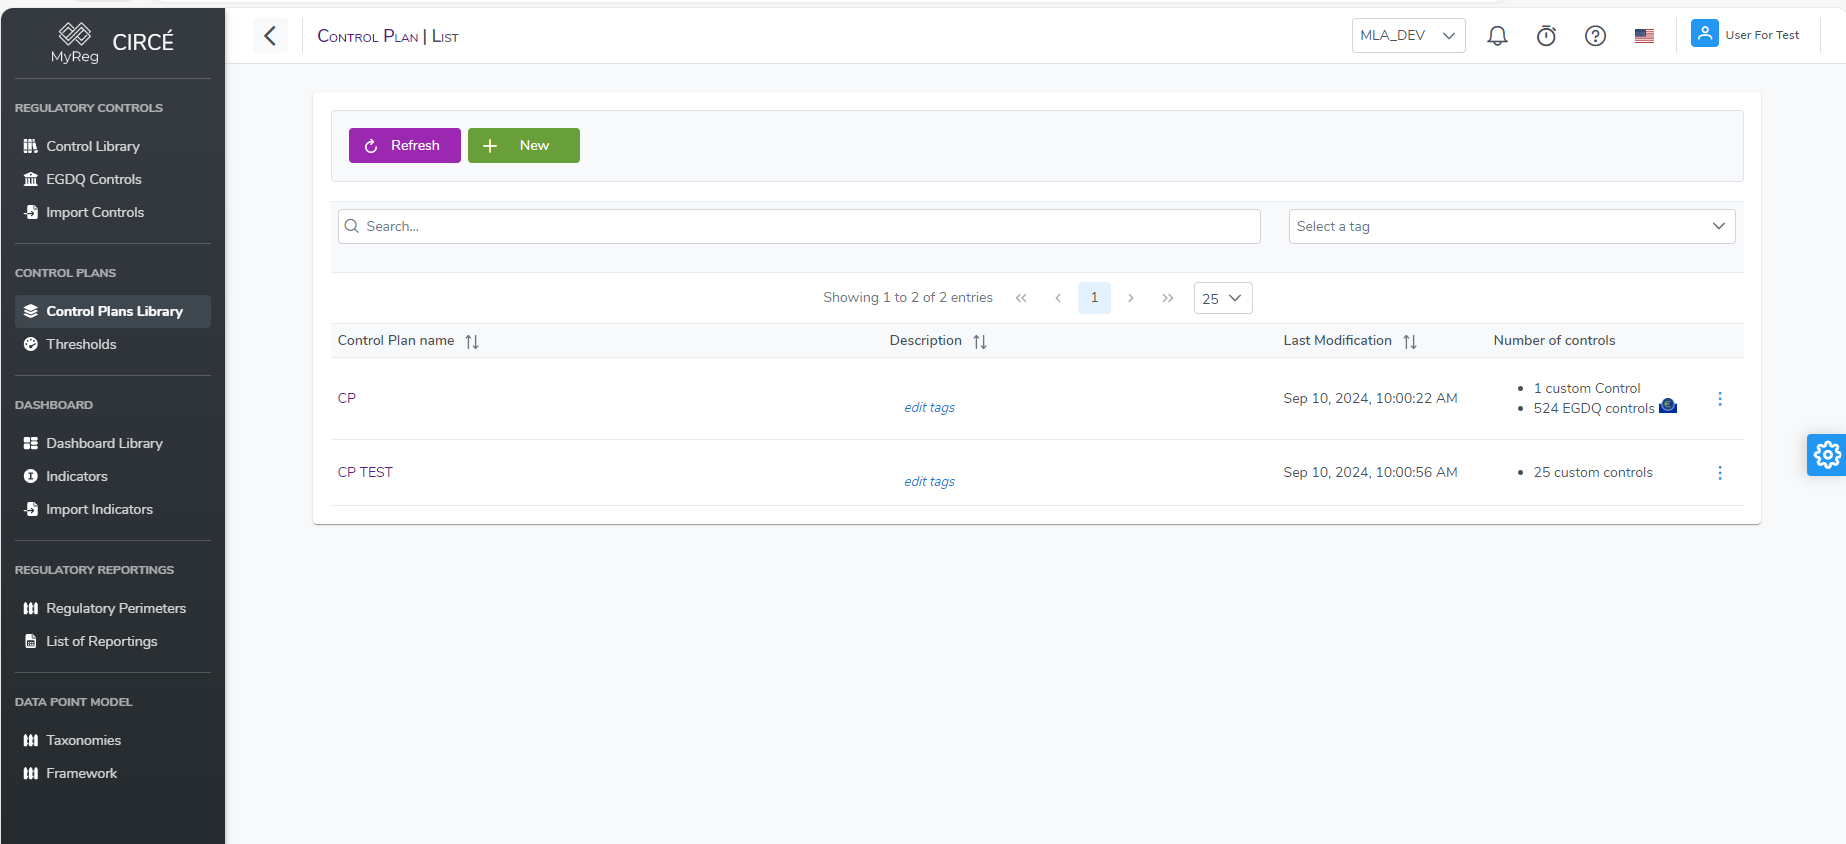
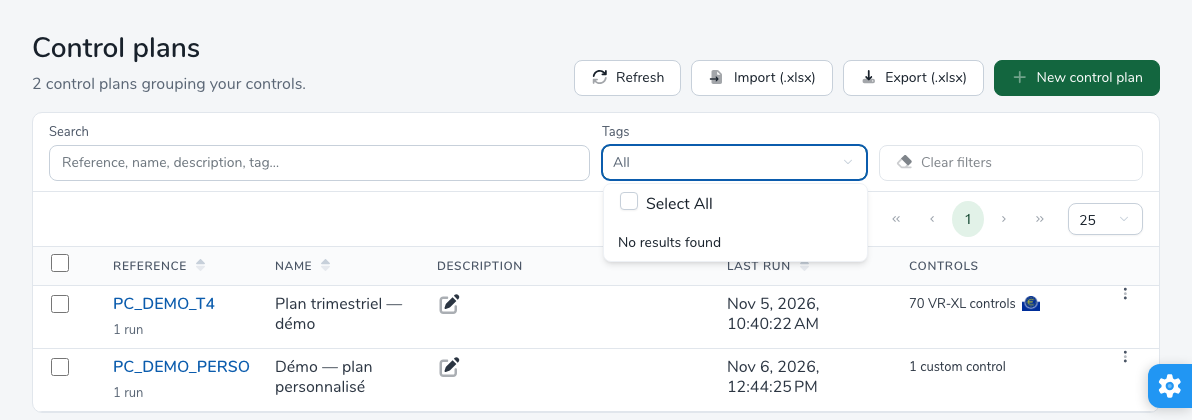
The header offers Refresh, Import (.xlsx), Export (.xlsx) and New control plan.
For each plan, the list shows:
- its reference, with its number of runs, or “No run yet”;
- its name;
- its description and its tags. Tags can be edited directly in the list;
- the date of its last run;
- the number of controls from each library.
The Reference, Name and Last run headers sort the list.
The available filters are:
- Search: reference, name, description, tag…;
- Tags: a plan is kept if it carries at least one of the selected tags.
Clear filters resets them.
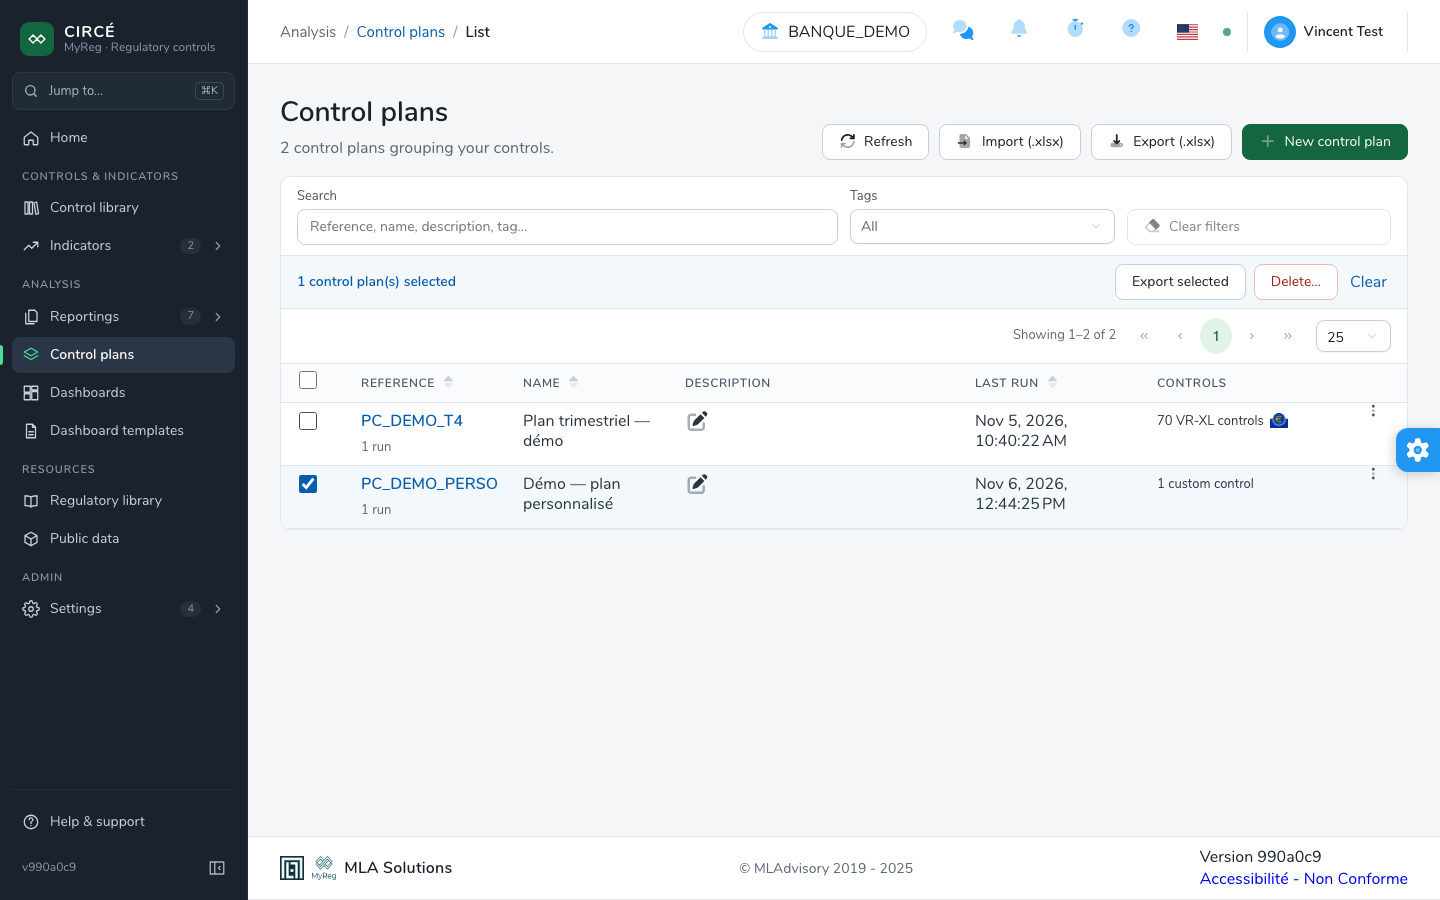
A plan’s ⋯ menu offers View, Edit, Delete and Permissions (if teams are enabled). As soon as a plan is checked, a bulk action bar offers Export selected, Delete… and Clear.
Export (.xlsx) exports the checked plans, or all plans if none is checked.
- The file
yyyy_MM_dd_HH_mm_ss_control_plans.xlsxcontains the plans and the list of their controls. - If tags are selected in the filter, the export keeps only the plans that carry all of these tags. The search is not applied to the export.
How to create a new control plan
On the list page, click New control plan.
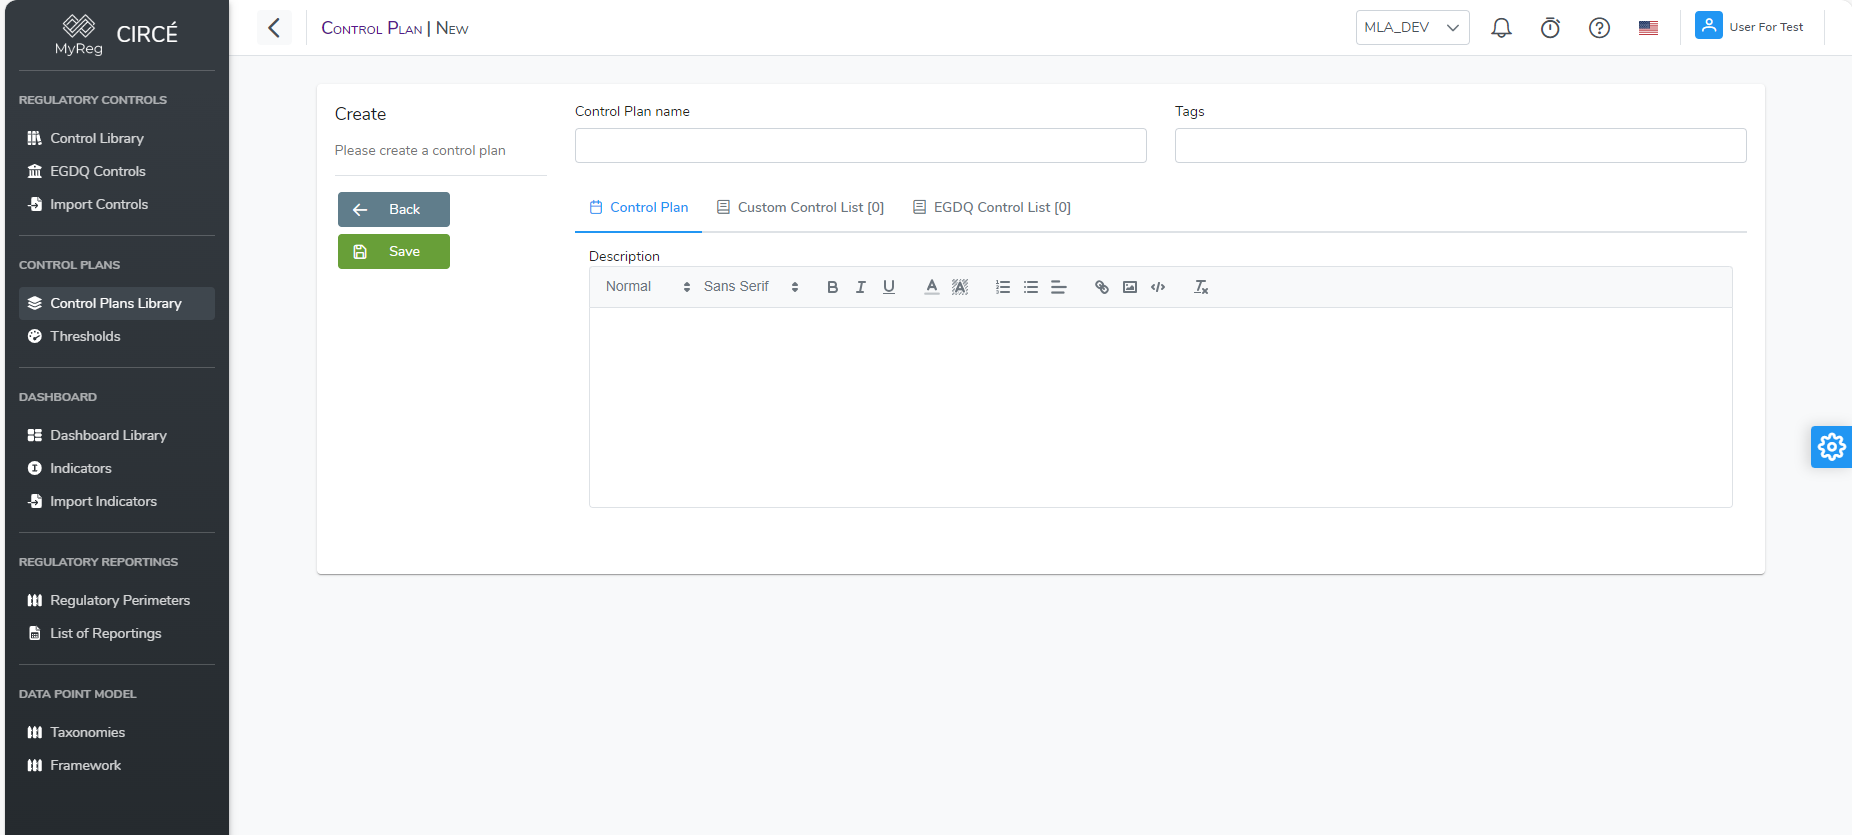
Fill in:
- the Reference: mandatory and unique;
- the Control Plan name: mandatory;
- the Tags: optional.
The page then has six tabs. Each counter shows the number of selected controls:
- Control Plan: the description of the plan.
- Custom Control List [n].
- EGDQ Control List [n]: the legacy layout, deprecated.
- Validation Rules Control List [n]: the legacy layout, deprecated.
- EGDQ-XL Controls [n].
- VR-XL Controls [n].
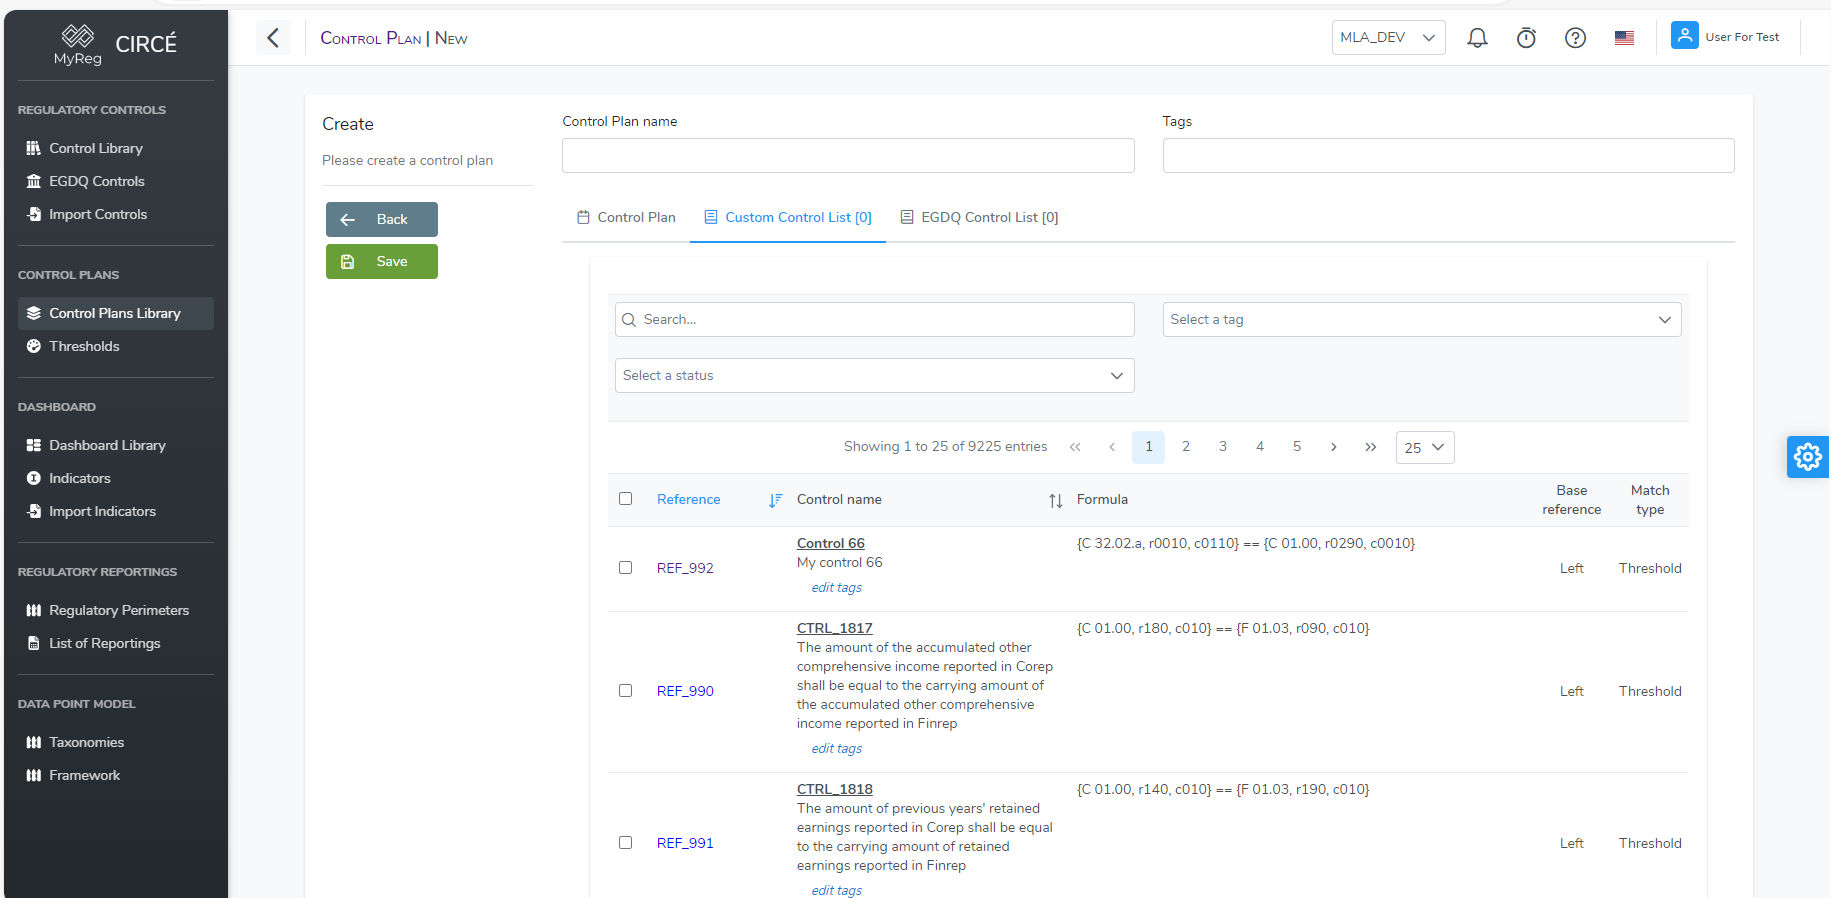
Each control tab shows the library list with its filters. Check the controls to include.
- The header checkbox checks the displayed page.
- Select all (N) checks every control matching the filters, across all pages.
- Selections are kept from one page and one tab to another.
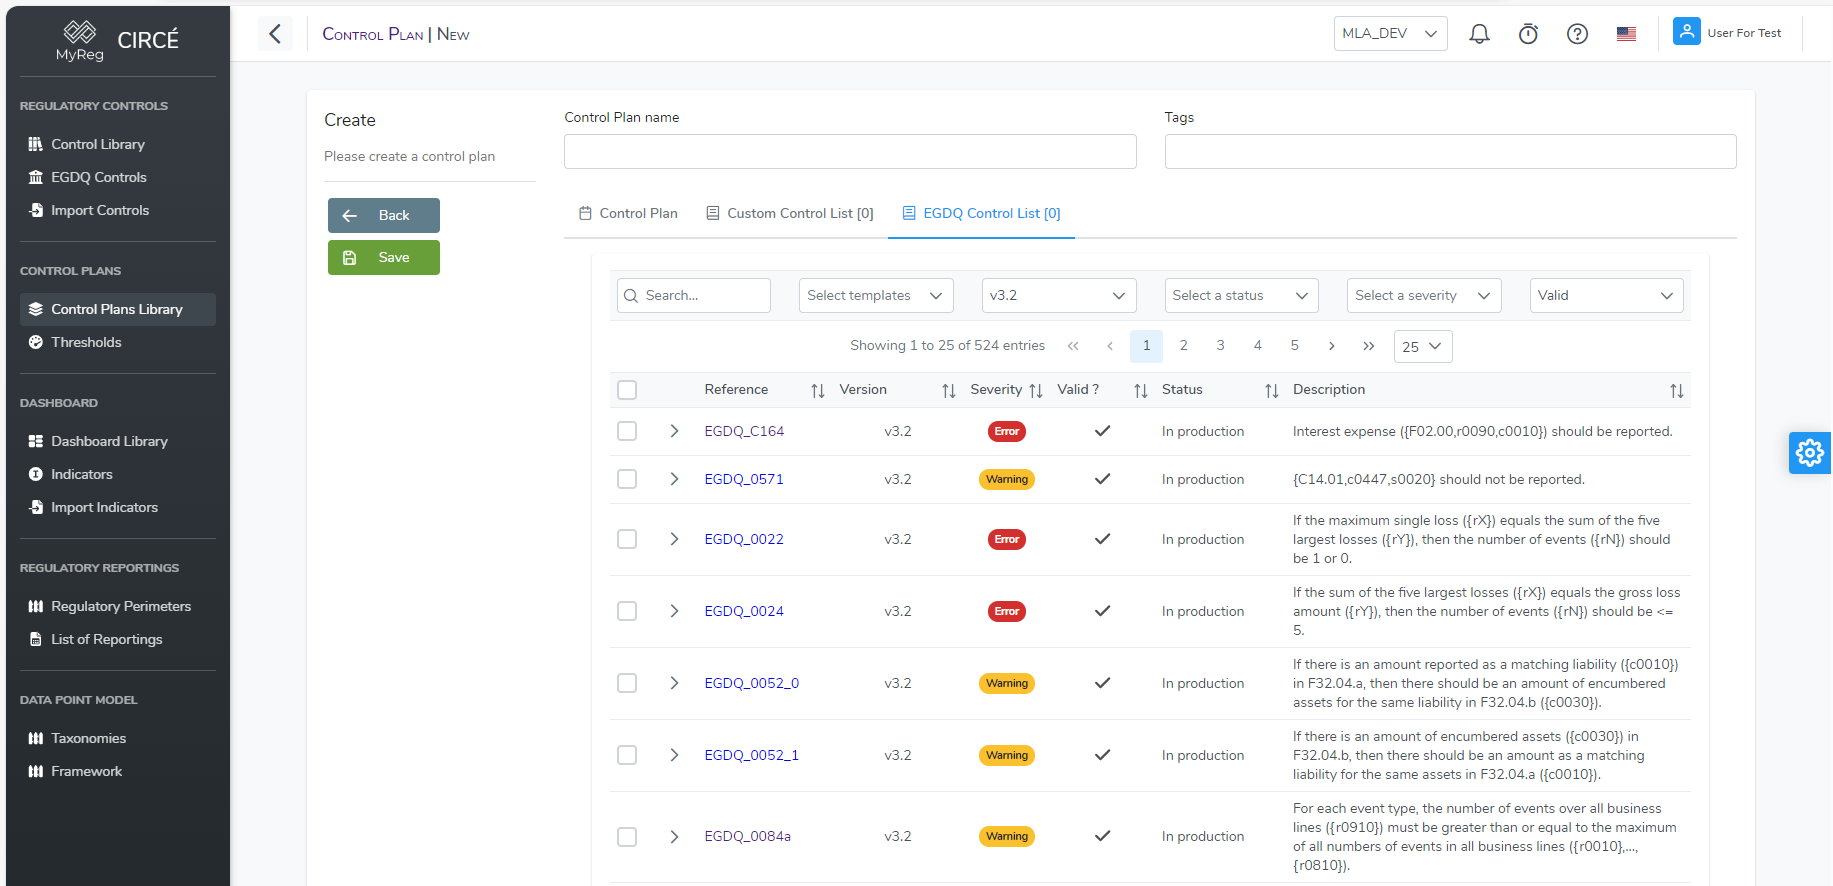
Click Save to create the plan.
You can also add custom controls to an existing plan from their list (see How to add controls to a control plan).
How to edit a control plan
Open a control plan and click Edit plan, or use the Edit entry of the ⋯ menu on the list page.
The Edit control plan page opens. Change the attributes, or check and uncheck controls in each tab, then click Save.
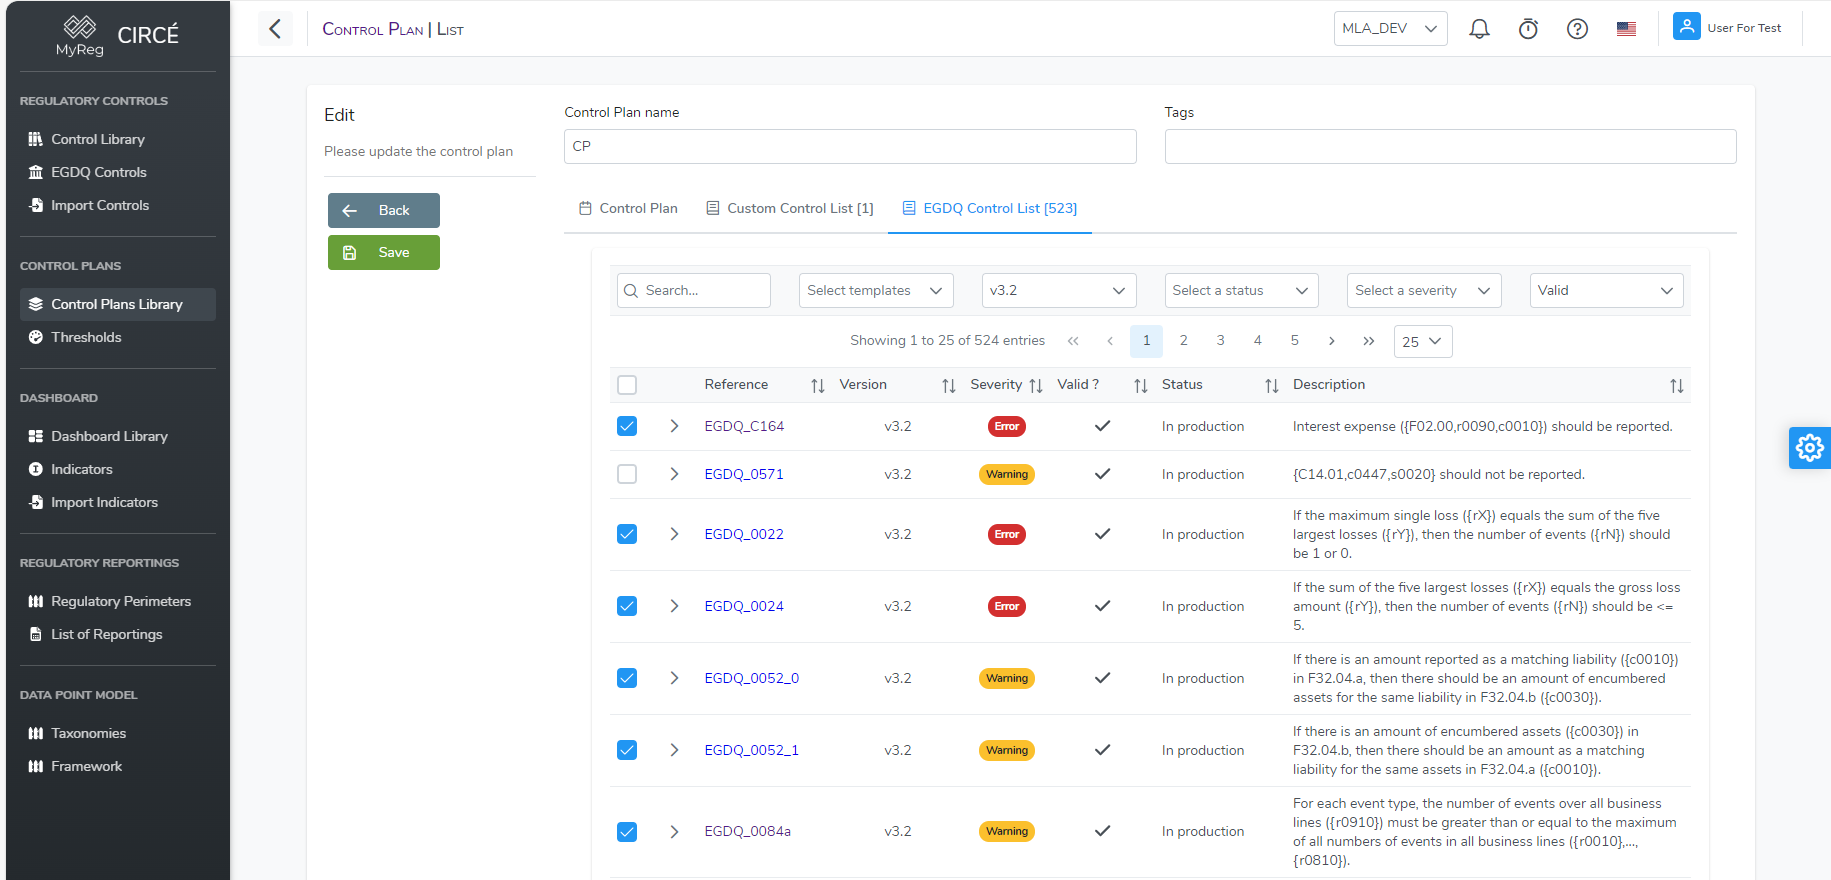
The Back button returns to the previous page without saving your changes.
The control plan page
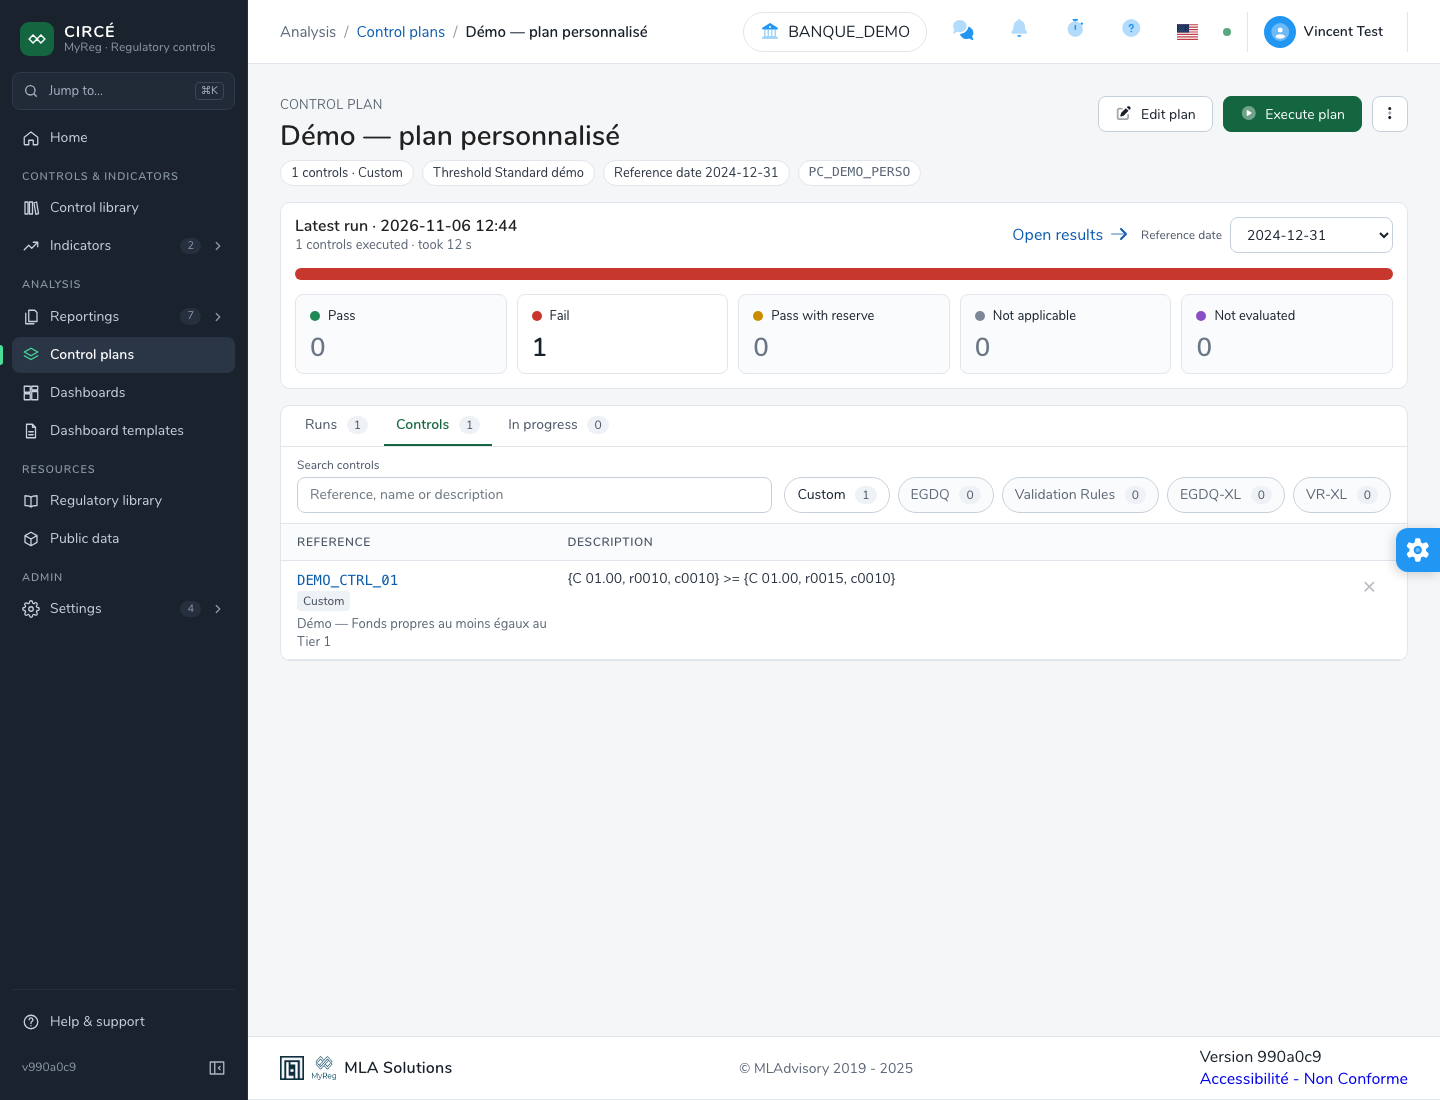
The header shows:
- the name of the plan;
- chips: the number of controls and their libraries, the threshold and reference date of the latest run, and the plan’s reference;
- the description and tags;
- the Edit plan and Execute plan buttons, and a ⋯ menu: Refresh, Add controls, Delete all runs and Delete plan.
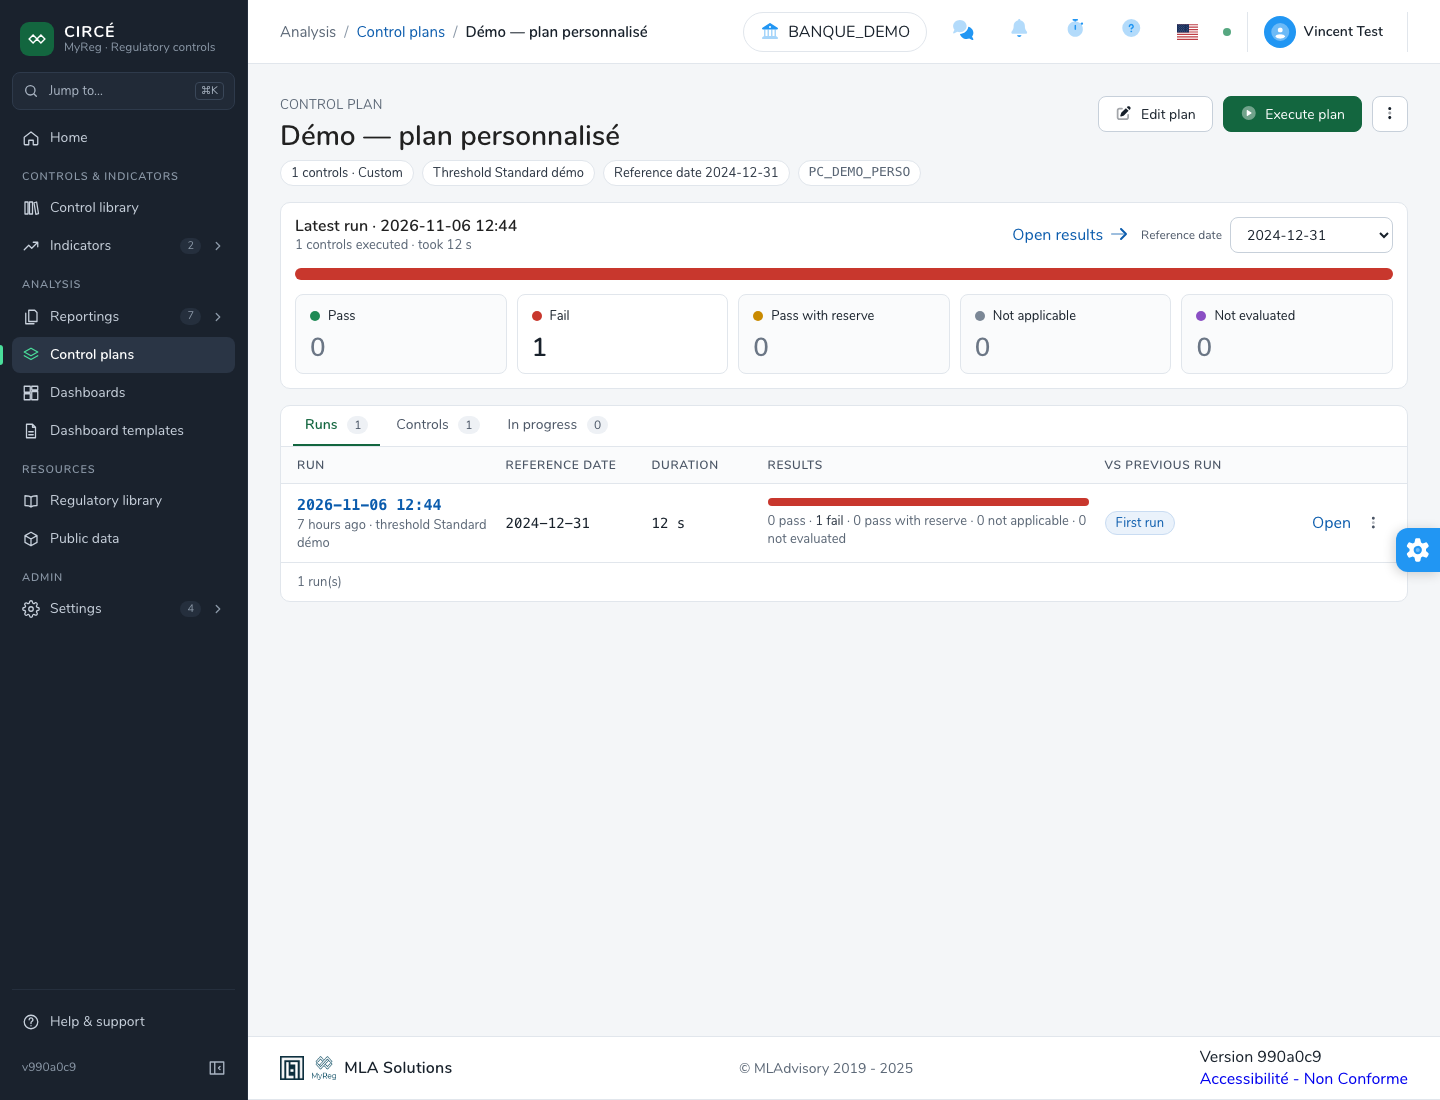
The “Latest run” card. It presents the plan’s latest run:
- the number of controls executed, how long the run took, and whether the results changed since the previous run;
- a breakdown bar and one tile per status: Pass, Fail, Pass with reserve, Not applicable and Not evaluated. Each tile opens the results filtered on that status;
- a banner when some controls did not run, because their precondition was false or their data was missing. The Review these N controls link opens those results;
- the Open results link.

Following a reference date. The card’s Reference date list picks a reference date, or All reference dates. The card then shows the latest run of that date, and the Runs tab only lists the runs of that date. The Show all dates link removes this filter.
The page has the following tabs:
- Runs: the completed runs (see the results).
- Controls: the plan’s controls.
- In progress: the running executions, with a progress bar updated in real time.
- Failed: the executions that stopped on an error and produced no results. This tab only appears when there are some. The ⋯ menu of a failed run offers Execute and Delete.
The Controls tab lists the reference and description of each control, with its library and tags.
- The Search controls field filters on the reference, name or description.
- The library buttons (Custom, EGDQ, Validation Rules, EGDQ-XL, VR-XL) only show that library’s controls.
- Clicking a reference opens the control in its library.
How to add or remove controls
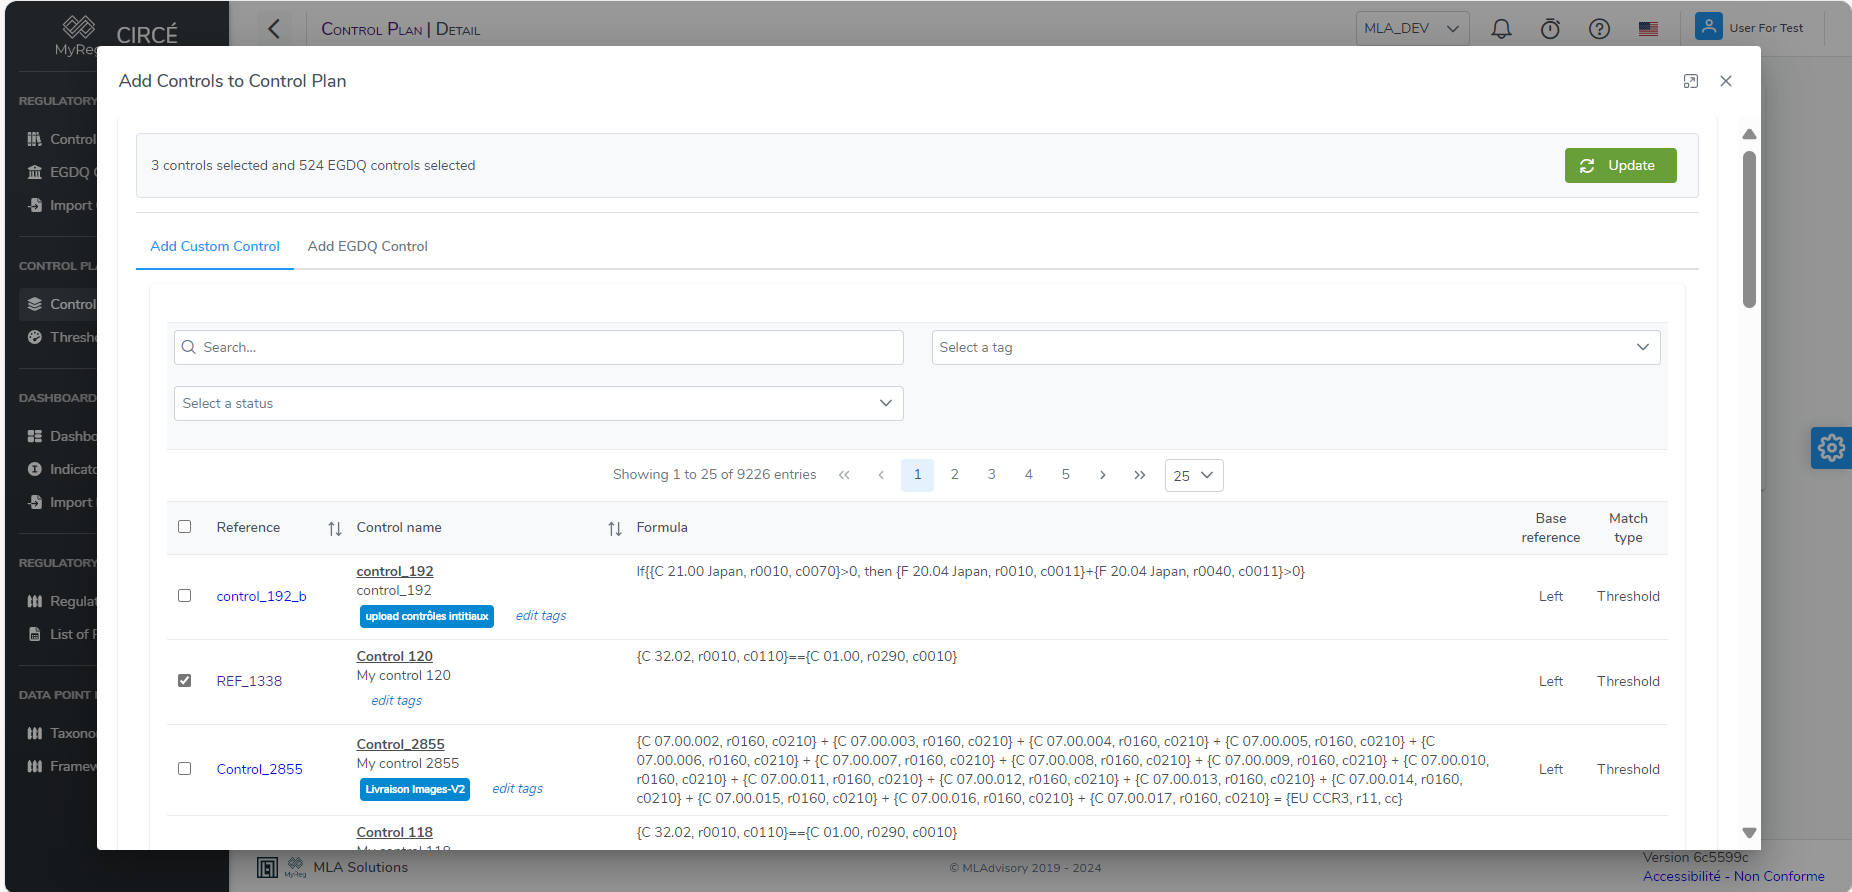
Add. You can add controls from the edit page, as described above. You can also use Add controls in the ⋯ menu of the plan page.
The Add Controls to Control Plan window opens with one tab per library:
- Add Custom Control;
- Add EGDQ Control;
- Add Validation Rules Control;
- Add EGDQ-XL Control;
- Add VR-XL Control.
Controls already included are checked. Check those to add and uncheck those to remove, then click Update.
Remove. In the Controls tab of the plan page:
- the cross on a row immediately removes that control from the plan;
- once a library is chosen, Remove all … controls removes all the controls of that library, after confirmation.
Removing controls does not change results already produced.
How to import control plans
On the list page, click Import (.xlsx) to open Import control plans. The expected file has the same shape as the export file:
| Sheet | Columns |
|---|---|
| Control plan | Reference (mandatory), Name, Description, Tags |
| Custom | Reference, Control plan references |
| Egdq, Validation Rules, EGDQ-XL, VR-XL | Reference, Version, Control plan references |
Import rules:
- A plan whose reference already exists is neither imported nor updated. It is reported in the summary.
- Controls are linked by their reference, or by their reference and version for published libraries. They must exist in their library.
The summary lists the Existing Control Plan References, the Missing Controls in Library and the Missing EGDQ References in Library. Back to control plans returns to the list.
How to delete a control plan
On the list page, use the Delete entry of a plan’s ⋯ menu. To delete several, check them and click Delete… in the bulk action bar. From the plan page, use Delete plan in the ⋯ menu.
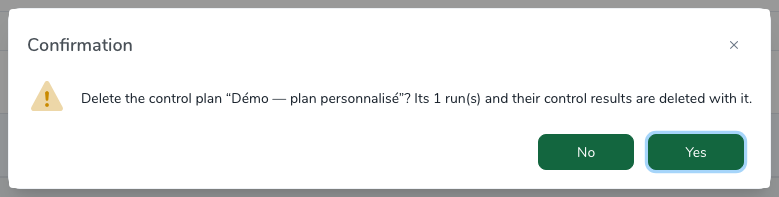
A control plan that has results cannot be deleted.
First delete its results, one by one or all at once (see How to delete results).
In a bulk deletion, plans that still have results are kept without any message.

How to execute a control plan
Once your plan is ready, click Execute plan on its page. The button is disabled if the plan contains no controls.
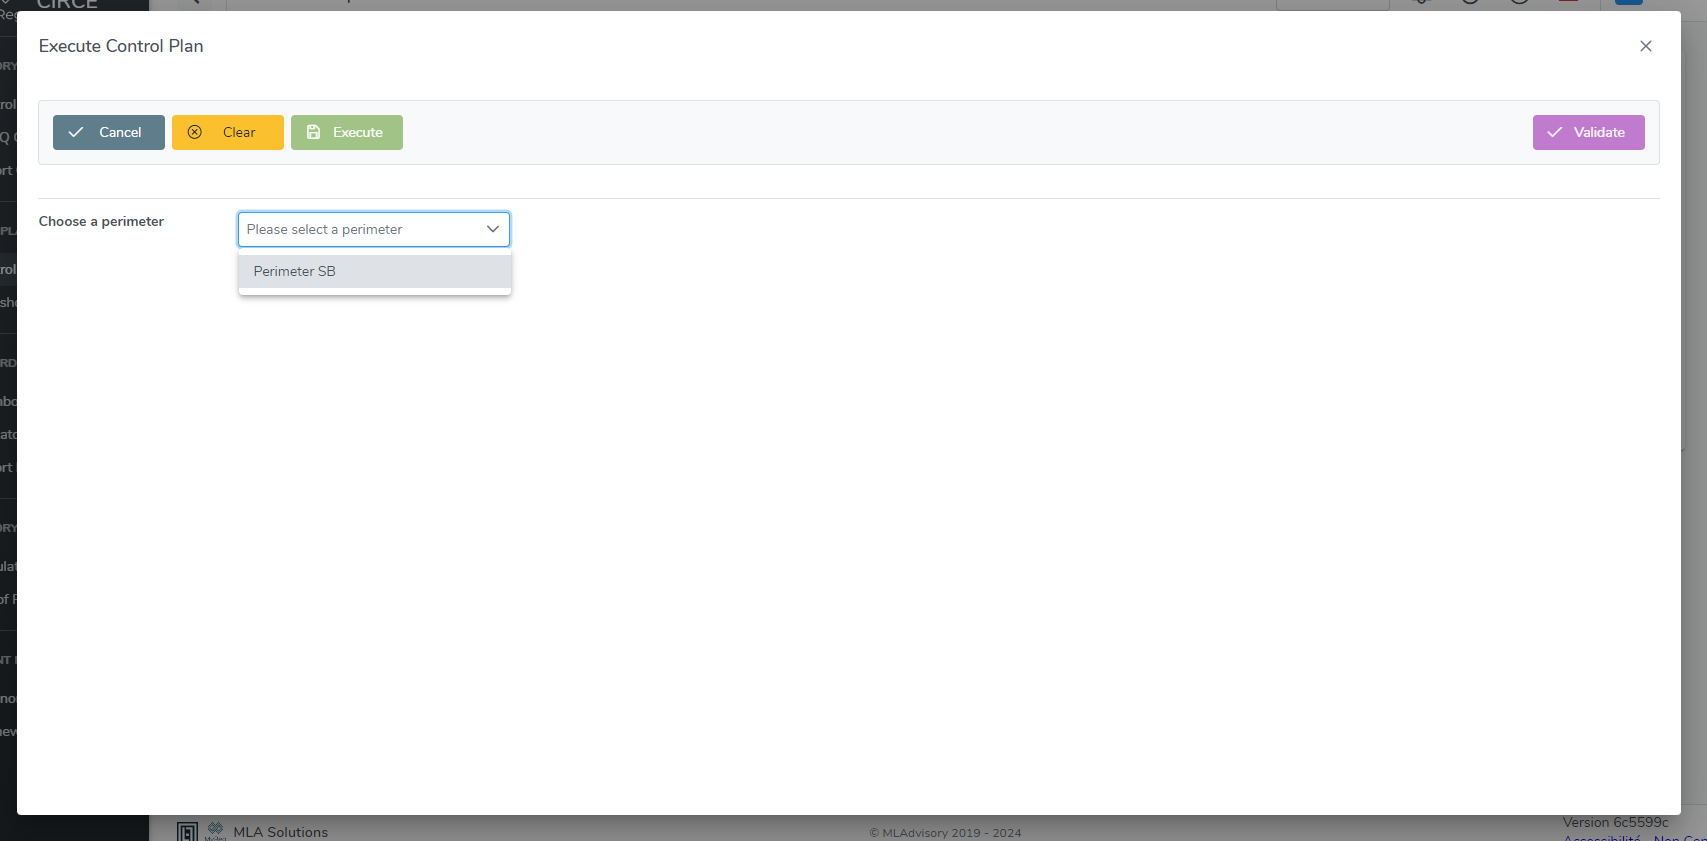
The Execute Control Plan window fills in three numbered steps. Each step appears only once the previous one is filled in, and a tick marks the steps done.
1. Perimeter. Choose the Perimeter. Its description is displayed, with two additional parameters:
- Currency: EUR by default;
- Business model: “Universal Banking” by default.
2. Threshold. Choose the Threshold set. The preferred threshold of the perimeter is preselected. A diagram recalls the pass, warning and fail zones of the chosen threshold and, for a relative and absolute threshold, how the two deviations combine (see Thresholds).
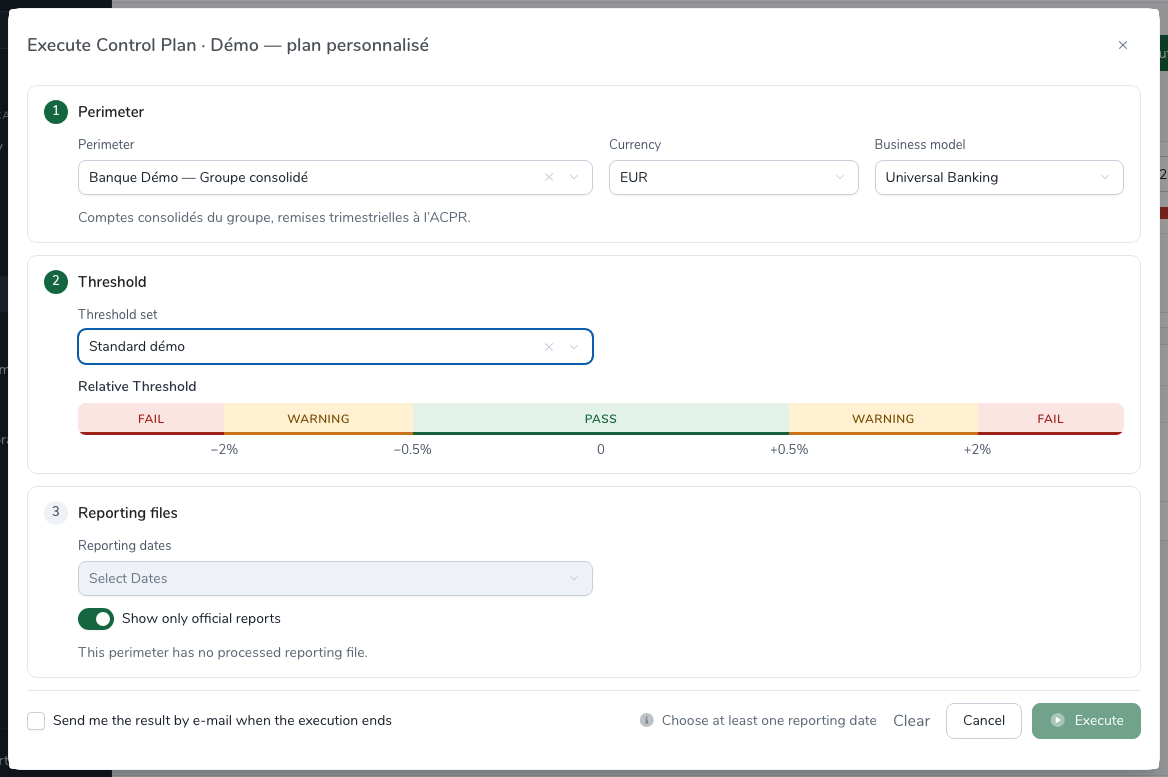
3. Reporting files.
- Reporting dates: only the dates of the perimeter’s processed files are offered. You can choose several: the files of every chosen date are listed.
- The Show only official reports switch is on by default. Changing it reloads the dates and clears the selection.
- Period type: Month, Quarter, Semester or Year, Quarter by default. The field appears once a date is chosen.
- Reference date: the list only offers the dates of the ticked files, and takes the most recent one until you pick another. While no file is ticked, it reads “Tick at least one reporting file”.
- These two parameters set the meaning of
[T]and[T-1]in formulas (see the grammar).
For each file, the list shows its Date, its File Name followed by its templates, and its Reporting format. The certificate icon marks an official reporting, the warning icon an incomplete extraction. The header checkbox ticks every file, and a counter reads “n of m file(s) ticked”.
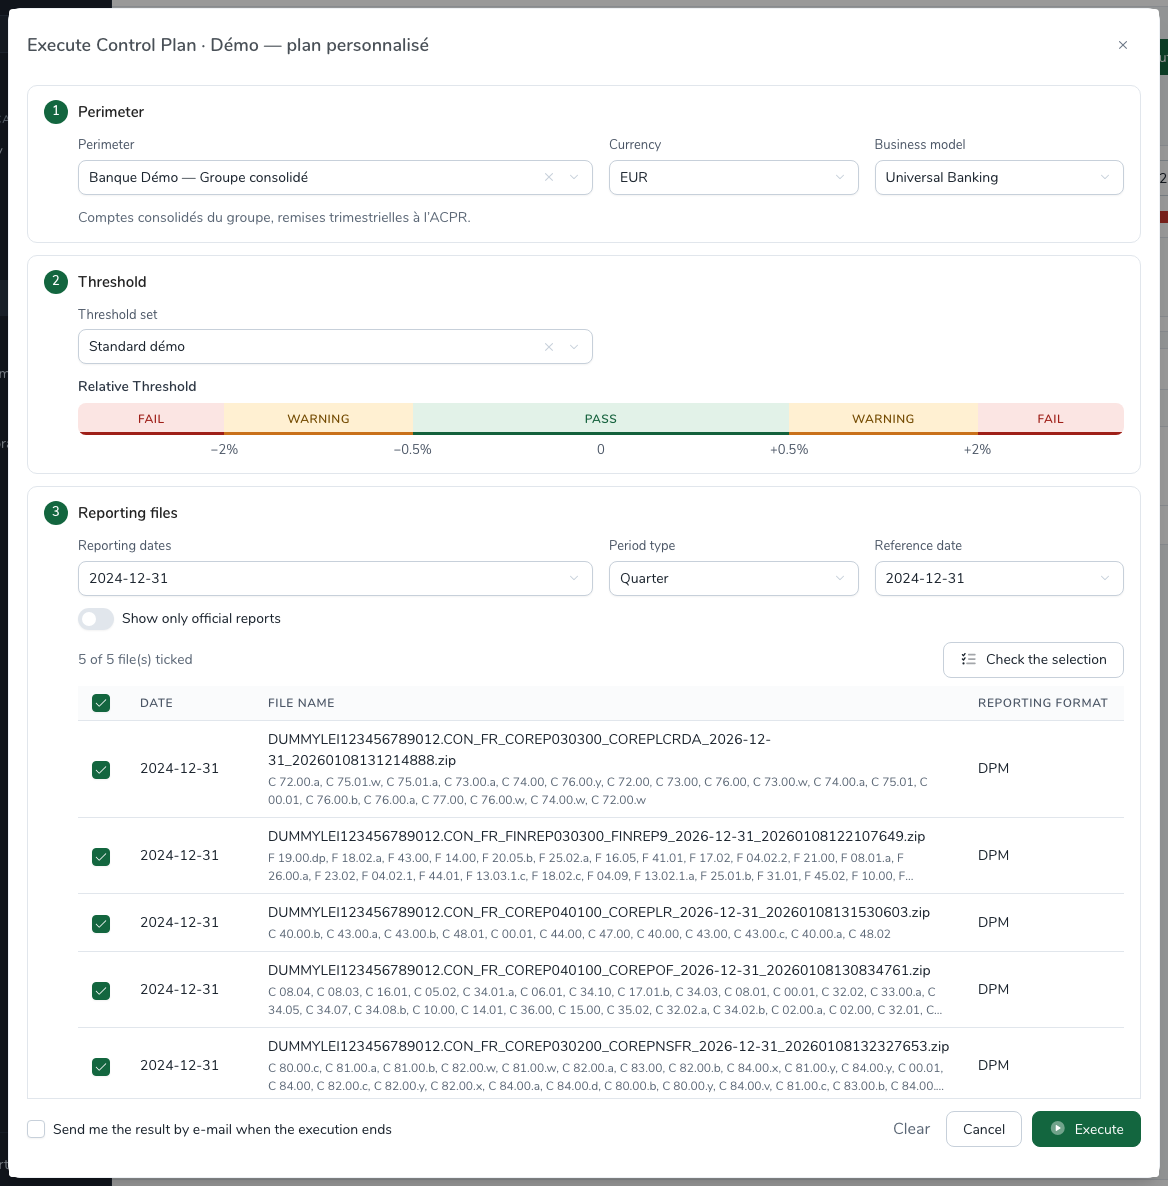
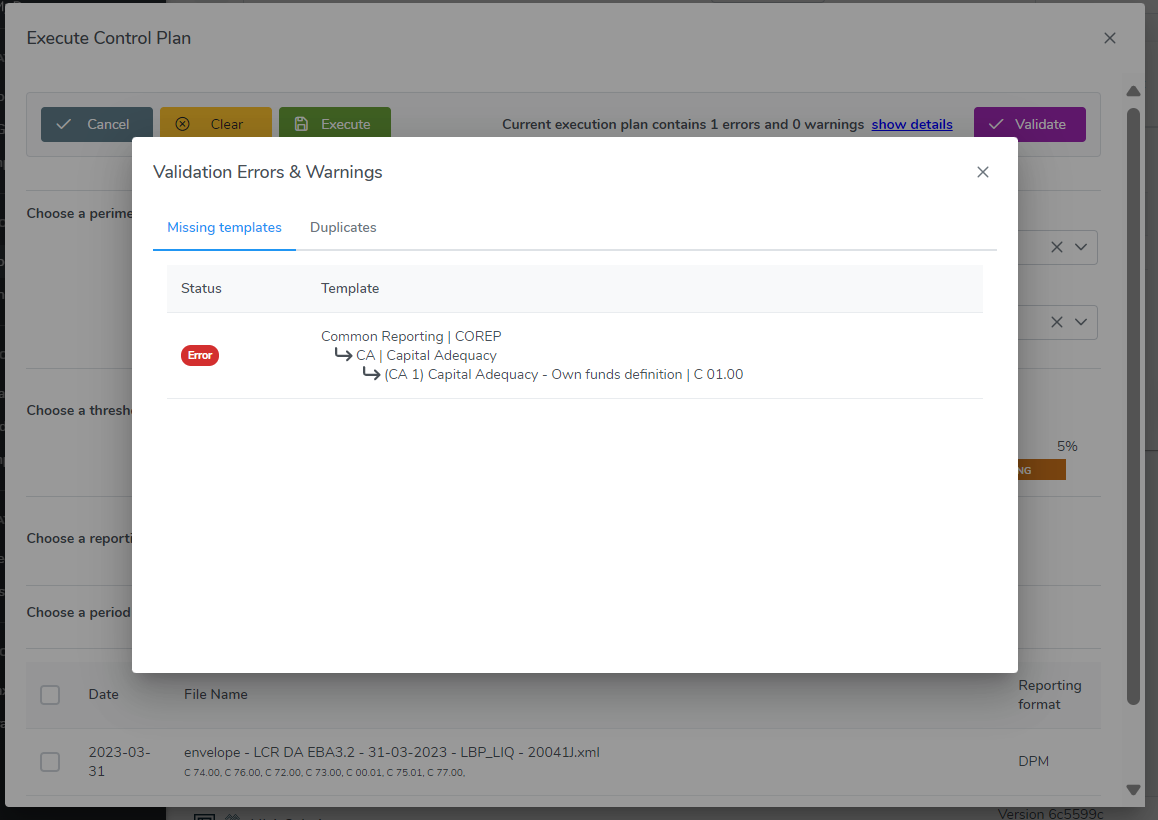
Check the selection (optional). Above the list, the Check the selection button looks for templates the plan needs that are missing or present in several ticked files. The outcome shows next to the button:
- “Every template the plan needs is there” when nothing is missing;
- otherwise “n error(s) · m warning(s)”: an error reports a template used by a formula but present in no file, a warning a template present in several files. The show details link opens the list of Missing templates and Duplicates.
The footer of the window holds:
- the Send me the result by e-mail when the execution ends checkbox (see Receiving the result by e-mail), unticked each time the window opens;
- a reminder of what is still missing, for instance “Choose a threshold set” or “Tick at least one reporting file”;
- Clear, which resets the window, Cancel, which closes it, and Execute, disabled as long as a perimeter, a threshold set, a reporting date, a ticked file, a period type or a reference date is missing.
Click Execute.
- The window closes and the execution appears in the In progress tab, with its progress.
- When it ends, it moves to the Runs tab, or to the Failed tab if it stopped on an error.
Receiving the result by e-mail
If you tick Send me the result by e-mail when the execution ends, an e-mail is sent to you when the execution ends. You are its only recipient.
- If the execution succeeded, the result Excel file is attached. It is the same file as the full export of the result page. Above 7 MB, it is replaced by a link to the result page.
- If you are no longer allowed to export this result, the e-mail only says that the execution ended, with no data.
- If the execution failed, the e-mail says so.
The Execute entry of a run’s menu never sends an e-mail. The Re-run plan button of the result page keeps the choice made for the original run.
The e-mail is only sent if the domain of your address is allowed by the platform administrator.
Control plan results
The run list
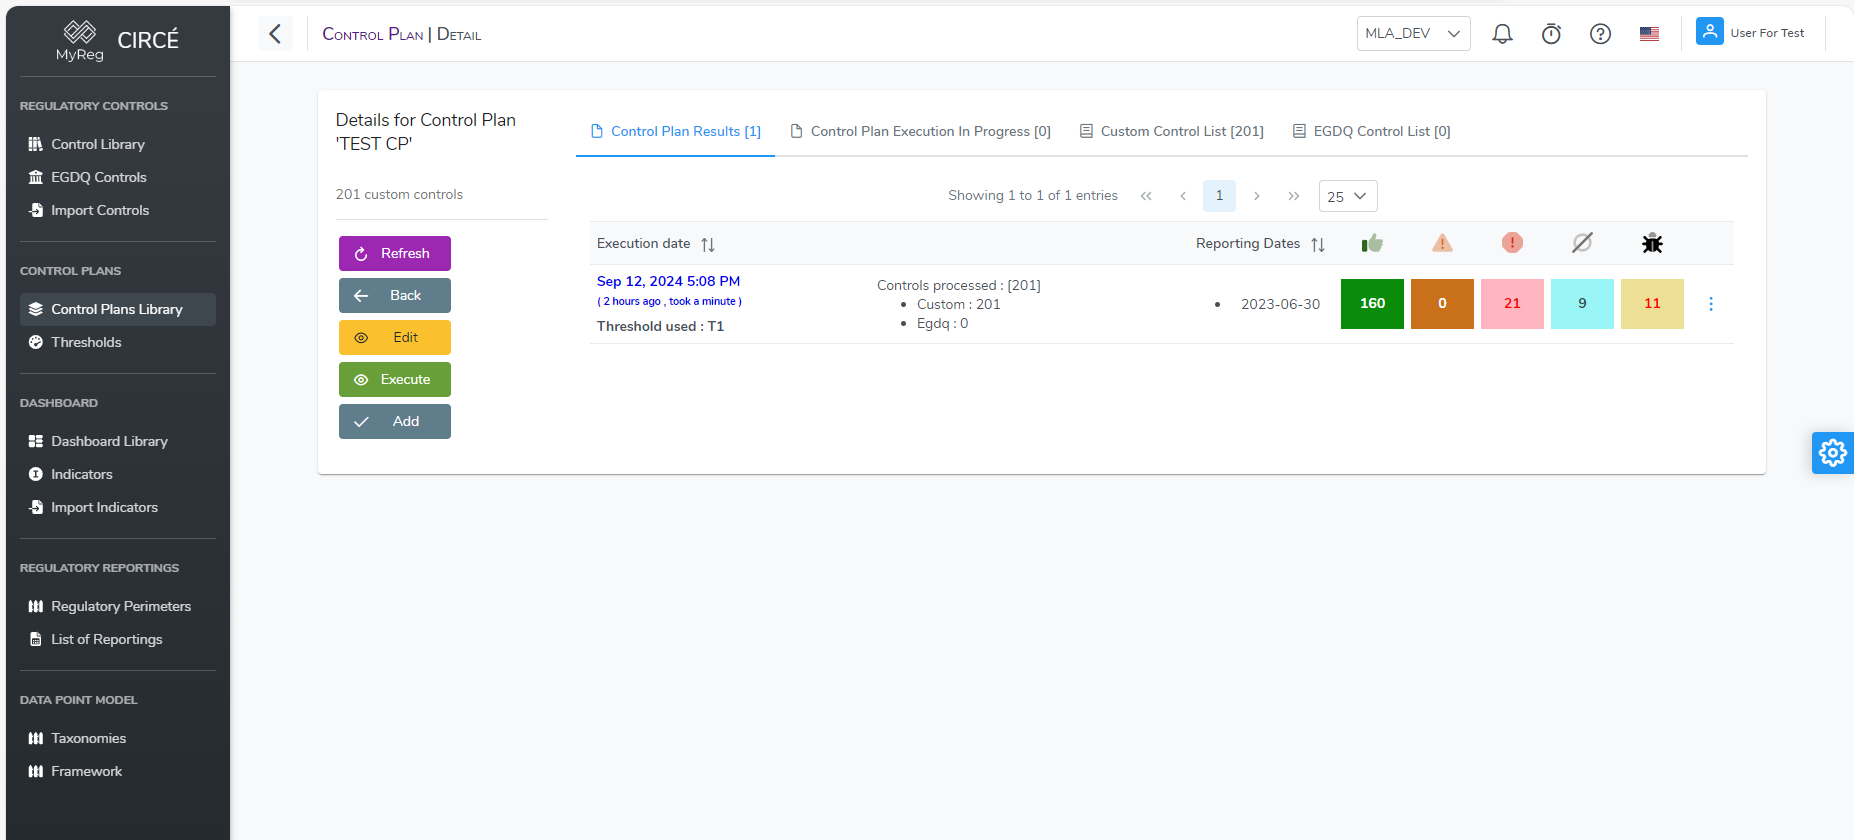
For each run, the Runs tab of the plan page shows:
- Run: the execution date, how long ago it was and the threshold used;
- Reference date: the reporting dates;
- Duration;
- Results: a breakdown bar and the number of controls in each status;
- Vs previous run: the change of each status compared with the previous run on the same reporting dates, “No change” or “First run”.
The list shows 25 runs per page.
The statuses of a control are as follows:
| Status | Meaning |
|---|---|
| Pass | The formula holds, or the deviation does not exceed the threshold’s success value. |
| Pass with reserve | The deviation lies between the success value and the warning value. For EGDQ-XL and VR-XL: the rule is not met and its published severity is “Warning”. |
| Fail | The deviation exceeds the warning value, or the formula is false. |
| Precondition is false (Not applicable) | The precondition does not hold: the control was not applied. |
| No Data (Not applicable) | The required data are missing from the files. |
| Not applicable (Not applicable) | The reporting’s release is outside the control’s release window: the control was not evaluated. |
| Unable to evaluate (Not evaluated) | The evaluation failed: incorrect formula, division by zero, etc. |
The name in parentheses is the status group used by the tiles and counters.
A run’s ⋯ menu offers:
- View;
- Execute, which reruns the plan with the same files, dates, period type, currency, business model and threshold. The execution uses the plan’s current controls and the threshold’s current values;
- Export results (.xlsx);
- Delete.
If some of the run’s files have since been deleted or re-imported, the rerun is refused with the message “N of the M reporting files of this execution no longer exist…”. Execute the plan again, choosing the current files.
When teams are enabled, a run belongs to the team that started it. Only the team’s owners and the administrator can delete runs, and a viewer cannot export them.
Viewing a result
Click the execution date, Open or View to open the result page.
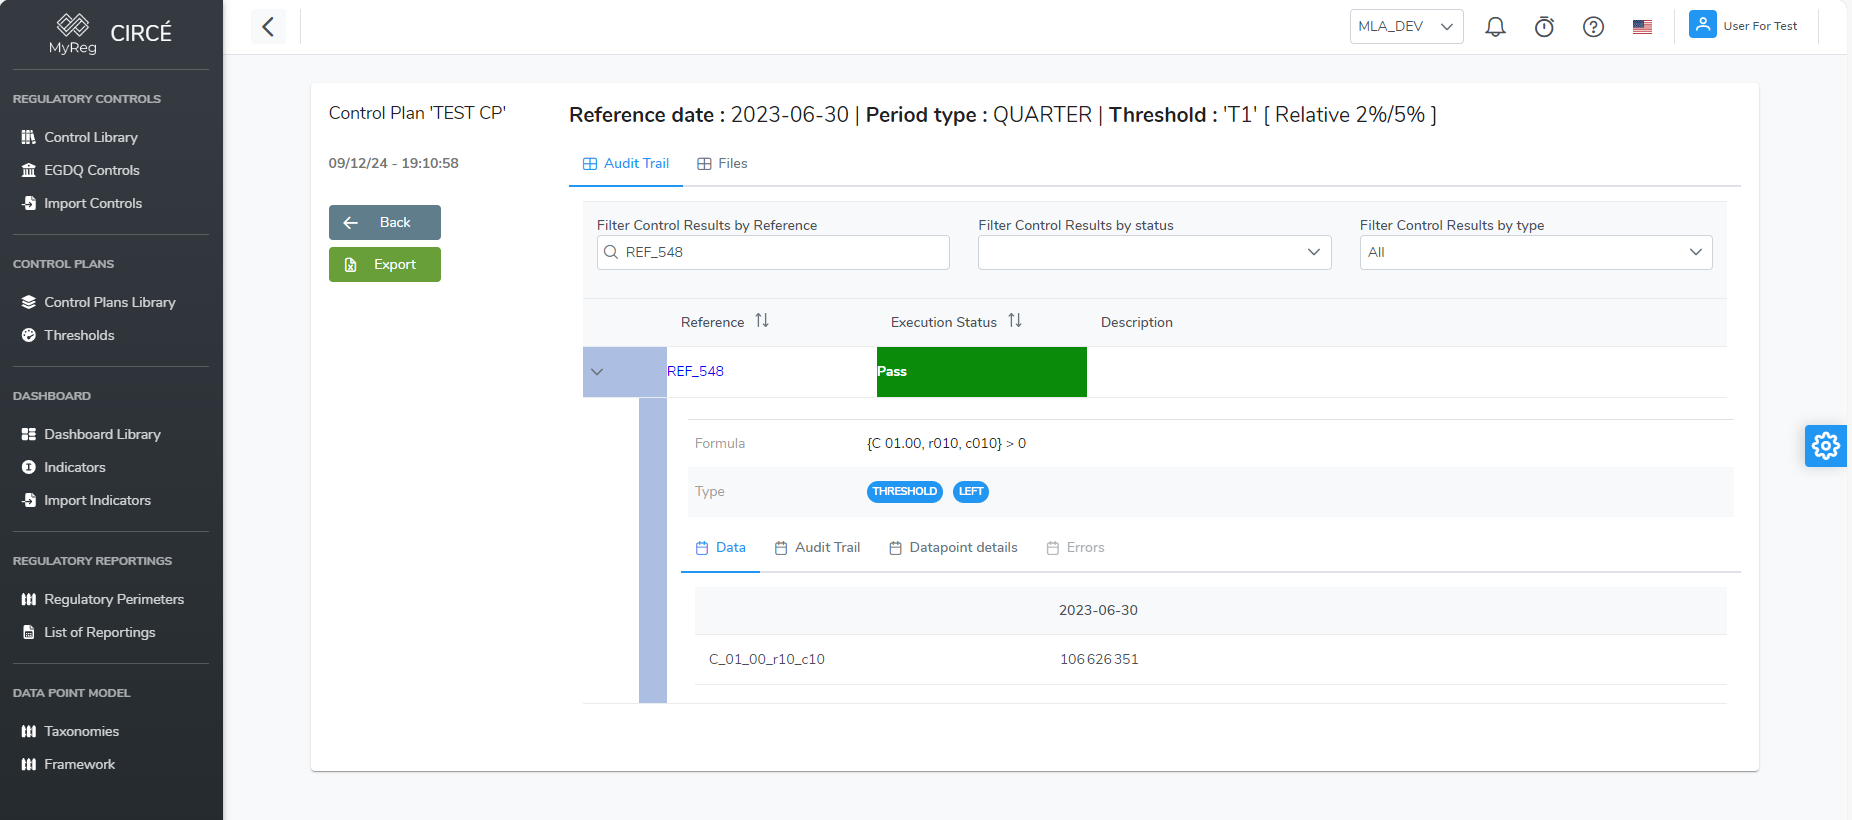
The header recalls the plan name and the execution date and time, and offers:
- Re-run plan, which reruns the execution with the same parameters, then opens the plan page;
- Export results (.xlsx), which always exports the whole run, whatever the filters;
- Export … only (.xlsx), which only appears while a status or type filter is active (see How to export a result).
Below the header are the reference date, the period type, the threshold and its values, and the number of regulatory files used.
The summary card gives the number of controls executed. Its All, Pass, Fail, Pass with reserve, Not applicable and Not evaluated tiles filter the result list.
The page has the following tabs:
- Control Results: the list of rules.
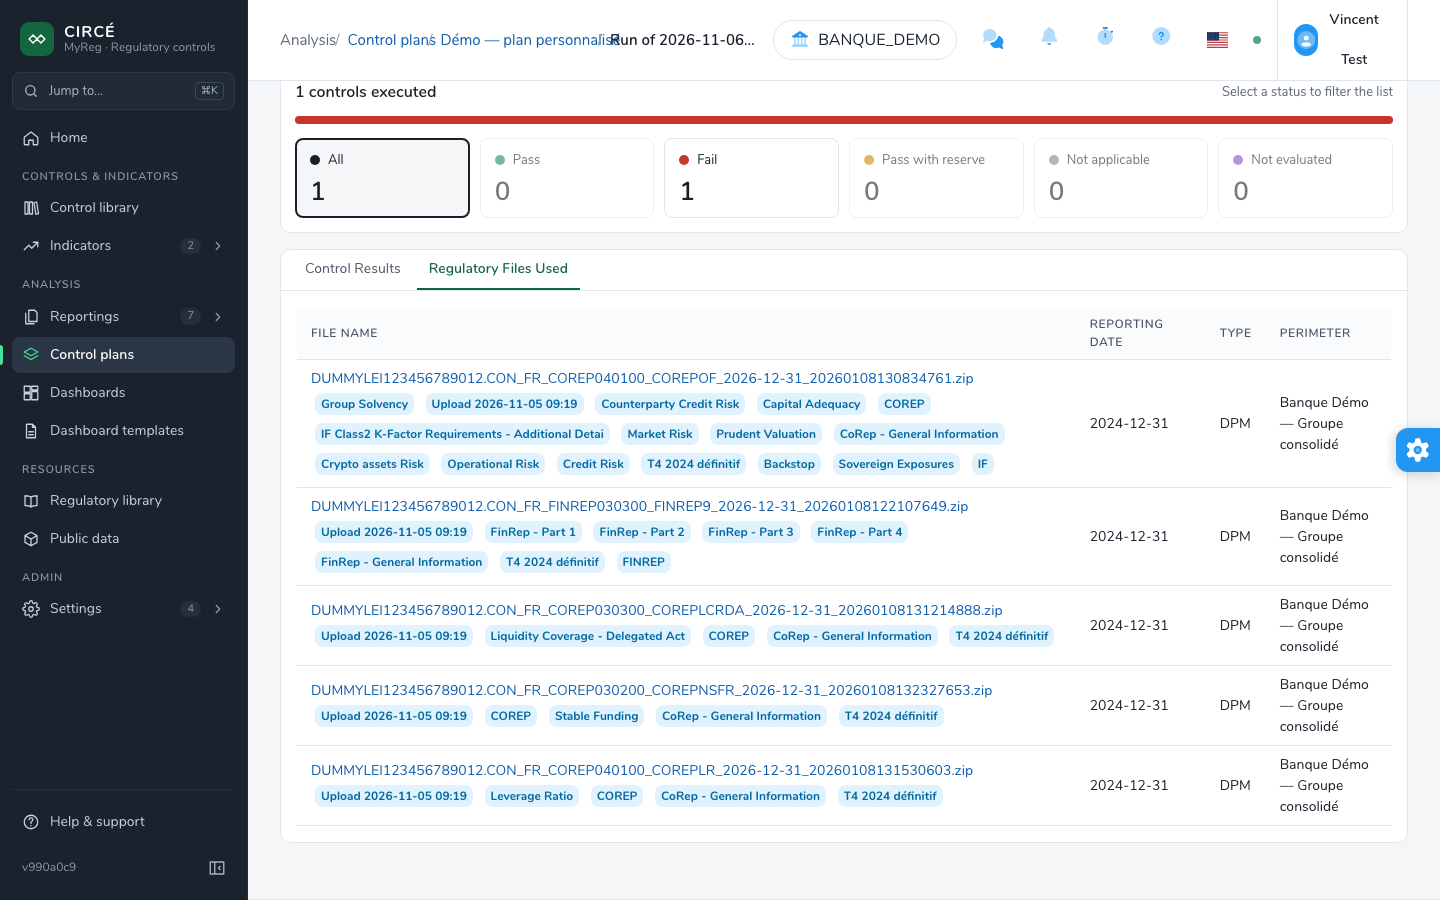
- Regulatory Files Used: the controlled files, with their name, reporting date, type and perimeter. Each name opens the file. A file deleted since the run is struck through, with the note “This file has disappeared: it was deleted after this run.”.
- Errors: the execution errors, if any.
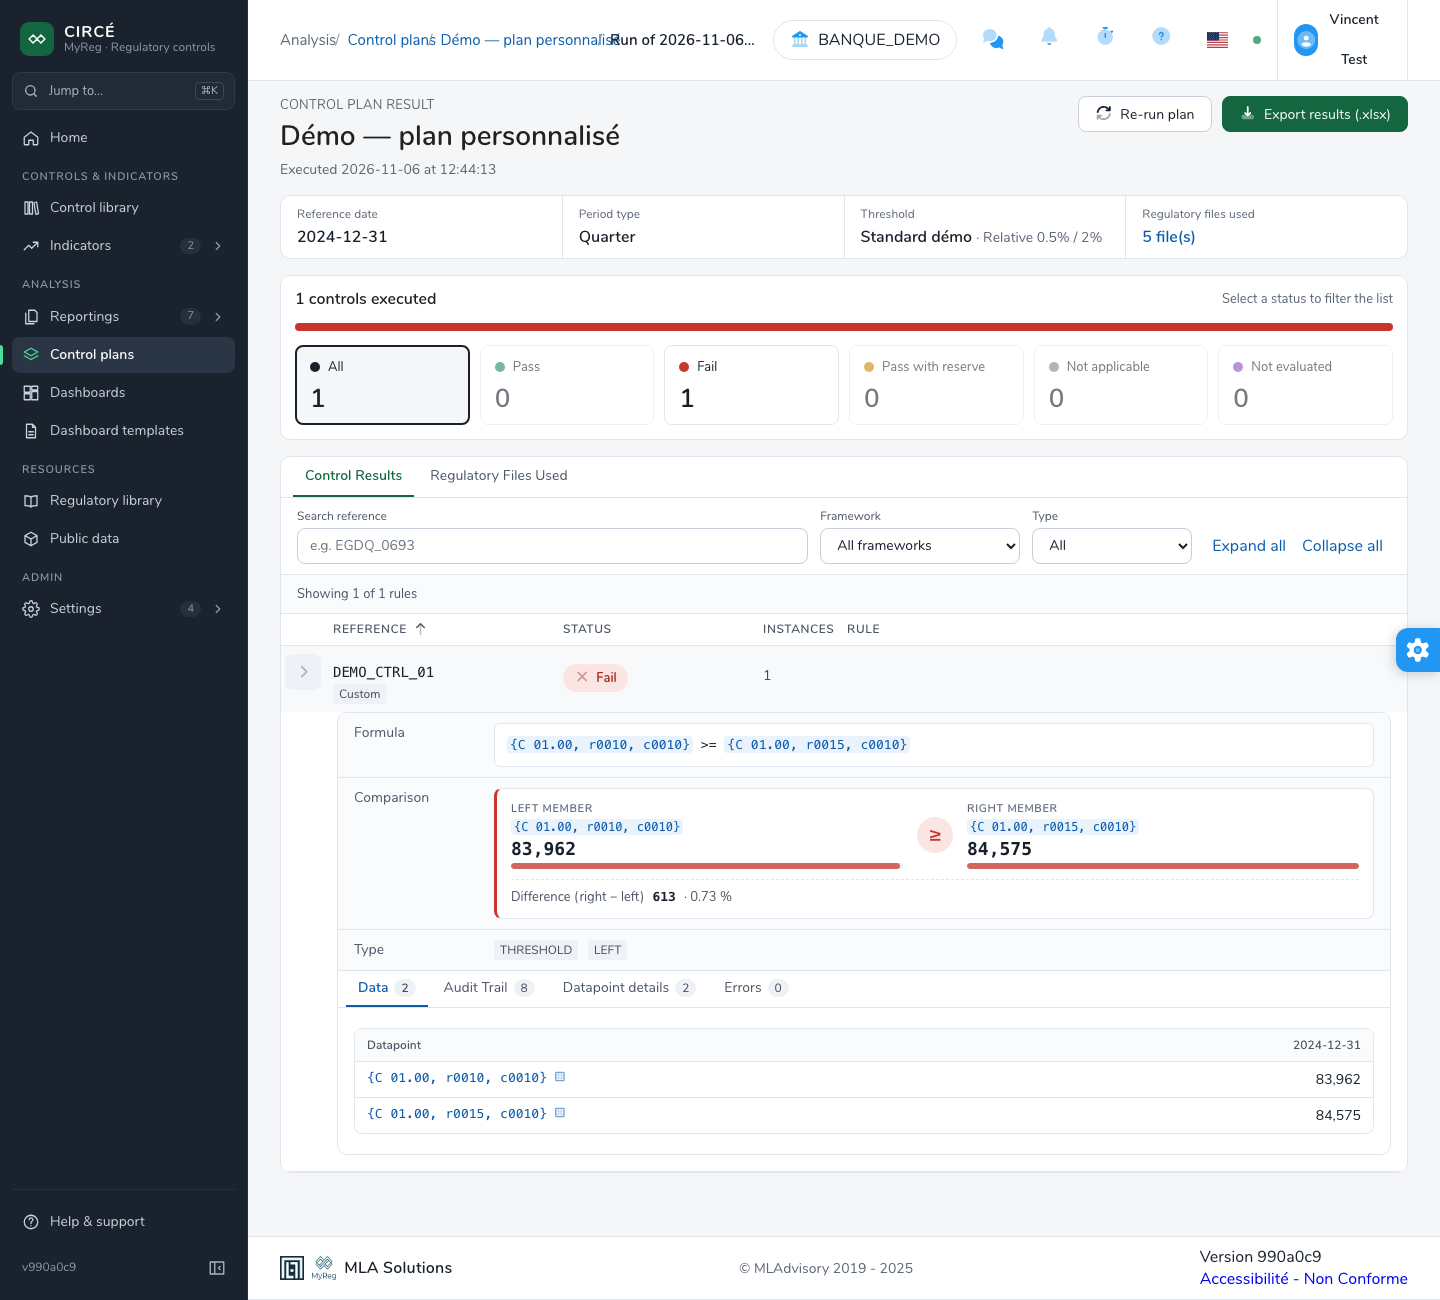
The Control Results tab lists one row per rule:
- Reference: the reference, which opens the control in its library, and its version, or “Custom”;
- Status;
- Instances: the number of instances of the rule. For a published control (EGDQ-XL, VR-XL, EGDQ or Validation Rules), it is the number of controls executed out of the controls in the rule;
- Rule: the description.
A control duplicated over open rows appears as “REF [r999]”, with one instance per row.
The tab’s tools are:
- Search reference;
- Framework: the framework of the rules;
- Type: All, Custom, EGDQ, Validation Rules, EGDQ-XL or VR-XL;
- Expand all and Collapse all;
- Clear filters;
- sorting by reference or by status.
Every rule of the run is listed on one page, with its number of instances. The detail of a rule is read only when it is opened: the line “Loading the result…” shows meanwhile.
Expanding a rule shows its detail, or the list of its instances, which expand in turn. The detail shows:
- the precondition, with the note “Evaluated false → formula skipped” if it was false;
- the formula, with syntax highlighting;
- Comparison, when the formula is a single comparison whose two members were evaluated: the Left member and the Right member, each with its expression, its amount and a bar to scale, the operator coloured by the status, then the Difference (right − left) and the relative gap. A rule evaluated by key, for example by currency, shows one comparison per key;
- the type;
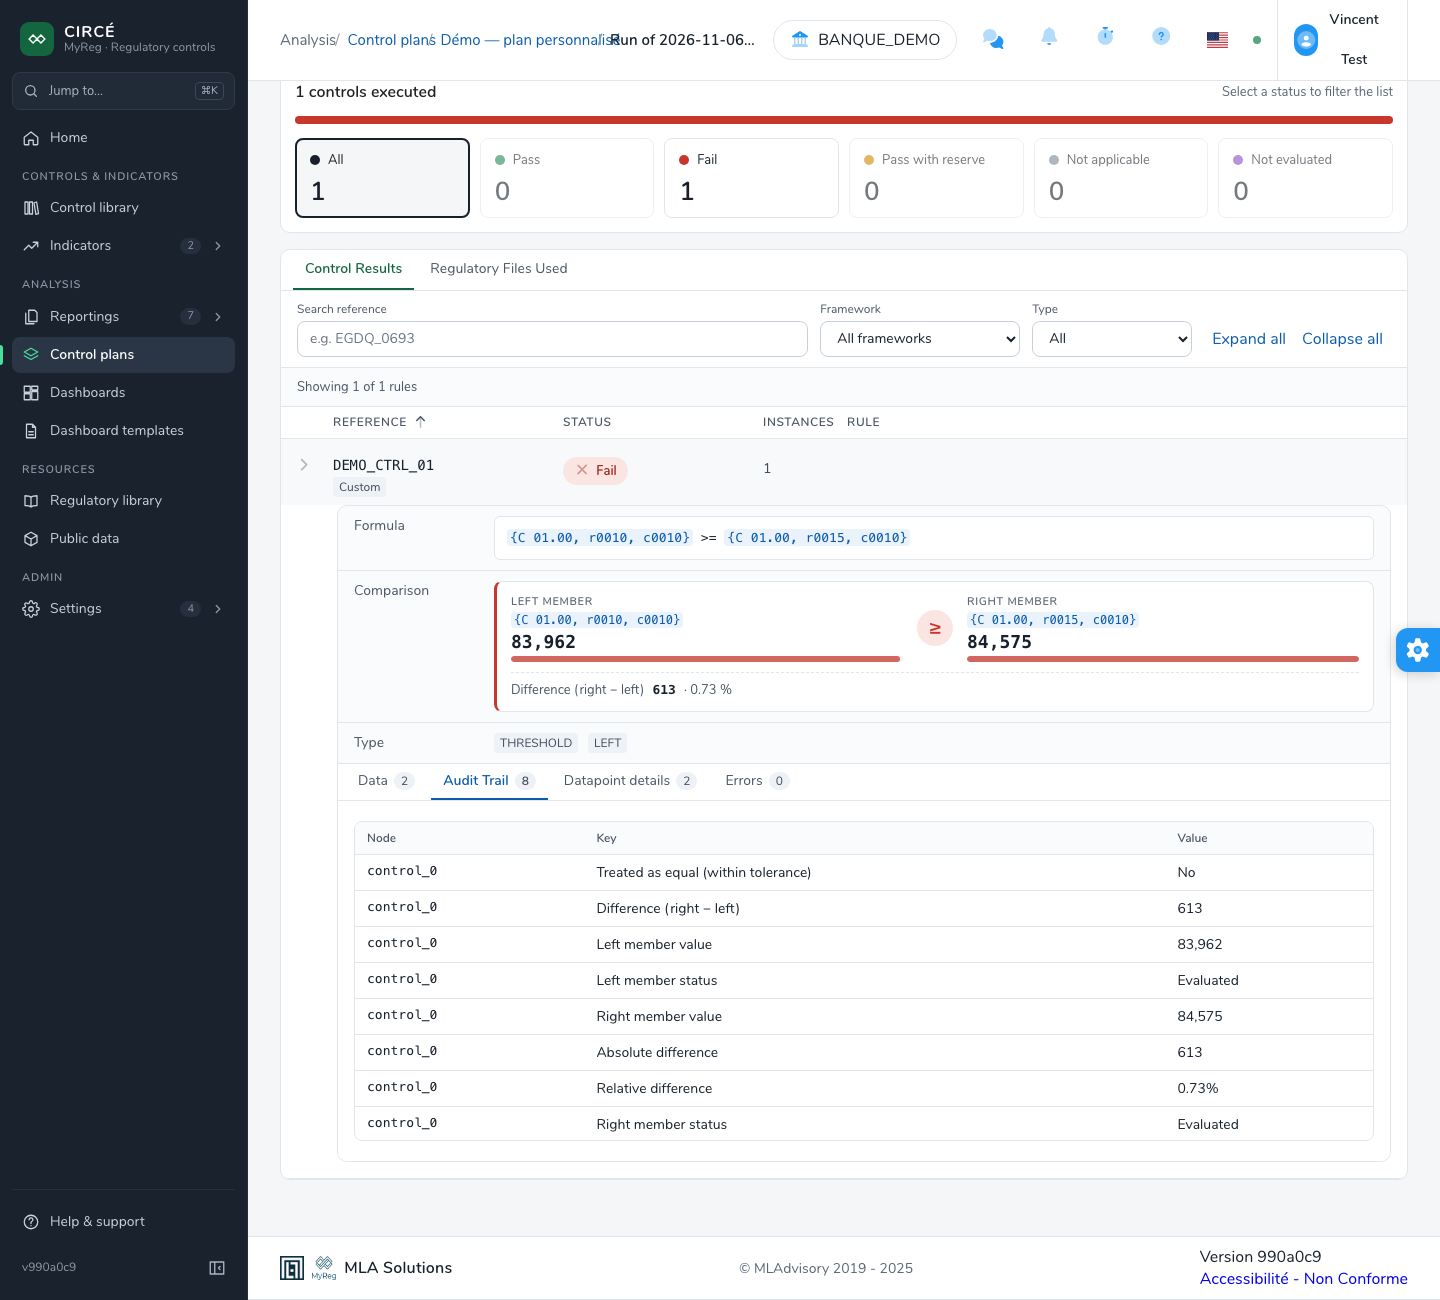
- four tabs:
- Data: the value of the datapoints used, for each date. Each datapoint, and each value read from a reported cell, is a link to the template of the reporting (see Open a datapoint in its template);
- Audit Trail: the calculation steps, named in the language of the interface: value and status of each member, absolute and relative differences, tolerance, “Treated as equal (within tolerance)”;
- Datapoint details: the resolution of each coordinate of the formula;
- Errors: the reasons why the evaluation failed, if any.
Open a datapoint in its template
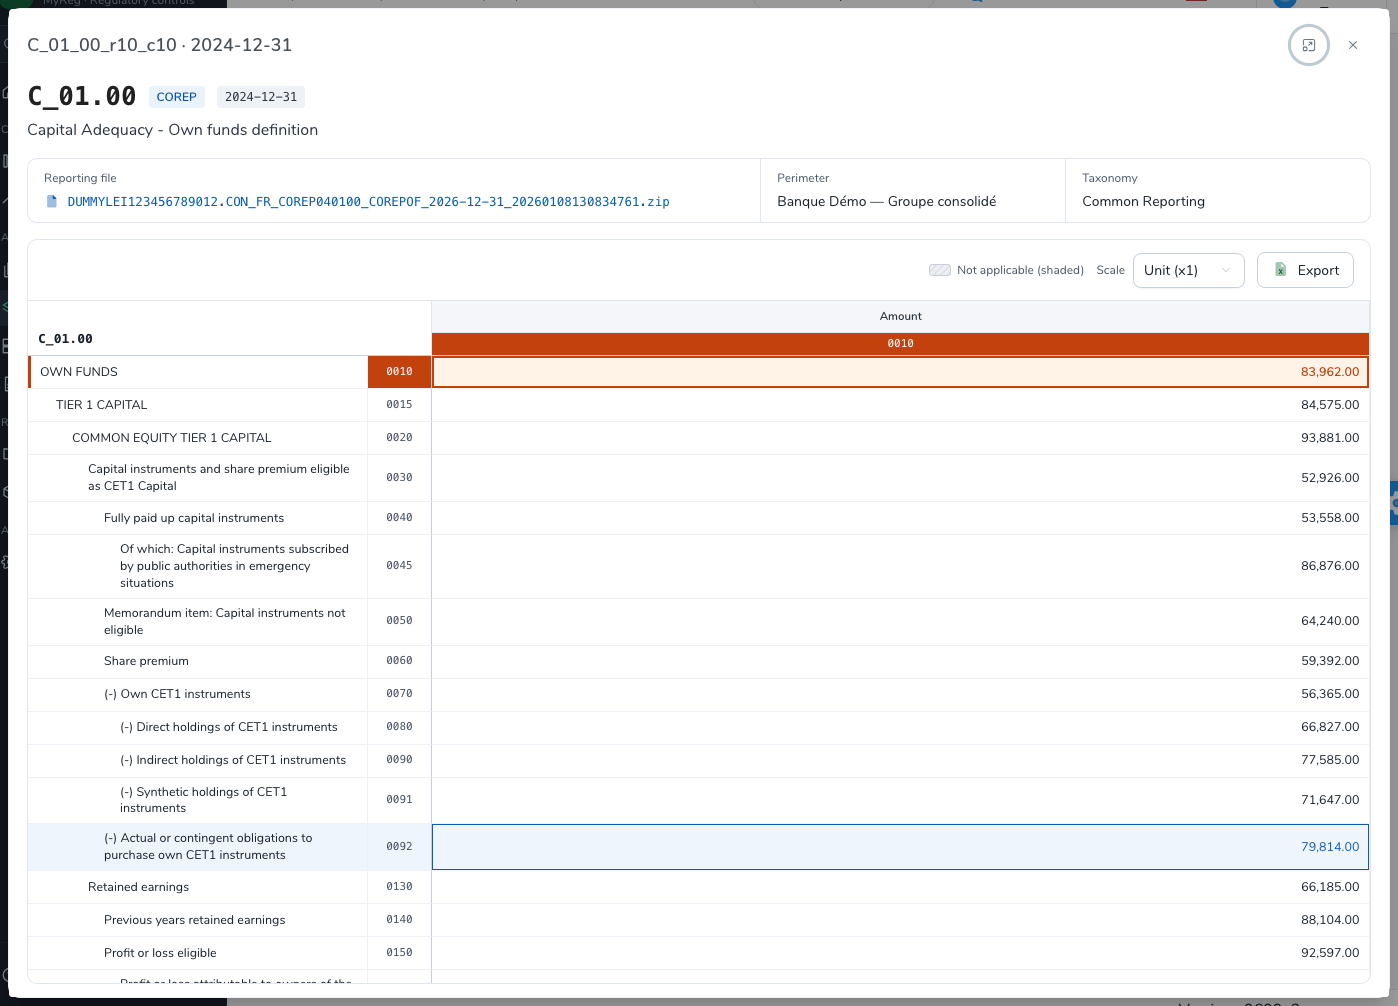
In the Data tab of a rule, the tooltip of a datapoint reads “Open C 01.00 on this datapoint”. Clicking it opens, in a dialog, the template of the reporting file the value was read from: the cell is framed, its row and column codes are marked, and the sheet shown is the cell’s. The header recalls the reporting file, with a link to its detail, the perimeter and the taxonomy. The Scale selector and the Export button are those of the template view (see How to navigate a reporting file).
- A datapoint the file does not report still opens the template: “This datapoint is not reported in the file: the framed cell is where its value would be.”
- Without a reporting file at this date in the run, the template is shown empty.
- If the file was deleted since, or if its taxonomy has no such table, the dialog says so instead of the template.
- Runs older than the recording of the sources show their datapoints without links: run the plan again to get them.
The same dialog opens from the explain of a Pillar 3 cell and from the EBA risk indicators.
How to export a result to an Excel file
On the result page, click Export results (.xlsx) to export every control of the run. A run’s ⋯ menu, on the plan page, offers the same export.
While a status or type filter is active, the Export … only (.xlsx) button exports only the controls of that status and type, for example “Export Fail · Custom only (.xlsx)”. The reference search and the Framework filter are not applied.
The file …_control_plan_<name>.xlsx contains three sheets:
- Context: the execution, the perimeter, the threshold and the files;
- ControlPlanResultsSummary: one row per control, with the formula, status, base, match type and deviations;
- ControlPlanResultsDetails: the same content, with the datapoint values for each date.
Headers are frozen and filterable, dates are real dates and values are formatted according to their type.
How to delete results
You can delete results in three ways:
one run: with the Delete entry of its ⋯ menu, in the Runs or Failed tab;
all runs: with Delete all runs in the ⋯ menu of the plan page, after confirmation;
a running execution: with the trash icon of the In progress tab.