Getting started
Video tutorial
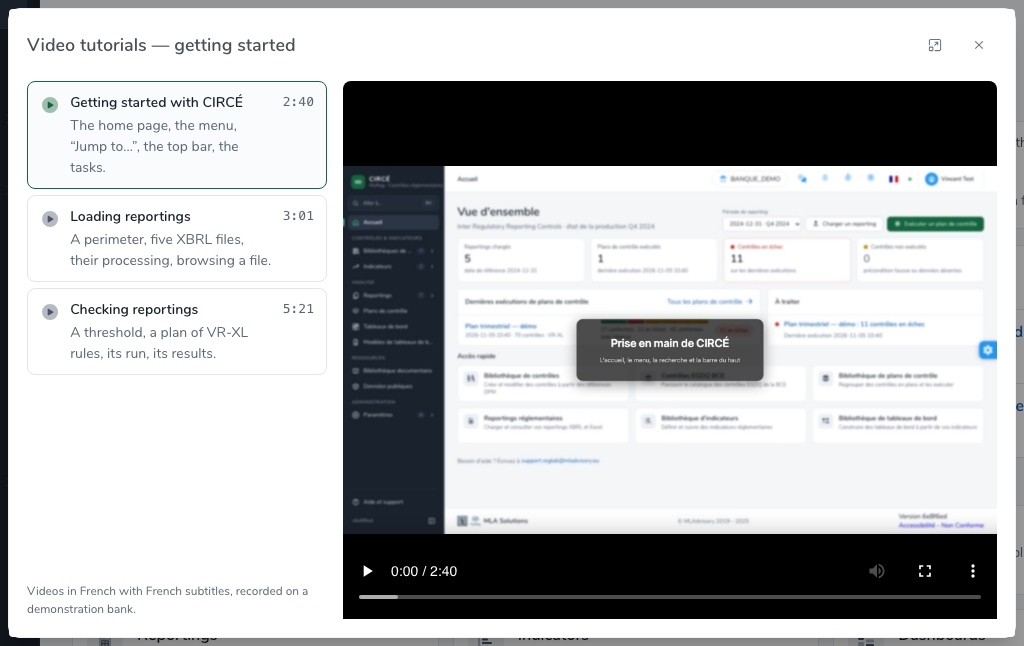
The tutorial (2 min 40, in French with French subtitles) shows the home page, the menu, the “Jump to…” search, the top bar and the background tasks.
Logging in and access
You log in with your company account. When the application’s address carries the name of your institution, you log in to that institution’s space. An address that matches no client shows the Unknown address page: check the address you were given, or write to support.reglab@mladvisory.eu.
Once you are logged in, the platform checks your rights. If one is missing, a page explains why and what you can do:
| Page | Reason | What you can do |
|---|---|---|
| You are not a member of this tenant | Your account does not belong to the selected tenant. | Ask one of its administrators to add you. If you belong to other tenants, the page offers them with Switch to …. |
| No valid licence | None of your tenants has a valid CIRCÉ licence. | Contact your administrator or MLA support. |
| You are not in any team | The Teams module is enabled and you are a member of no team. | Ask the tenant administrator to add you to a team, then Check again. |
| This page needs a role in the team | You administer the tenant, but you have no role in any team, or not in the selected team. | Open Teams to give yourself a role, or Back to home. |
| Your teams could not be loaded | The service that lists your teams did not answer. | Check again in a moment, then contact support if it persists. |
| Access denied | You do not have access to this page. | Back to home. |
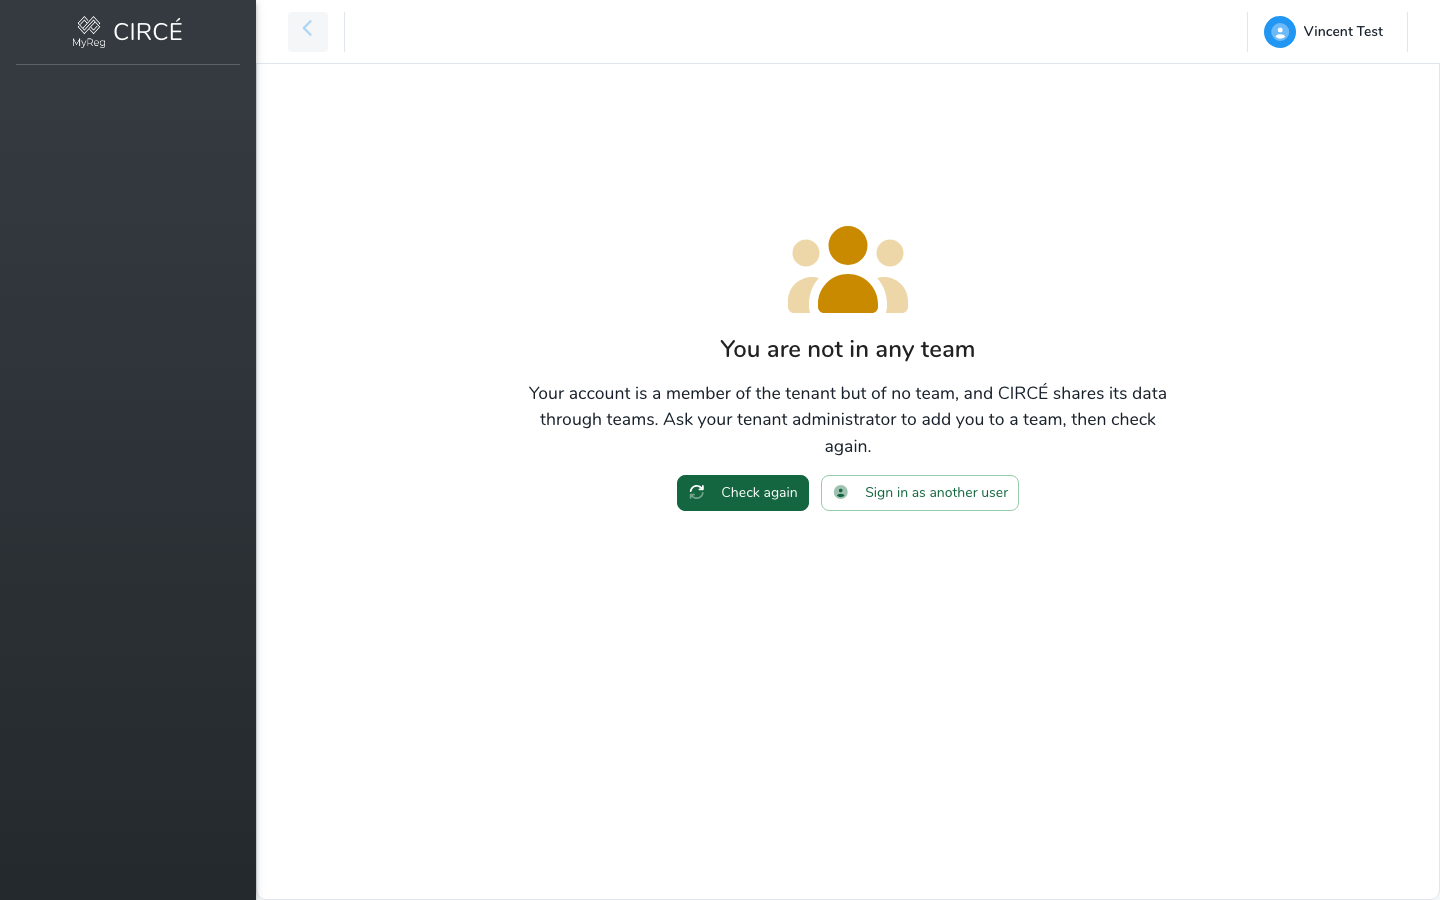
These pages only offer the user menu with Logout, and the Sign in as another user button. This button shows the login form instead of reusing the session already open in the browser.
The top bar
From left to right, the top bar contains:
- on small screens only, the button that opens the left-hand menu (see The left-hand menu);
- the breadcrumb. It follows the organisation of the menu (section, group, page, then the item you are viewing) and stays displayed when you change tab or filter;
- the tenant and the team you work in (see Switching tenant or team);
- the assistant button (speech bubbles, tooltip “Ask the assistant”), if the assistant is enabled (see The assistant);
- the Notifications bell, with the number of unread notifications. It opens the notifications page;
- the Background Tasks icon (stopwatch), with the number of running tasks. It opens the tasks page;
- the help menu (question mark):
- Help / Support opens the support page;
- Online Documentation opens this user manual;
- the gear icon that opens Teams / Permissions, if the Teams module is enabled;
- the language choice (flag): Français or English;
- for administrators only, the live updates indicator;
- your name, which opens the Profile, Settings and Logout menu.

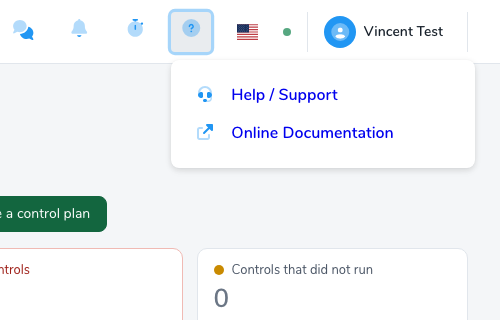
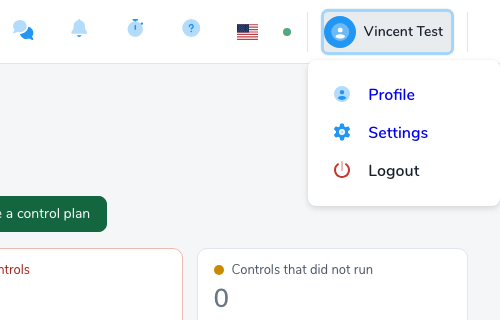
On a narrow screen, the bar keeps only the tenant, the team and your name: the other entries (assistant, notifications, tasks, teams, help, documentation and language) move into the user menu.
A gear-shaped button on the right edge of the screen opens the appearance panel. It lets you choose:
- the colour scheme: Light, Dim or Dark;
- the menu type: Static, Overlay or Horizontal;
- the display scale;
- the input field style.
These settings are remembered in the browser: they come back on your next visit.
Switching tenant or team
The tenant only appears if your organisation manages several subscriptions, and the team only if the Teams module is enabled (see Teams and permissions). When the tenant’s client has a logo, it is shown before the tenant’s name.
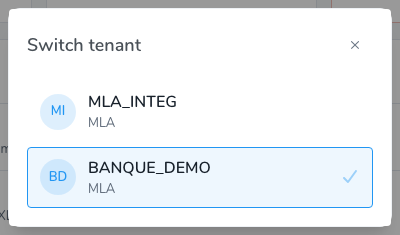
Click the name of the tenant or of the team to open the Switch tenant or Switch team dialog:
- The list shows each choice with, for a tenant, the name of its client. The current choice is ticked.
- Beyond a few choices, the Filter field narrows the list.
- Only the teams you are a member of are offered.
- Choosing a tenant or a team reloads the application. The lists then show the objects of the new team. A new tenant puts you on your first team in that tenant.
The left-hand menu
The content of the left-hand menu is described in the introduction.
The menu is displayed in three ways:
- expanded, with the name of each page;
- collapsed to a bar of icons. The Collapse menu button, at the bottom of the menu, switches to this mode, and Expand menu leaves it. The name of each page appears as a tooltip, and a group opens in a small window next to the bar. This choice is remembered from one visit to the next;
- on small screens, as a drawer, opened by the Open menu button of the top bar.
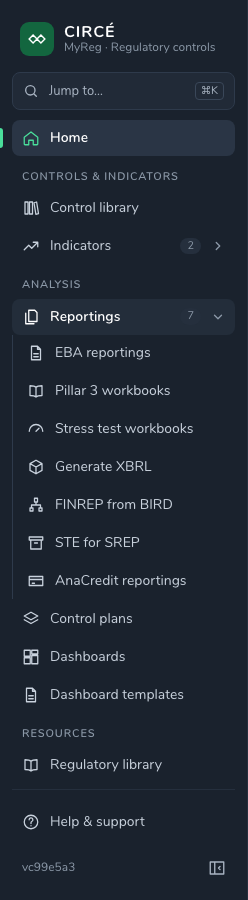
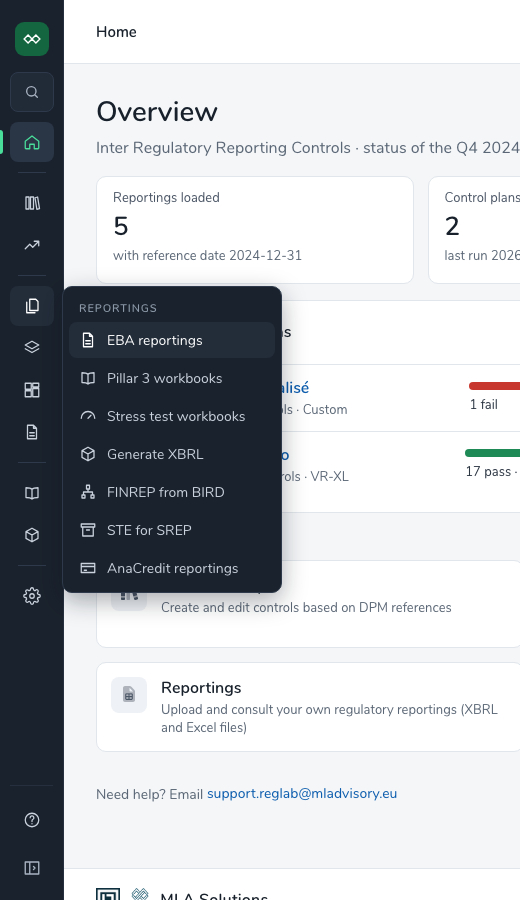
Only one group stays open at a time: opening a group closes the previous one. The group that holds the current page opens by itself.
Jump to…, at the top of the menu, opens any page by its name:
- Click Jump to… or press Ctrl K (⌘K on a Mac).
- Type part of the page name.
- Choose the page with the ↑ ↓ arrows, then Enter. Esc closes the window.
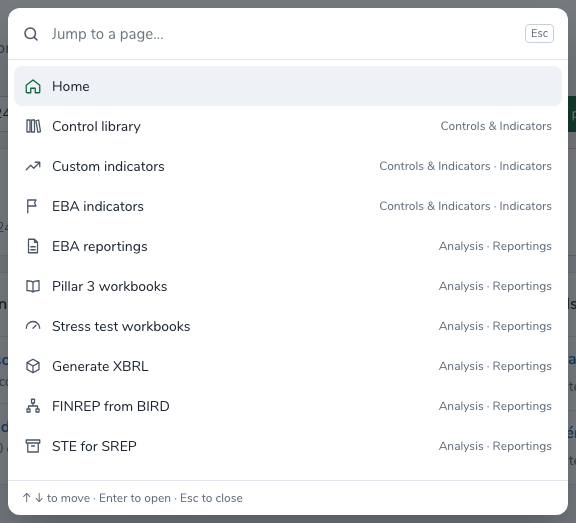
The bottom of the menu offers Help & support, which opens an e-mail to support, and shows the application version.
The home page
The home page (Home) is an overview of the production for a reporting period.
- The Reporting period selector chooses the reference date. The Video tutorials (3), Upload a reporting and Execute a control plan buttons sit next to it.
- Four key figures sum up the period:
- Reportings loaded: the processed reportings of this reference date;
- Control plans run, with the date of the latest run;
- Failed controls, across the latest runs;
- Controls that did not run: precondition false or no data.
- Recent control plan runs lists the five latest runs of the period. Each one opens its result. The All control plans link opens the list of plans.
- Needs your attention lists what requires your attention:
- for each plan, the failed, not evaluated or not run controls of its latest run. Each line opens the result filtered on these controls;
- the reportings that failed processing, across all periods;
- the reportings that need a reference date (Excel files uploaded without a date).
- These last two lines open the list of reportings, Processing tab, filtered on exactly these files.
- Go to offers six shortcuts: control library, ECB EGDQ controls, control plans, reportings, indicators and dashboards.
- At the bottom of the page, “Need help? Email support.reglab@mladvisory.eu” opens an e-mail to support.
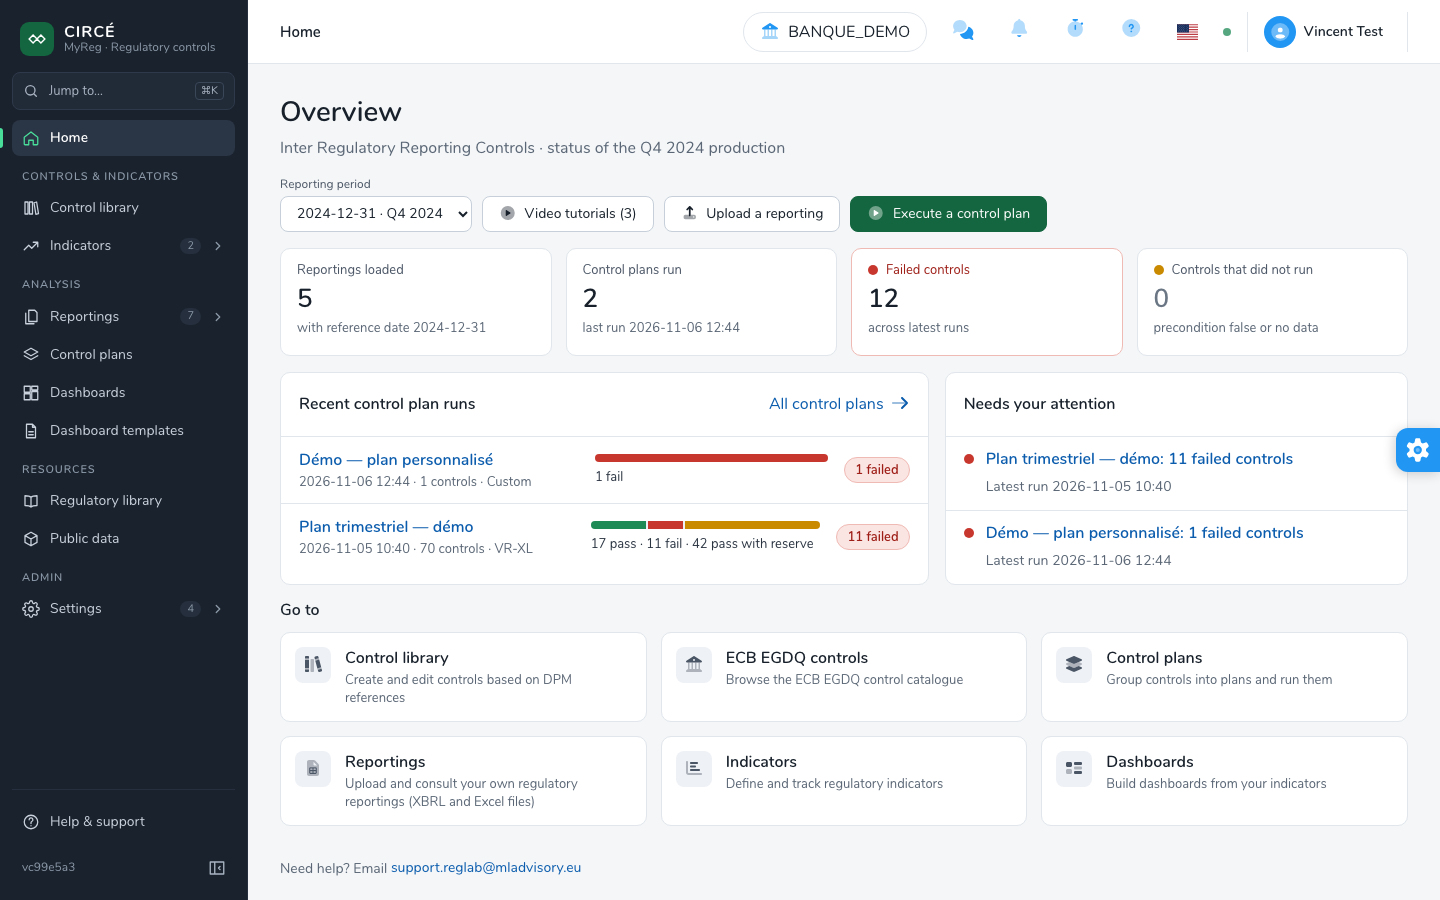
As long as no reporting is loaded, the page shows “No reporting period yet: upload a reporting to get started.”
The Video tutorials (3) button opens the Video tutorials — getting started dialog. It offers the three tutorials of this manual, in French with French subtitles: Getting started with CIRCÉ, Loading your reportings and Checking your reportings. Click a tutorial to play it in the dialog.
Common ergonomics
Messages
Confirmation and error messages appear at the top of the screen:
- The same message repeated is shown only once, with a counter (×N).
- At most three messages are shown at the same time.
- They disappear by themselves after 5 seconds, or 10 seconds for an error.
Downloads and exports
- While a file is being prepared, the export button shows a loading indicator and stays disabled. A second click therefore does not start a second export.
- The file is saved under its real name.
- If the export fails, the server’s error message is displayed.
Lists
When the displayed page of a list becomes empty (after a deletion or a filter), the list goes back to its last page.
Live updates
Screens update by themselves when something changes on the server, without reloading the page:
- tasks;
- reportings;
- control plan, dashboard and dashboard template results;
- library documents.
The progress bars of runs move in real time. If the link is interrupted, screens refresh every 30 seconds.
Administrators see a small indicator to the left of their name, in the top bar:
| Colour | Meaning |
|---|---|
| Green | “Live updates: connected” |
| Orange | “Live updates: reconnecting”, after 5 seconds without a link |
| Red | “Live updates interrupted — data refreshes every 30 s”, after 60 seconds without a link |
The Settings page lets you test the link.
Teams and permissions
This chapter only applies to installations where the Teams module is enabled.
Principle
Business objects are attached to one or more teams:
- controls;
- indicators;
- control plans;
- dashboards;
- reporting files;
- thresholds;
- perimeters.
A run (of a control plan, a dashboard or a dashboard template) belongs to the team that started it. Sharing a control plan or a dashboard with another team therefore does not show it the past runs.
Each user has a role in each of their teams:
| Role | Rights |
|---|---|
| OWNER (Owner) | Read, export and download, create, edit, delete, run. Delete runs. Manage team members and object permissions. |
| MEMBER (Member) | Read, export and download, create, edit, delete, run. A member cannot delete runs. |
| VIEWER (Viewer) | Read only. A viewer can neither export nor download. |
“Run” covers running a control plan or a dashboard, as well as reprocessing a reporting file. “Delete runs” covers control plan, dashboard and dashboard template results.
Work always takes place in the context of the team selected in the top bar:
- Lists only show the objects attached to that team.
- An object you create (control, loaded file, perimeter, etc.) is attached to that team. To create, you must be OWNER or MEMBER in it.
- Actions on an object are allowed according to your role in the teams that hold that object. These actions are viewing, editing, deleting, running and exporting.
- Exports without a selection only contain the objects of the selected team.
- You can only use objects you can read: for example, add a control to a plan, or run a plan on a reporting or with a threshold.
- A refused action displays an error message. If the permission service is unavailable, the message reports an unavailable service rather than an access refusal.
Runs started before these rules were introduced are no longer visible.
The Teams page
Open the page from the Teams / Permissions gear in the top bar. It has two tabs.
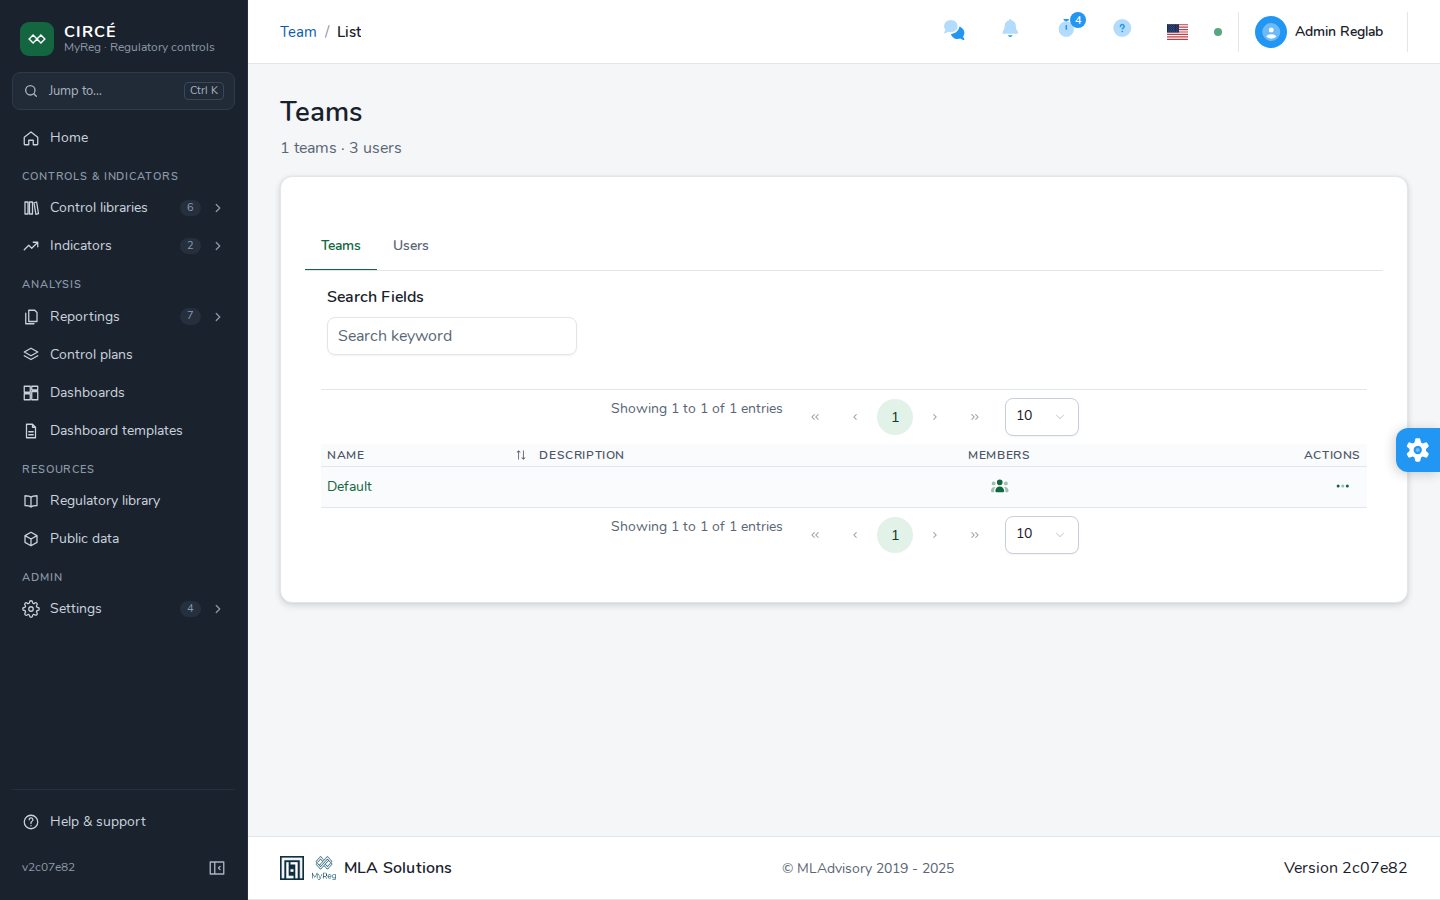
The Teams tab lists the teams with their name, description and members.
- The View members icon opens the list of members and their roles. This list is only visible to the users who hold a role in the team, and to the administrator.
- A team owner can:
- Update role of a member;
- Delete member. An owner cannot be deleted directly.
- The action menu of each team offers View, Edit (name and description), Delete and, for an owner or a member of the team, Export: the list of its members in an Excel file.
- The Export team members button exports at once the members of every team where you are an owner or a member. The administrator exports every team.
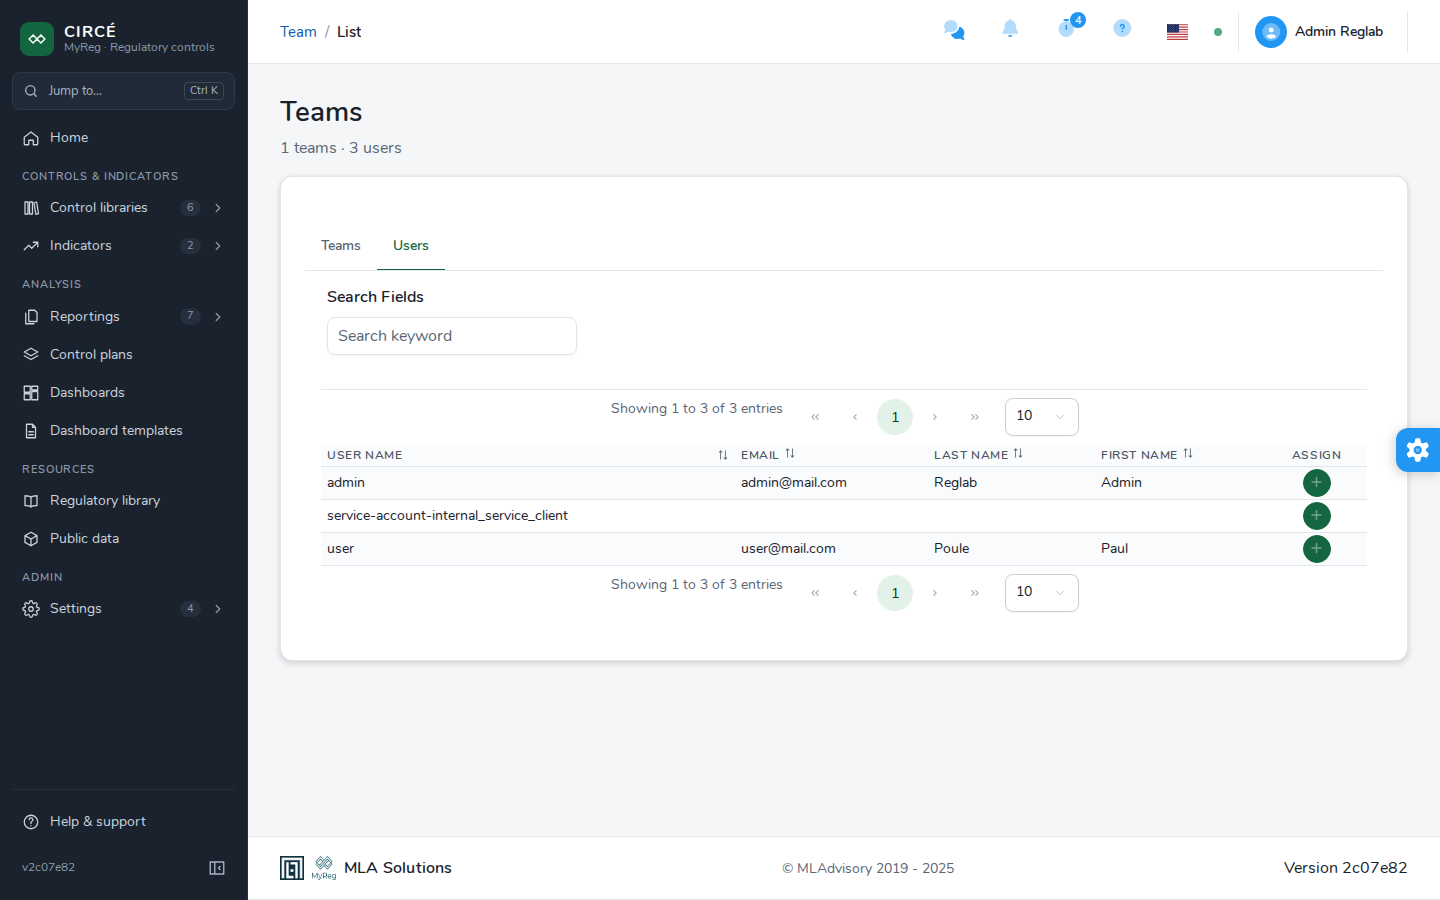
The Users tab lists the users known to the platform.
- The Assign to team (+) button adds a user to a team with a role: Owner, Member or Viewer.
- To give a role in a team, the Default team included, you must own that team, or be an administrator.
- A user cannot be added twice to the same team.
Rules to know:
- A team must always have at least one owner. The last owner cannot be removed: to take this role away from them, first delegate it to another member.
- An owner removed from the team loses their rights immediately.
- A team cannot be deleted as long as it contains users other than you.
- Objects that were attached only to a deleted team can then be reached by the administrator only.
- Only the team owner and the administrator can edit or delete a team and manage its members.
Administrator-only tasks
The platform administrator role (SAU) additionally allows you to:
- Create Team.
- Enter a name (mandatory and unique) and a description.
- Tick the users to add and choose the role of each one.
- At least one user must be given the Owner role.
- Save is only active when the name is entered and at least one user is ticked.
- Import users from the Users tab, with the Import button. Importing is reserved to the administrator.
- The Download model link provides the expected Excel file: “Users” sheet, columns Username, Email, FirstName, LastName.
- A row is rejected if the e-mail is invalid, or if the e-mail or the username already exists.
- Imported users join the Default team with the MEMBER role.
- An import summary is displayed at the end.
An administrator account that has no role in any team does not see the business pages. It only has access to teams, settings and the profile.
Managing an object’s permissions
The action menu of the lists offers a Permissions entry. This is the case for controls, indicators, control plans, dashboards, thresholds, perimeters and reporting files. The “Manage which teams can access this object.” dialog lets you:
- add a team: Select a team, then Add;
- remove a team from the Assigned Teams list with Remove from team.
To add or remove a team, two conditions are required:
- owning the team being added or removed;
- having the right to edit the object.
The administrator is not subject to these conditions. An object must always remain attached to at least one team.
The lists of controls, indicators and reporting files also have a Permissions button in the toolbar. It adds teams to all the ticked objects at once. This mode only allows adding, not removing.
Profile
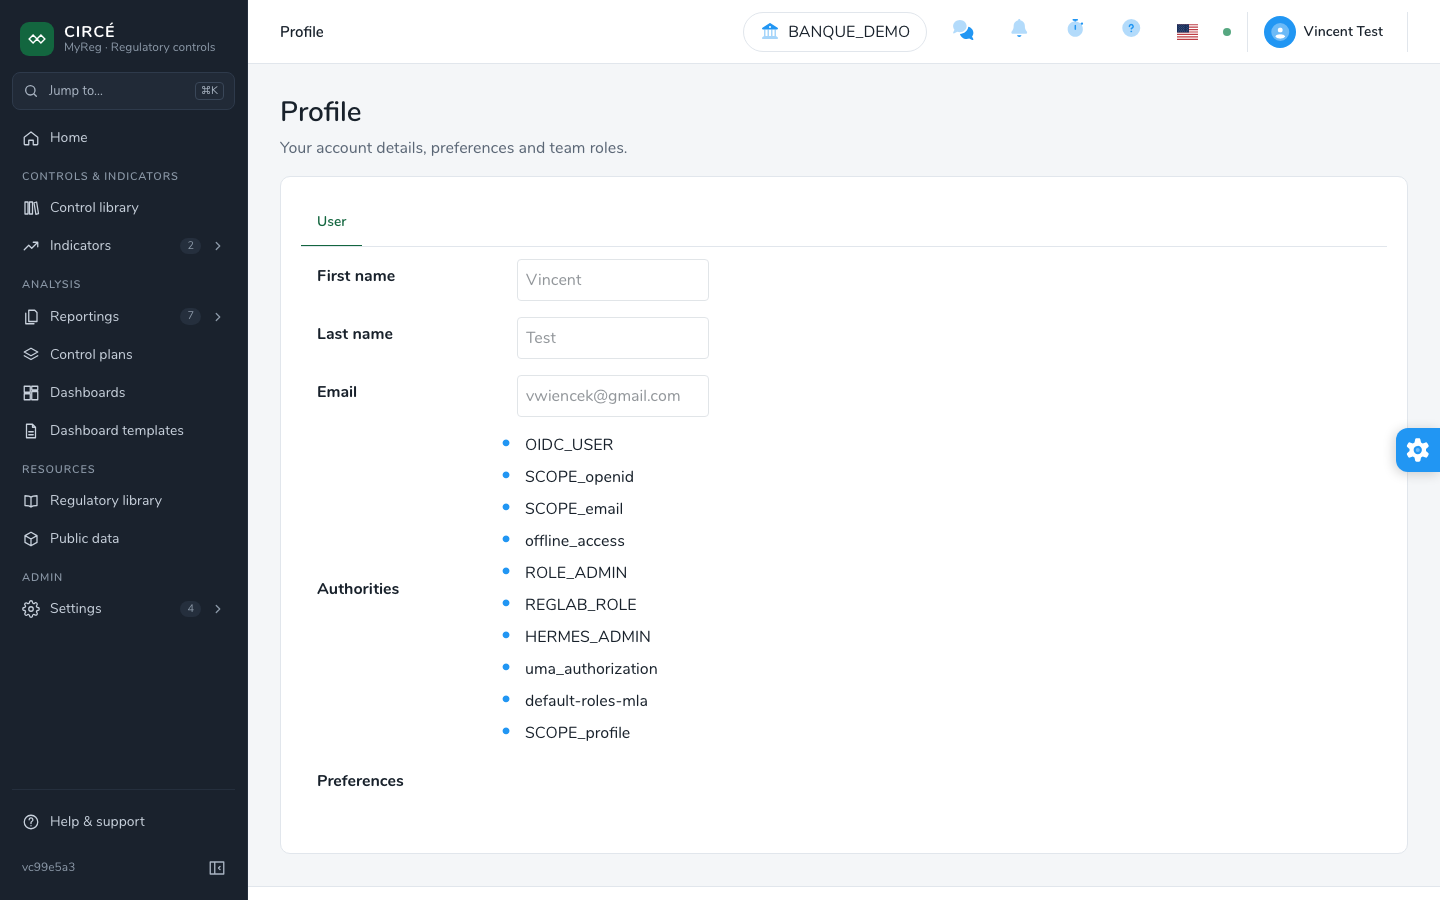
The Profile page (user menu) displays, read-only:
- your first name, last name and e-mail;
- your application roles;
- your preferences;
- if the Teams module is active, your teams and your role in each one.
Settings
The Settings page (user menu) shows the state of the platform. The Refresh button reads all the information again. It has four sections.
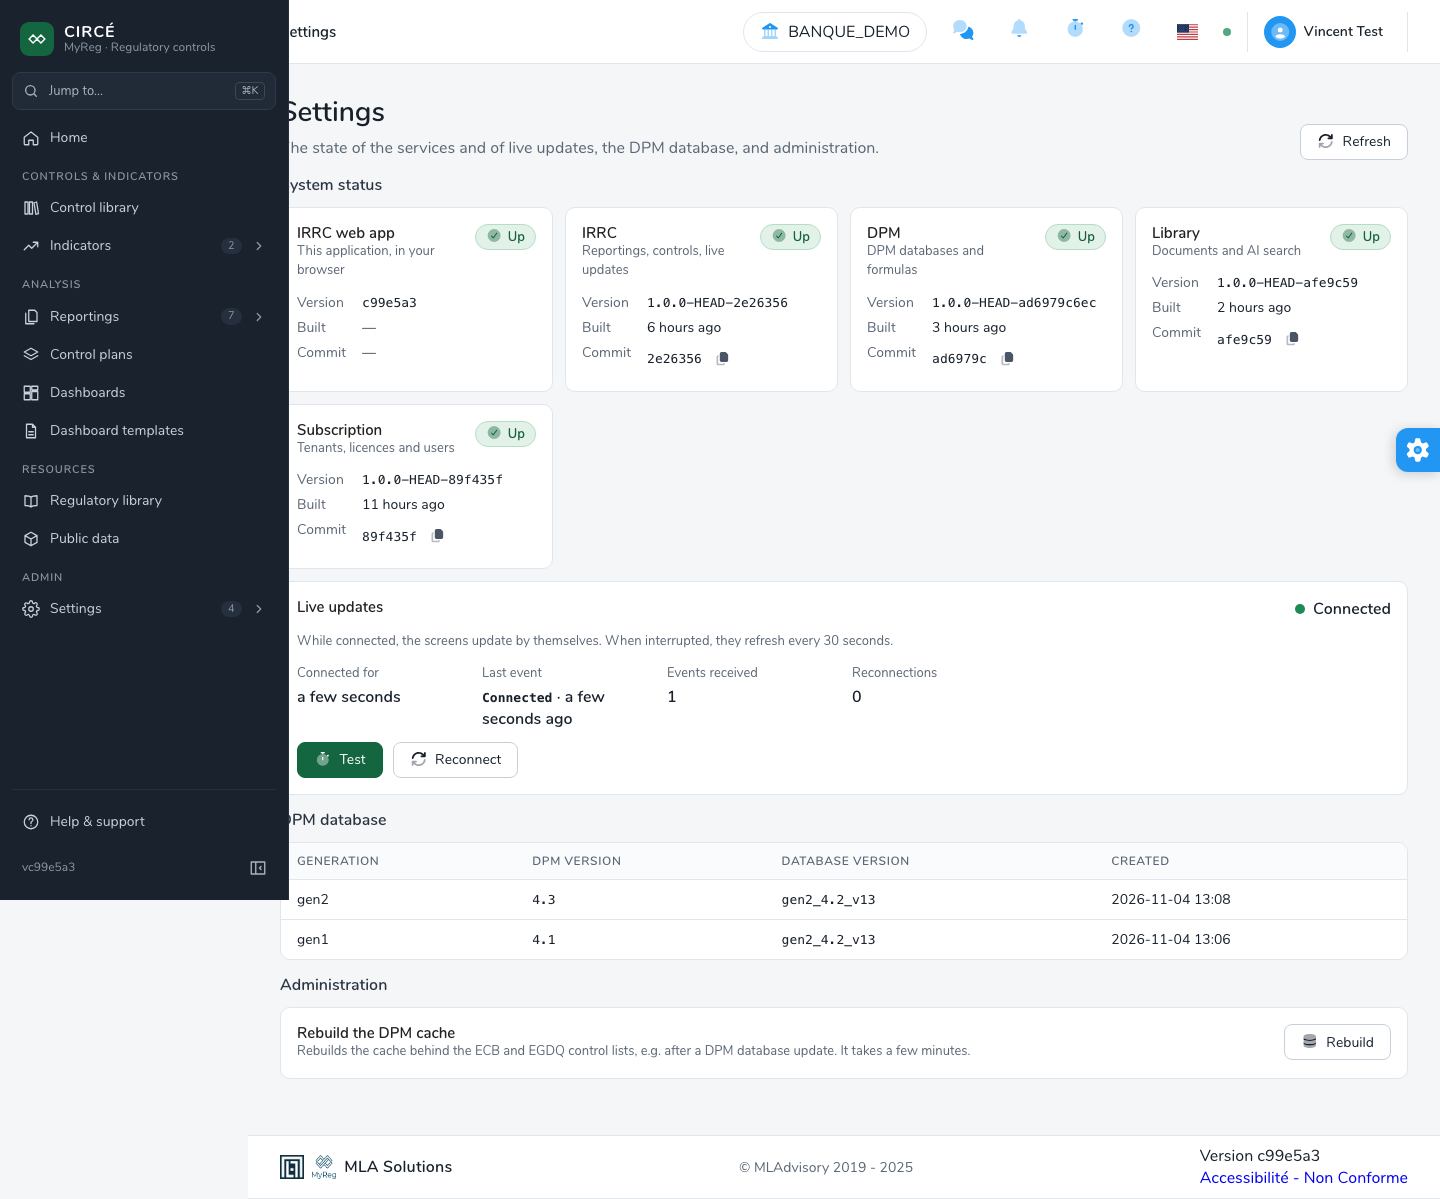
System status shows one card per service:
- IRRC web app (this application, in your browser);
- IRRC (reportings, controls, live updates);
- DPM (DPM databases and formulas);
- Library (documents and AI search);
- Subscription (tenants, licences and users), when the platform manages subscriptions.
Each card shows whether the service is Up or Unreachable, its version, its build date and its commit identifier, which the copy icon copies in full. This information is useful when contacting support.
Live updates shows the state of the link (Connected, Connecting…, Interrupted, retrying), how long it has been open, the last event received, the number of events received and the number of reconnections.
- Test sends a test and shows the round trip time, for example “Round trip: 40 ms”. Without an answer within 10 seconds, updates do not reach this tab.
- Reconnect reopens the link.

DPM database lists, for each generation of the DPM database, the DPM version, the database version and its creation date.
Administration, for administrators only, offers Rebuild the DPM cache with the Rebuild button.
- A confirmation is requested: the build takes a few minutes. Meanwhile, the EGDQ control lists are slower for every user and their validity filter is partial.
- The progress is shown under the button, followed by the message “The DPM cache is rebuilt.”.
- It also appears at the top of the EGDQ, Validation Rules and EGDQ-XL lists: “Indexing controls: n%”.
- This indexing also takes place automatically when the service starts and every night.
Background tasks
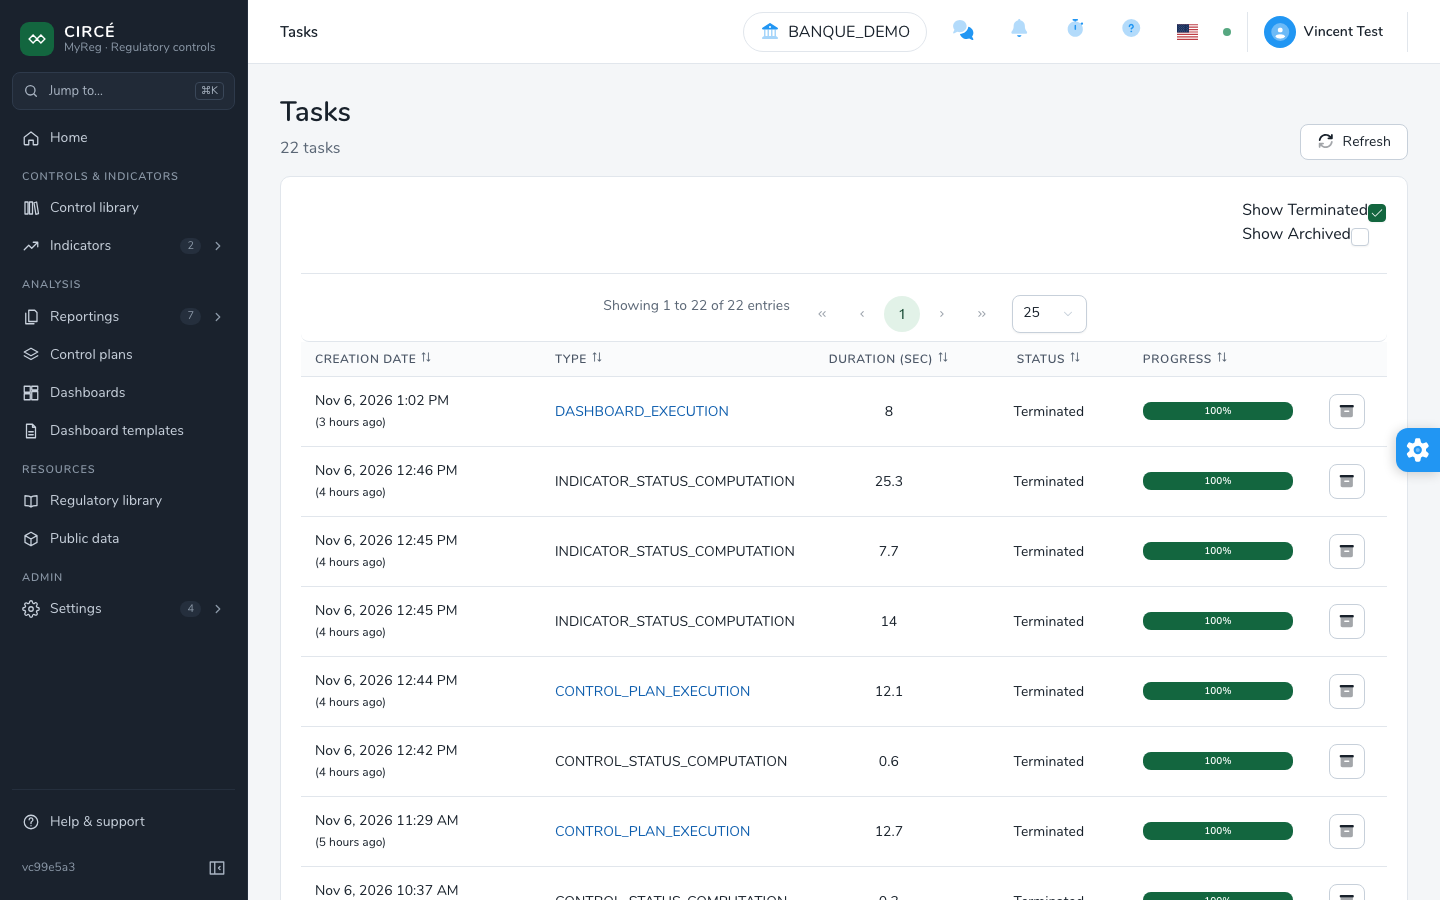
The Tasks page lists your organisation’s long-running processes, with their creation date, type, duration in seconds, status and progress:
- control plan executions (CONTROL_PLAN_EXECUTION);
- dashboard executions (DASHBOARD_EXECUTION);
- reporting file extractions (XBRL_EXTRACTION);
- control and indicator status computations (CONTROL_STATUS_COMPUTATION, INDICATOR_STATUS_COMPUTATION).
Usage:
- The Show Terminated (ticked by default) and Show Archived (unticked by default) checkboxes filter the list.
- A finished task can be archived with the archive button. To do so, you must be able to read the task’s object (the reporting, the control plan result or the dashboard result).
- The Refresh button reads the list again. It also updates itself as the processes run.
- A task cannot be cancelled from this page.
- For a control plan or dashboard run, the task’s type is a link that opens the result of that run.
Notifications
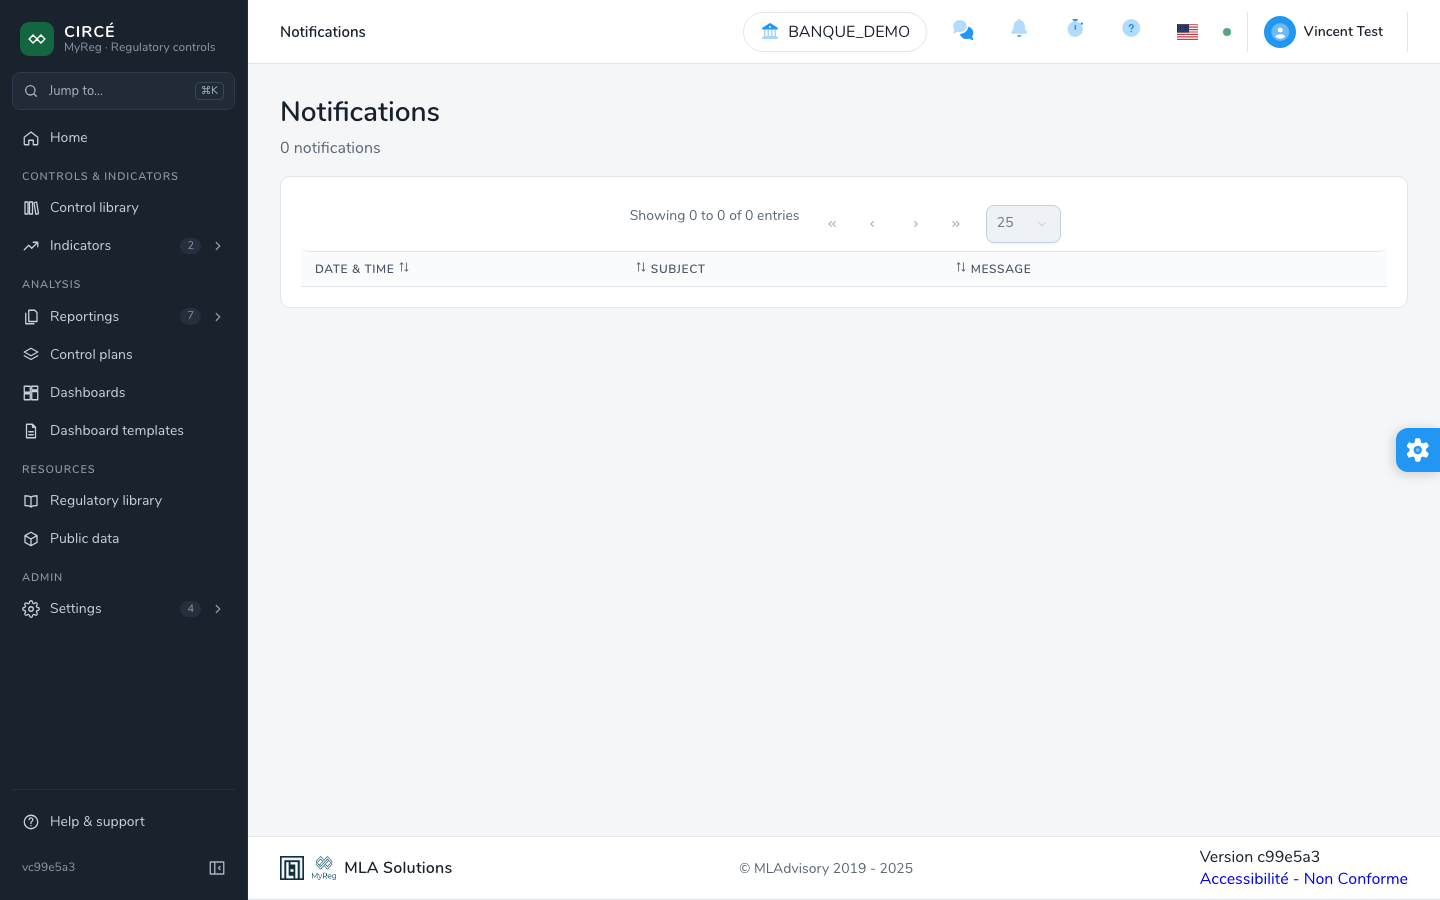
The Notifications page opens from the bell in the top bar. It lists the notifications the platform sent you, with their Date & time, Subject and Message. Unread notifications are in bold, and their number is shown on the bell.
On each row, the eye marks the notification as read, the crossed eye marks it as unread again, and the minus sign deletes it.
Language
The flag in the top bar lets you switch the interface between French and English. The choice is saved with your account: it comes back on your other browsers, and the e-mails the platform sends you are in that language. The labels switch at once, then the page reloads so that dates and amounts follow the language: unsaved input on that page is lost, as when switching tenant or team. In French, long dates and amounts take French month names and separators, for instance in a template view and in result tables. The lists’ timestamps keep the 2026-11-06 13:42 form in both languages.
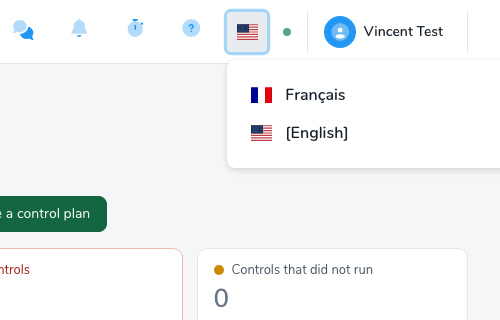
The interface labels are translated, including deletion confirmations, drop-down lists, import summaries and permission dialogs. A few technical values, such as task types, remain displayed as codes.
Help / Support
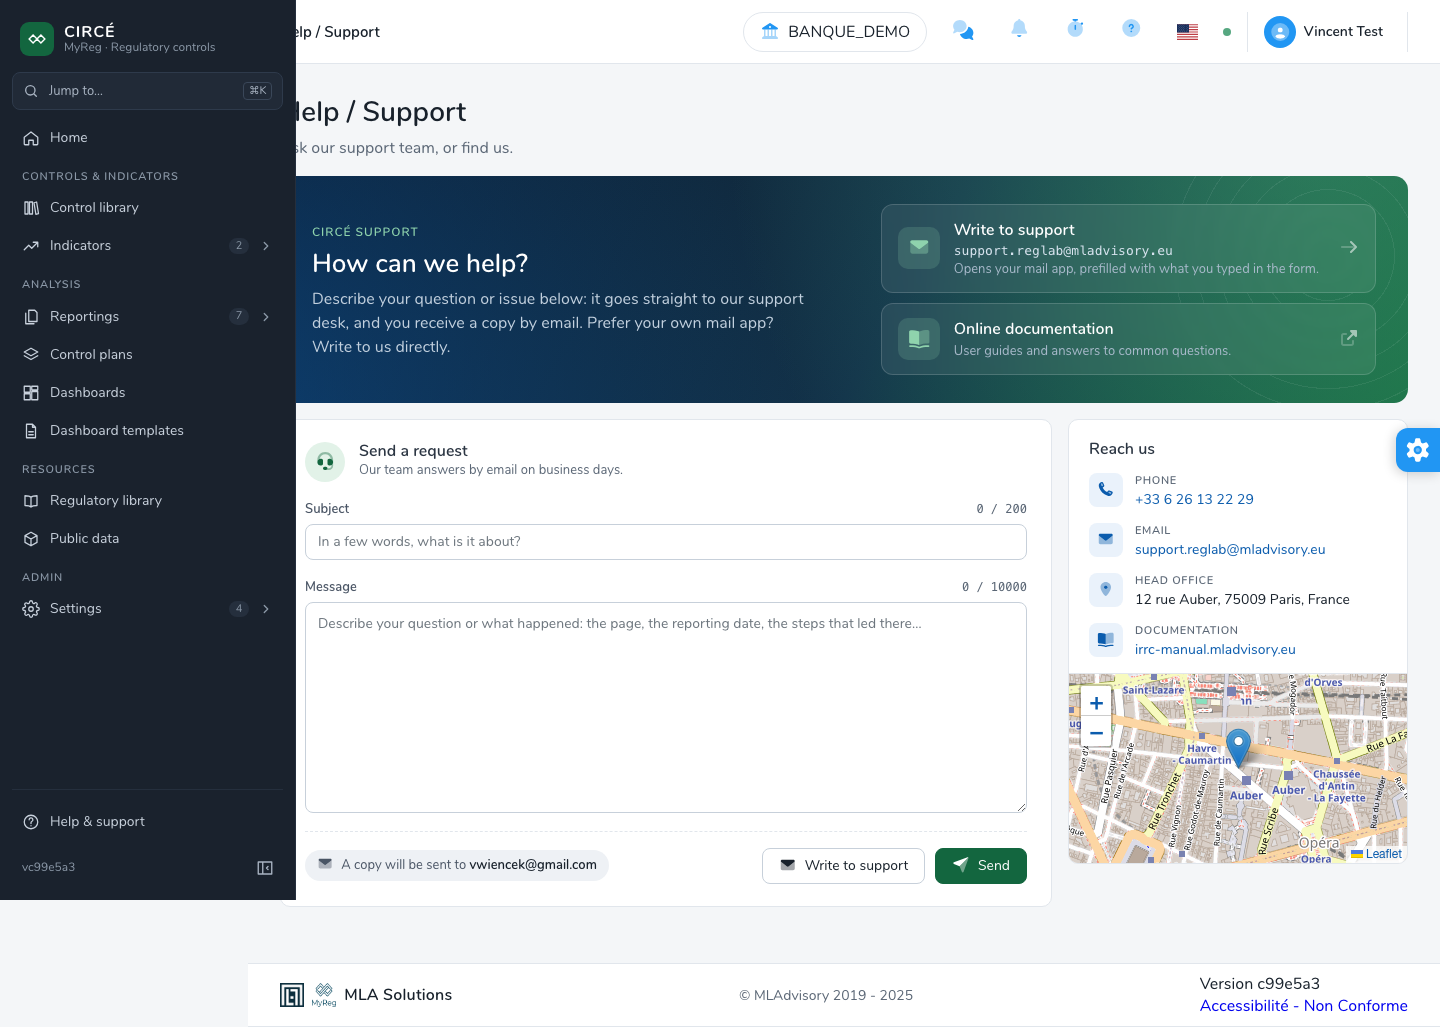
The Help / Support page opens from the help menu in the top bar. It gathers the ways to reach support:
- Write to support opens your mail app, prefilled with what you typed in the form;
- Online documentation opens this user manual;
- the Send a request form: enter the Subject and the Message, then click Send. The request goes straight to support, and a copy is sent to the e-mail address of your account. Our team answers by e-mail on business days;
- the Reach us box: phone, e-mail, head office and documentation.
If your account has no e-mail address, the form invites you to write to support from your mail app. If sending fails, your text is kept for another try.
Support access
Authorize read-only support access, choose its duration and revoke it.