Perimeters and reporting files
Reporting files are found under Analysis > Reportings > EBA reportings. Perimeters are managed under Admin › Settings › Perimeters. RUBA and AnaCredit reportings each have their own page: RUBA reportings and AnaCredit.
Video tutorial
The tutorial (3 min 01, in French with French subtitles) shows creating a perimeter, loading five reportings, their processing and browsing a file.
Perimeter
How to create a new perimeter
You can create a new perimeter from the Regulatory perimeters page.
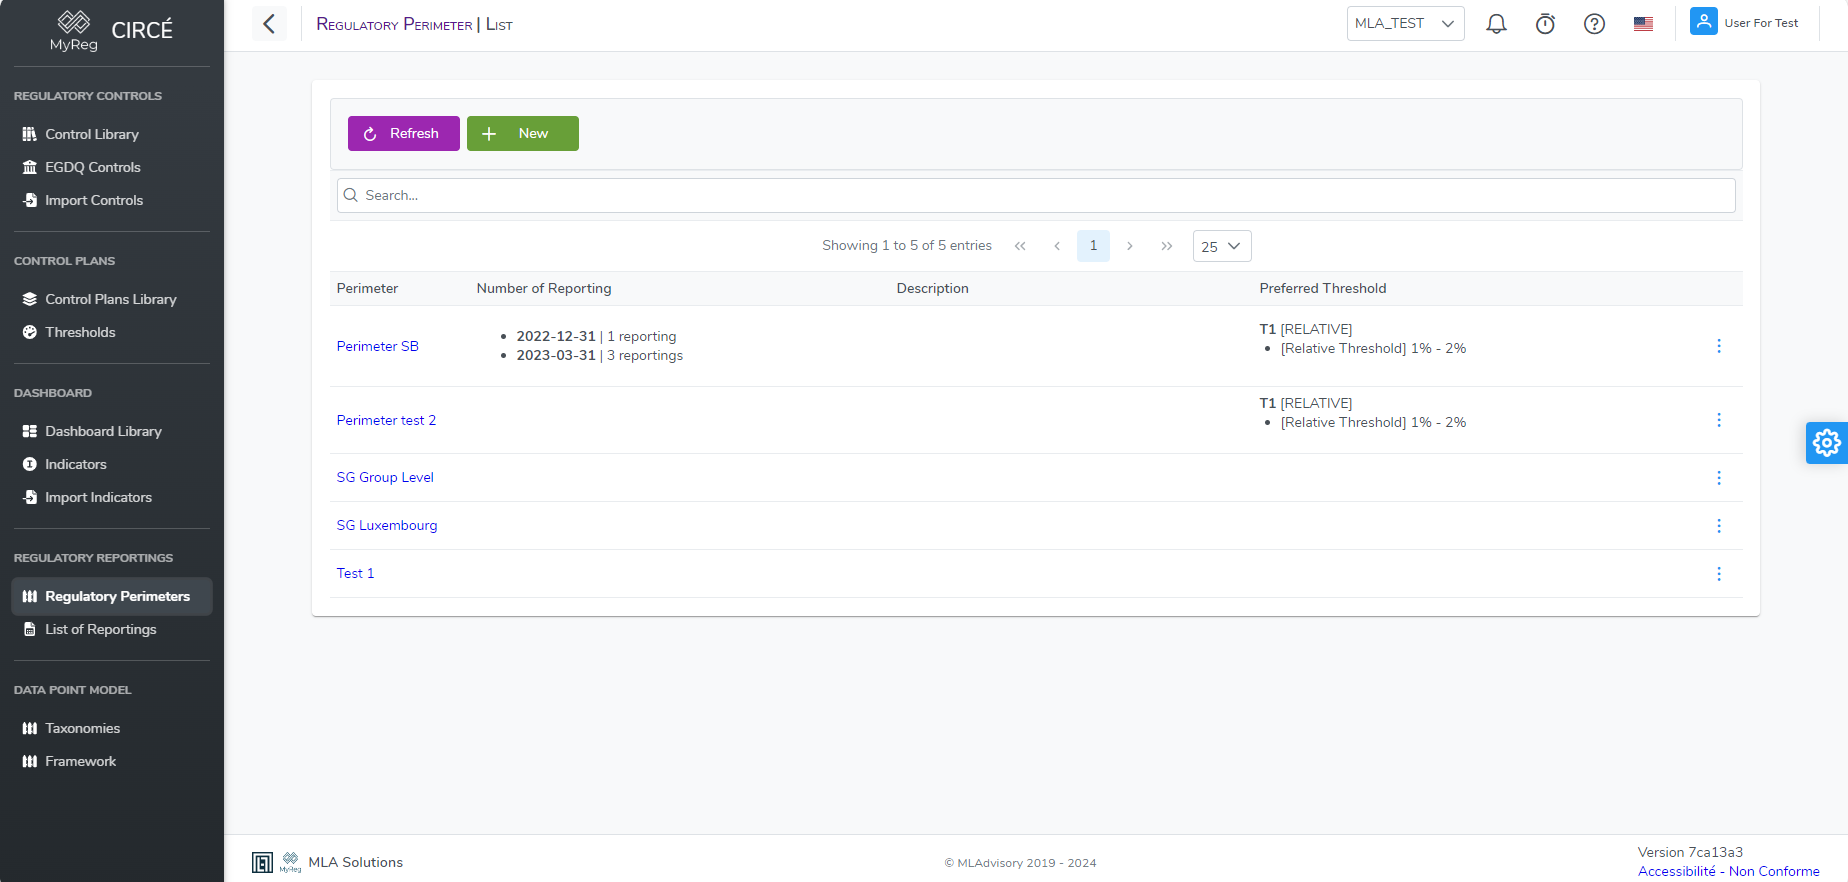
For each perimeter, the list shows:
- its name and description. A long description is collapsed: Show more expands it;
- its Reportings by reference date: one chip per date, for example “2026-03-31 · 2 reportings”.
- A chip opens the list of the perimeter’s reportings at that date.
- Beyond four dates, a last “+n more” chip opens all the perimeter’s reportings.
- A perimeter without reportings shows “No reportings yet”, with an Upload files link;
- its Preferred threshold, or “Not set · Chosen when a plan is run”.
The Search field filters the list on the perimeter’s name or description.
Click the New perimeter button.
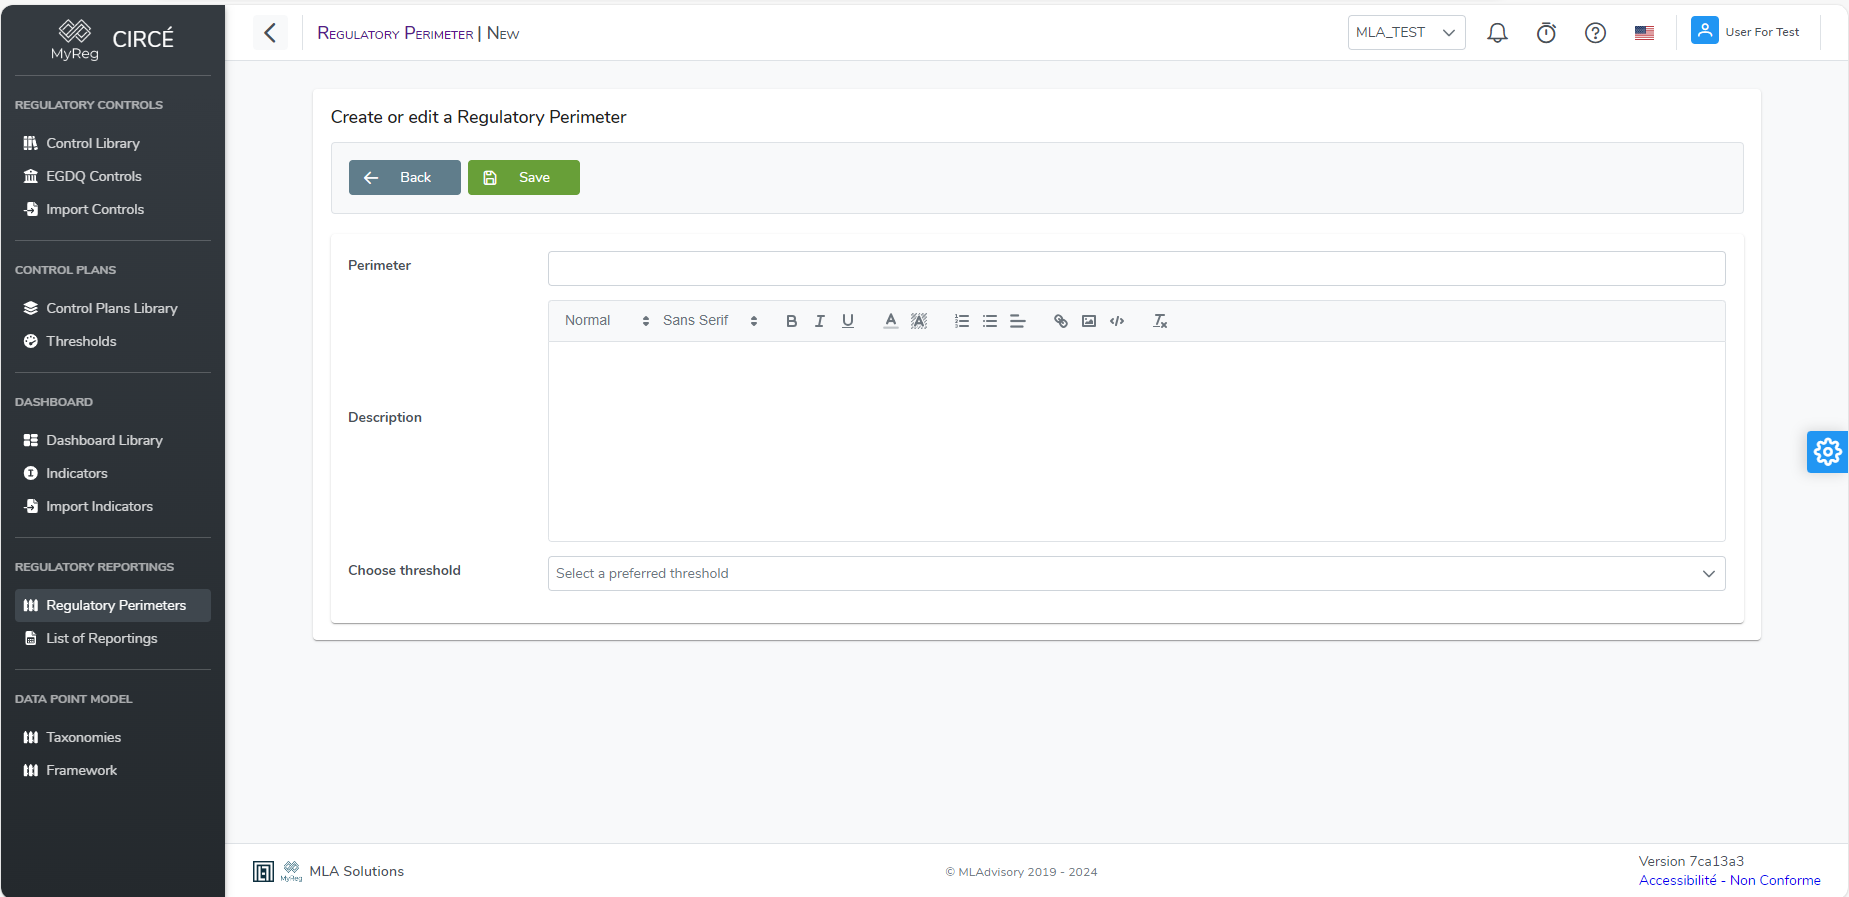
Then enter:
- a name for your perimeter, mandatory and unique;
- a description, optional;
- a preferred threshold, optional, from the Choose threshold list.
Click Save to create your new perimeter. If the Teams module is enabled, the perimeter is attached to the selected team.
The ⋯ menu of each perimeter offers View, Edit, Upload files, View reportings (if the perimeter has some), Permissions (if the Teams module is enabled) and Delete.
How to edit a perimeter
Open a perimeter and click the Edit button.
You can also use the Edit entry of the ⋯ menu on the list page.
Make your changes, then click Save.
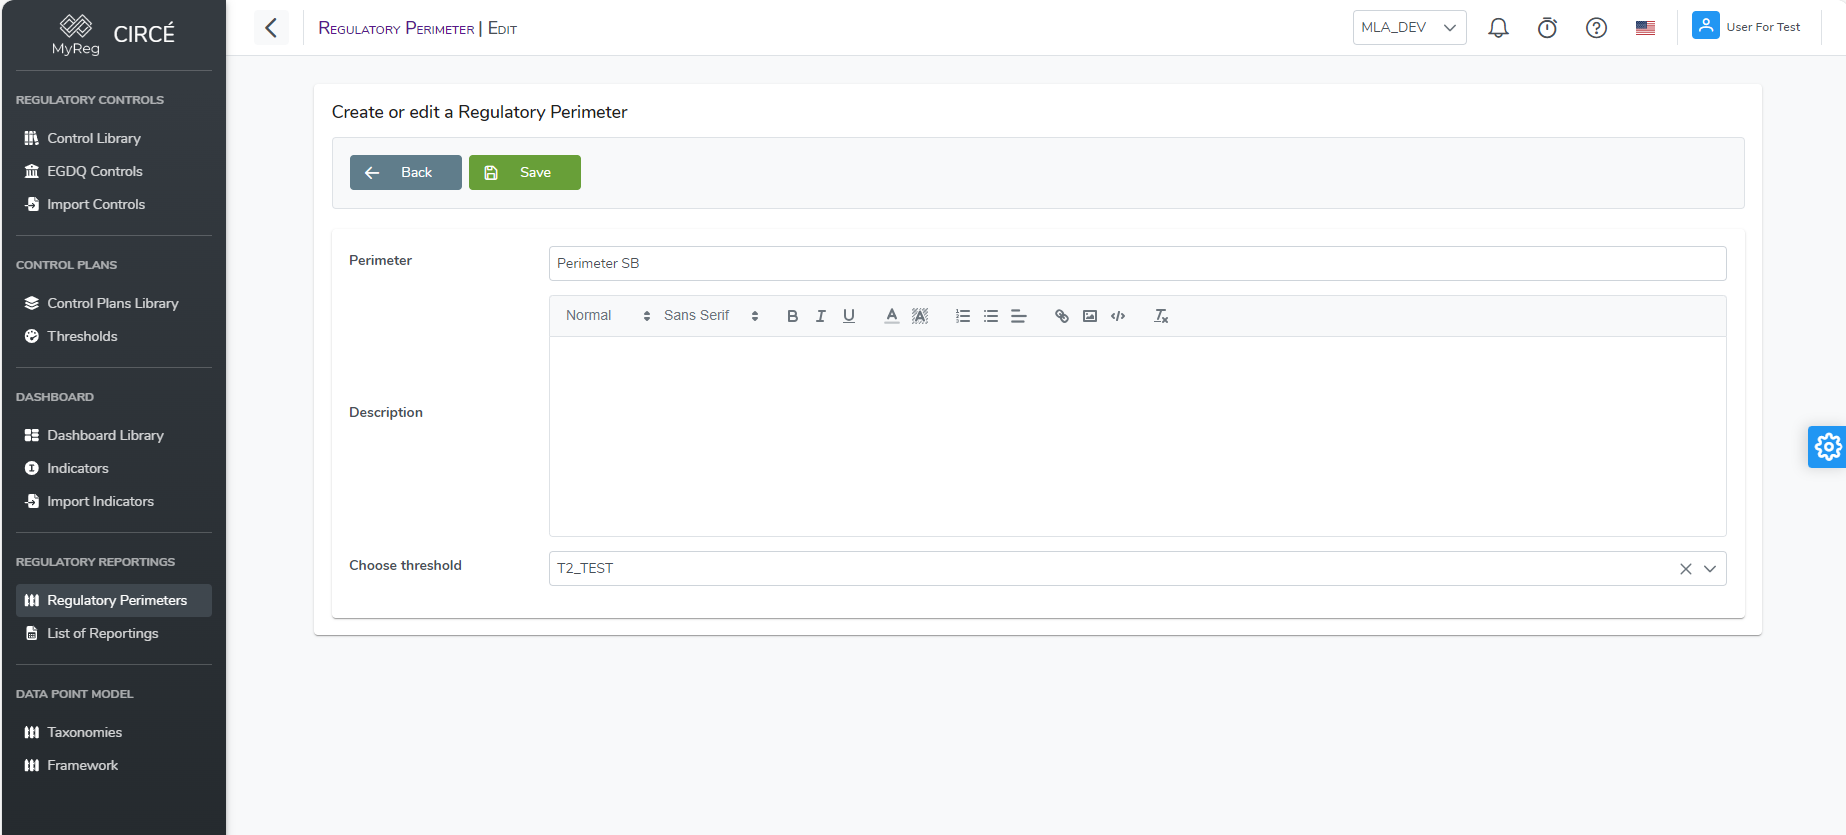
The Back button returns to the previous page without saving your changes.
How to delete one or more perimeters
On the list page, use the Delete entry of a perimeter’s ⋯ menu. To delete several, select them, then click Delete… in the bulk actions bar that appears.
A confirmation dialog names each perimeter and says in advance which ones cannot be deleted. It lets you confirm or cancel your action.
A perimeter that contains one or more reporting files cannot be deleted.
All files count, including those in error or being processed. A perimeter may therefore look empty in the list and still be impossible to delete.
Delete its files first, or move them to another perimeter. Reportings are never deleted with a perimeter.
In a bulk deletion, the other perimeters are deleted. A message lists the ones that were kept, with a View reportings link for each.

Reporting files
How to upload reporting files
On the EBA reportings page, click Upload files to open the Upload reporting files page. You can also use the Upload files entry of a perimeter’s ⋯ menu.
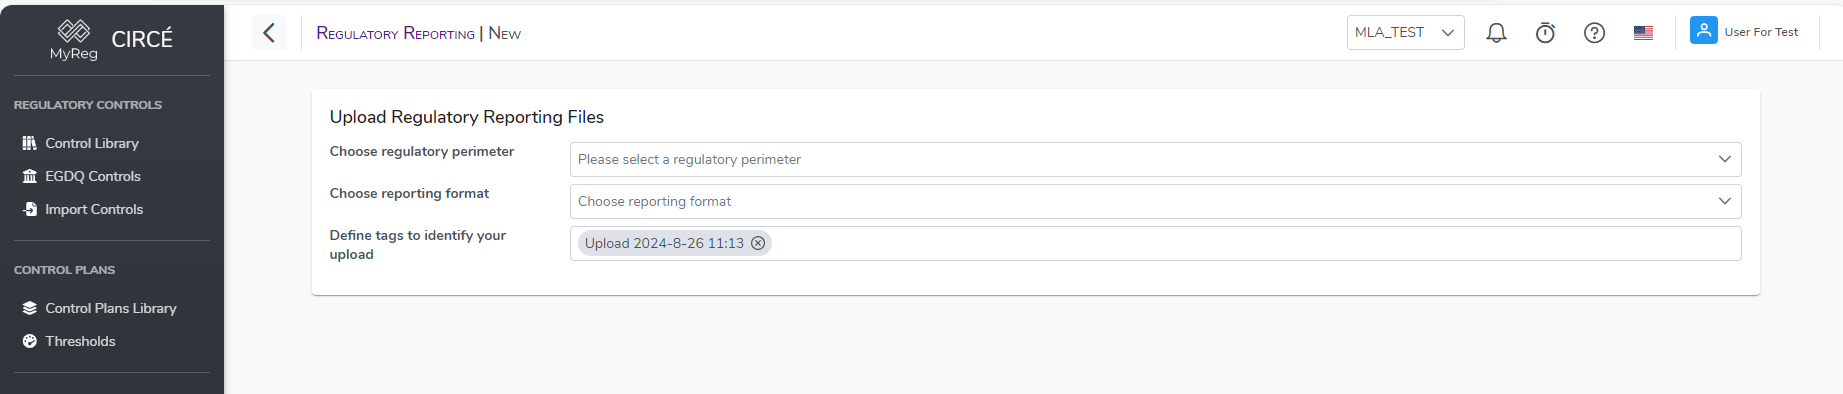
The upload takes two steps.
- Where do these files belong?
- Choose the destination Perimeter. At least one perimeter must have been created: otherwise, the page offers Define a perimeter.
- Fill in the Tags that will identify this upload. A
Upload yyyy-MM-dd HH:mmtag is suggested by default. Tags are created with the Enter key.
- Add files: drop the files in the area provided, or click browse your computer. The area recalls the accepted formats and the maximum size.
Each added file is checked straight away. Its Status column shows:
- Ready: the file will be uploaded;
- Unsupported format: its extension is not accepted;
- Too large: it exceeds the maximum size;
- Duplicate: a file with the same name is already in the list.
Files that are not ready are skipped at upload. The trash icon removes a file from the list.
For each ready file, you can:
- check its Format, that is, its nature: DPM, RUBA, OTHER, and ANACREDIT if the module is enabled.
- The format is detected from the file name: a name containing “ruba” gives RUBA, otherwise DPM.
- You can change it.
- tick the checkbox of the Official submission column if the file is the official version of the reporting. The checkbox then shows Official, otherwise Test only.
The bar at the bottom of the page sums up the files added, ready and skipped. Click Upload N files. A progress bar is shown for each file. If you leave the page during an upload, you are asked to confirm.
At the end, a panel says how many files were uploaded to the perimeter. It offers Run a control plan on these files, View in reporting list and Upload more files.
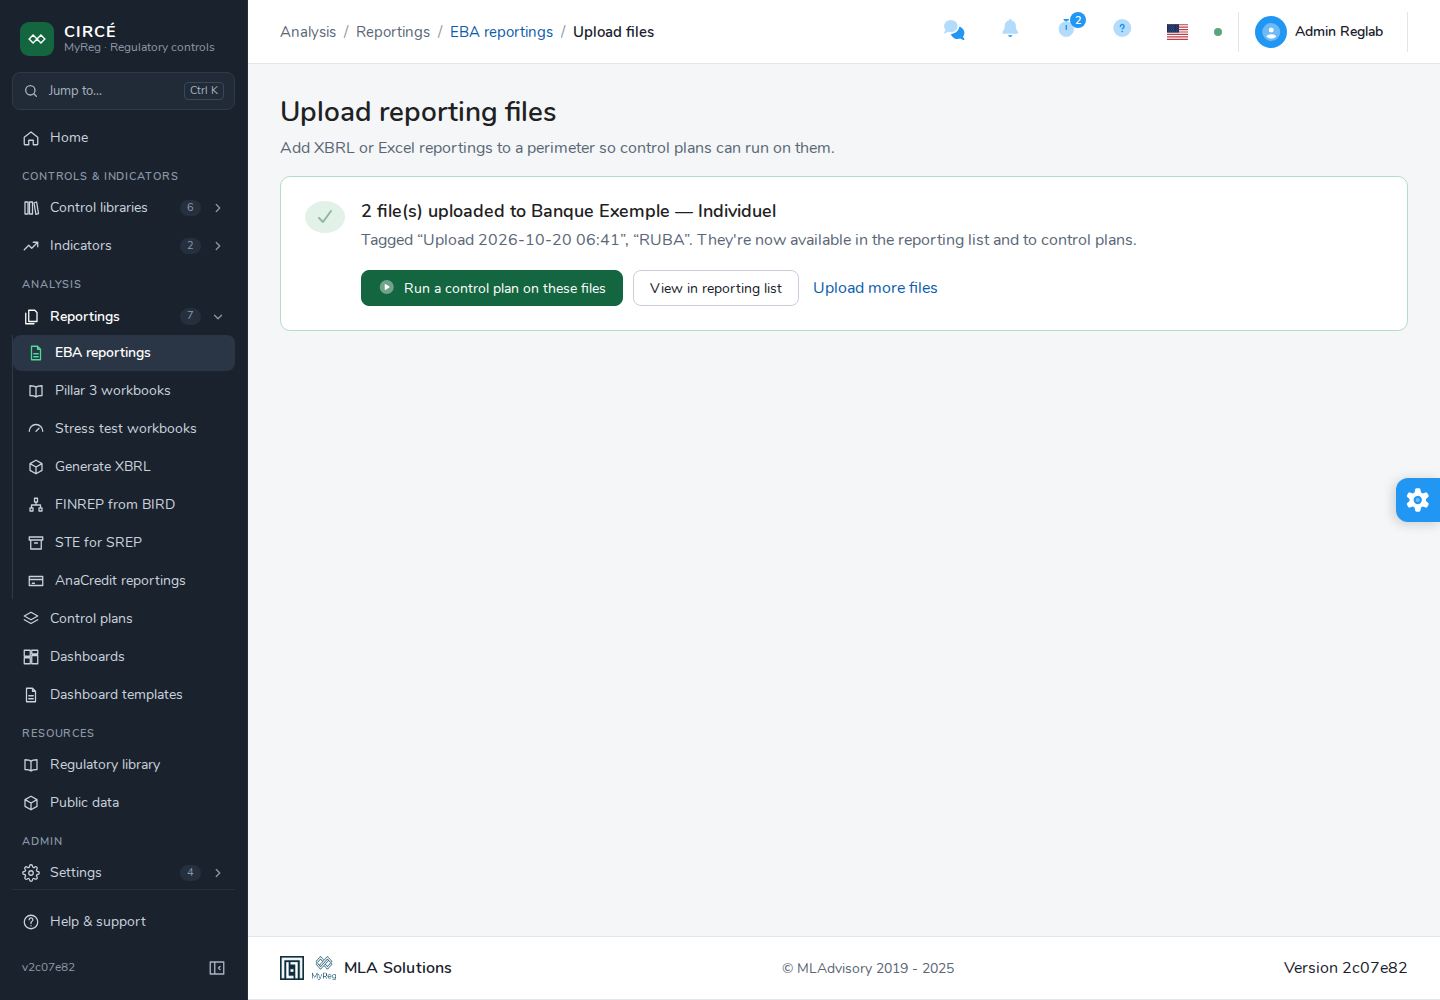
The files the server refused are listed separately, with their reason:
- Already uploaded to this perimeter: the same file already exists in this perimeter. It is not uploaded a second time;
- No valid reporting in this file: the file could not be read;
- Upload failed, or the server’s message.
A ZIP archive of which only some files were already present counts as uploaded: only the new files are added.
The Retry failed files button sends them again.
Formats accepted by default: .xml, .xbrl, .xlsx, .xls and .zip. For a DPM reporting:
- XBRL-XML instances (
.xml,.xbrl) up to version 4.1 of the taxonomy. From 4.2 onwards, an XML file is refused: upload the xBRL-CSV report package (.zip) of the filing instead; - XBRL-CSV reportings, in particular ZIP archives containing a
META-INF/reportPackage.jsonfile. The file is read with the taxonomy version its entry point declares, not from its reference date; - Excel workbooks in the EBA template layout;
- ZIP archives of several files: each file in the archive is uploaded separately and inherits the archive’s “Official” choice.
RUBA and AnaCredit reportings are uploaded in XML format.
The size of a file is limited, to 100 MB by default.
Tracking the processing of a file
After the upload, each file is extracted in the background. The EBA reportings page has two tabs:
- Files: processed files, ready to use;
- Processing: files being processed or that could not be processed.
- The status of each file is Processing…, Processing failed or Reference date missing.
- For a failed file, the error message is shown under its status.
- The Status filter exists in this tab only.
- Each file can be reprocessed, downloaded or deleted there from its ⋯ menu.
- The Delete all… button deletes all files in this tab, after confirmation.
The count of each tab takes the filters into account. It is then followed by an asterisk, and its tooltip says for example “8 of 12 – filters applied”.
The list updates itself when processing finishes. The Refresh button reloads it on demand.
An Excel workbook uploaded without a reference date has the Reference date missing status. Use the Complete the reference date entry of its ⋯ menu: choose the date in the Complete Regulatory Reporting File dialog, then click Submit. The file is then processed again.
The reporting file list
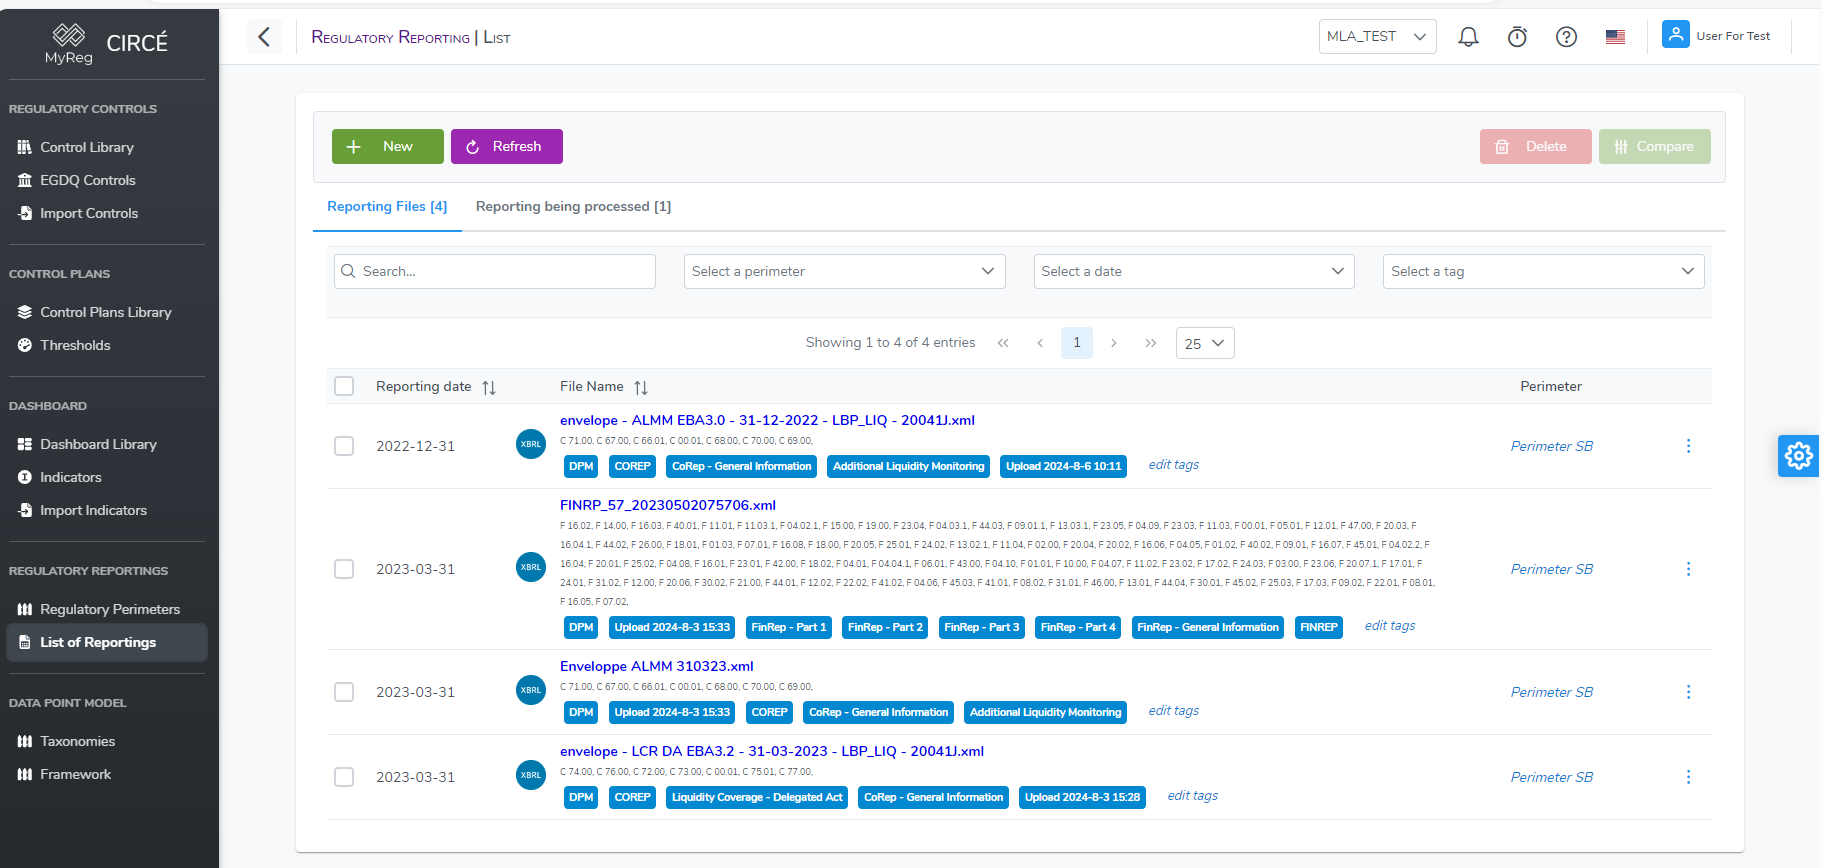
For each file, the list shows:
- the Reporting:
- a nature badge: DPM, RUBA or AnaCredit;
- the file name, which opens the file details;
- the format: XBRL-XML, XBRL-CSV, Excel or ZIP;
- the Official mark if the file is the official version;
- the Extraction incomplete mark if some data could not be extracted;
- the tags;
- the Ref. date, that is, the reference date;
- the Templates: the “n templates” button expands the list of the file’s template codes. The expanded panel also offers Run a control plan on this file and Download file;
- the Perimeter;
- Uploaded: the upload date and the status, Processed for the files of this tab.
Under the tabs, the filter bar offers:
- the Search field (“File name, tag, template…”): it filters the list as you type, on the file name, tags, template codes and labels, and perimeter;
- the Filters button, which opens the Filter the reportings dialog. It carries the number of applied filters;
- the Clear all filters eraser, active as soon as a search or a filter is set.
The applied filters appear as chips under the bar, for example “Report nature · DPM”. The cross of a chip removes that filter only.

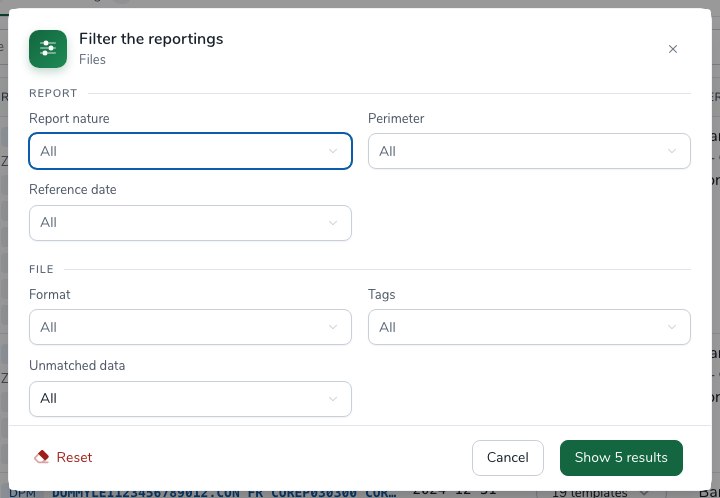
The Filter the reportings dialog names the tab concerned and groups the filters in two parts:
- Report: Report nature, Perimeter, then Reference date in the Files tab or Status in the Processing tab;
- File: Format, Tags and Unmatched data. The With unmatched data only choice keeps only the files whose extraction is incomplete.
Each list offers All by default. The Show n results button tells, as you choose, how many files of the tab match, and applies the filters. Reset empties the dialog’s filters, to apply the same way. Cancel closes the dialog without changing anything.
The filters are kept in the page address: a filtered list can be shared or bookmarked. When no file matches, the Clear filters link resets them all, like the eraser.
Click the header of the Reporting, Ref. date, Perimeter or Uploaded columns to sort the list. A second click reverses the order. Without a sort, the latest uploaded files come first.
The ⋯ menu of each file offers:
- Rename;
- Change perimeter;
- Edit tags;
- Toggle official flag, for a processed file;
- Complete the reference date, for a file without a reference date or in error;
- Download, which returns the original file;
- Reprocess;
- Permissions, if the Teams module is enabled;
- Delete.
When files are selected, a bulk actions bar appears: Compare, Reprocess, Download, Permissions (if the Teams module is enabled), Delete… and Clear. It also offers Build AnaCredit if the AnaCredit module is enabled, and Generate Pillar 3 if the Pillar 3 module is enabled. An action that is unavailable for the current selection shows the reason.
How to rename a file
In the list, use the Rename entry of the file’s ⋯ menu. The Rename the file dialog opens: enter the new File name, then click Save.
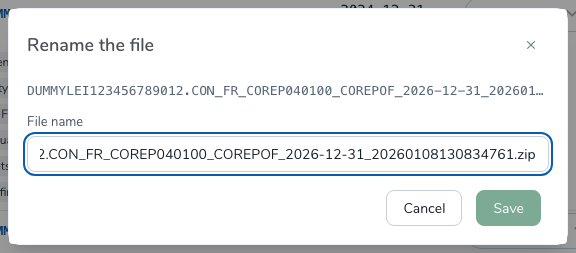
On the details page, use the Rename file… entry of the More actions menu (⋯), then click Rename.
Name rules:
- It cannot be empty.
- It is at most 150 characters long.
Only the name changes. The data, the perimeter and the control or indicator results are not modified.
How to change the perimeter of a file
In the list, use the Change perimeter entry of the file’s ⋯ menu. Choose the new Perimeter in the Change the perimeter dialog, then click Save. Only the attachment changes: the data, the date and the existing results are kept.
How to mark a file as official
A file can be marked official at upload time, with the checkbox of the Official submission column. You can also use the Toggle official flag entry of its ⋯ menu at any time.
Official files carry the Official mark. Running control plans and dashboards offers only official reportings by default. Several files of the same perimeter and the same date can be official.
How to reprocess one or more files
Reprocessing restarts the extraction from the original file kept by the platform. This is useful after a taxonomy fix or for a file in error. A file uploaded with an earlier version of the platform must also be reprocessed for its filing information (entity, consolidation, version, module, currency) to be known. It is used in particular to generate Pillar 3.
To reprocess:
- one file: use the Reprocess entry of its ⋯ menu, in either tab;
- several files: select them, then click Reprocess in the bulk actions bar. A confirmation lists the files concerned.
During reprocessing, the file moves to the Processing tab. It returns to the Files tab once processed.
How to navigate a reporting file
Click a file’s name to open its details page, titled for example “FINREP reporting · 2026-03-31”.
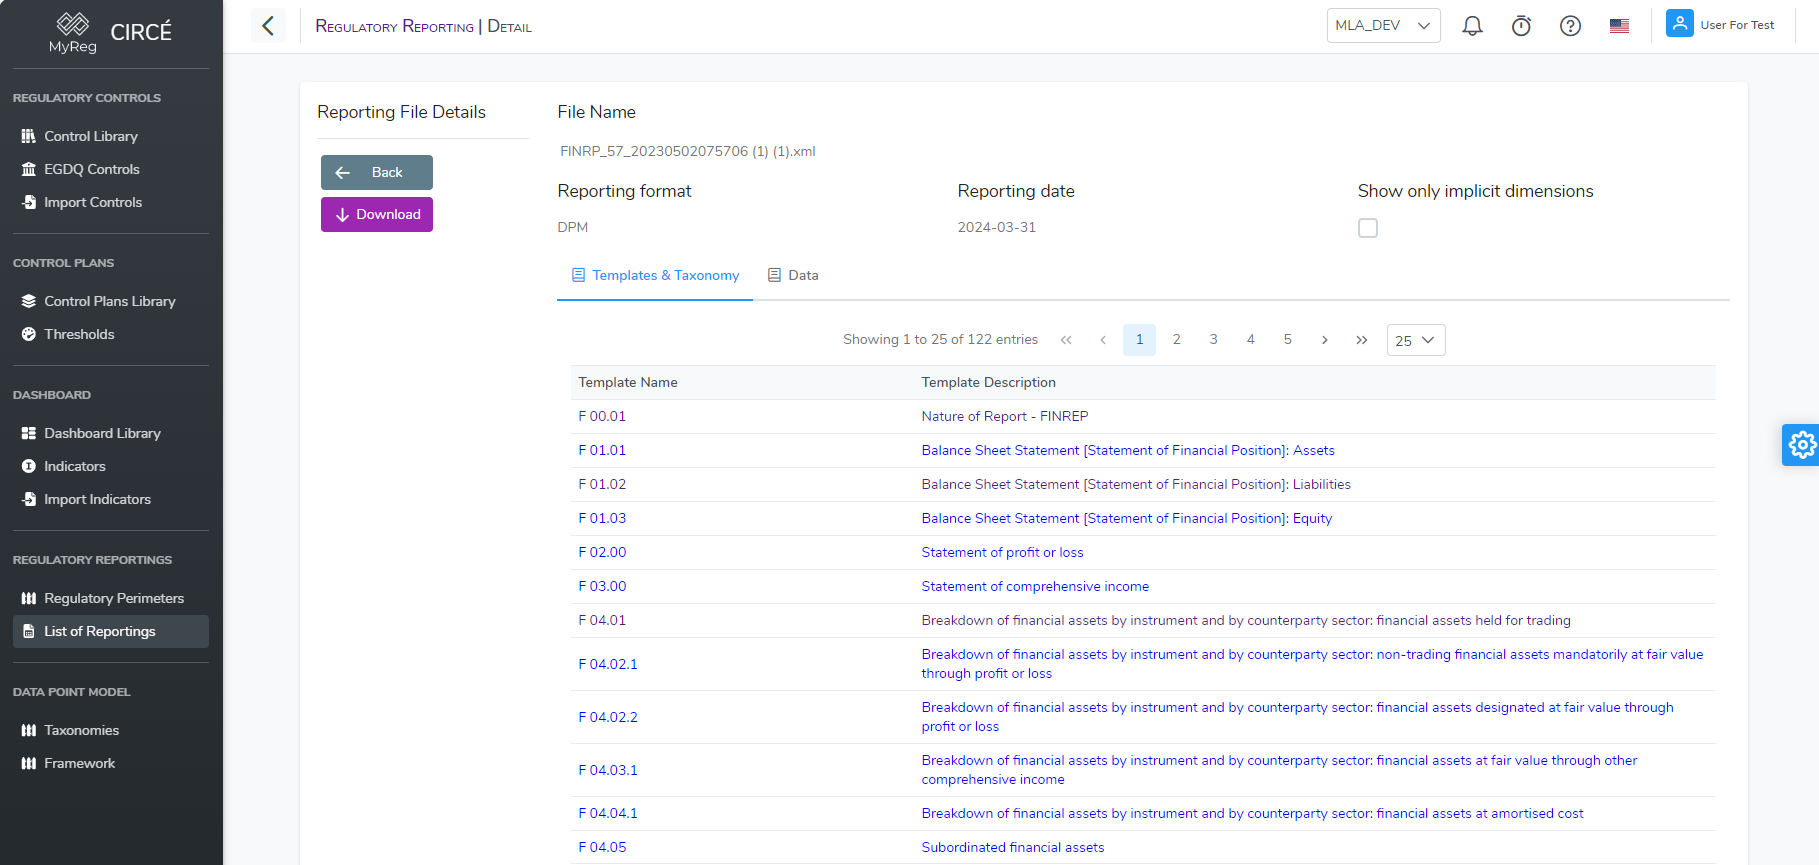
The header shows the framework (or, failing that, the report nature), the status and, where relevant, the Official and Extraction incomplete marks. It also shows:
- the Reference date;
- the Perimeter, with a link to that perimeter;
- the Format, the nature and the taxonomy;
- the Tags.
The header actions are:
- Download file, for the original file;
- Export data (.xlsx), with All data and Filtered data, for exports;
- Run a control plan, available once processing finishes;
- Open analytical review, for a processed DPM file. It opens the analytical review;
- Delete…;
- More actions (⋯): Rename file….
The browser’s Back button returns to the previous page.
The page has the following tabs:
Templates: the file’s templates, grouped by family. The Filter templates field searches codes and names.
- A template’s code opens its table view, with the file’s data.
- View data opens the Data tab, filtered on that template.
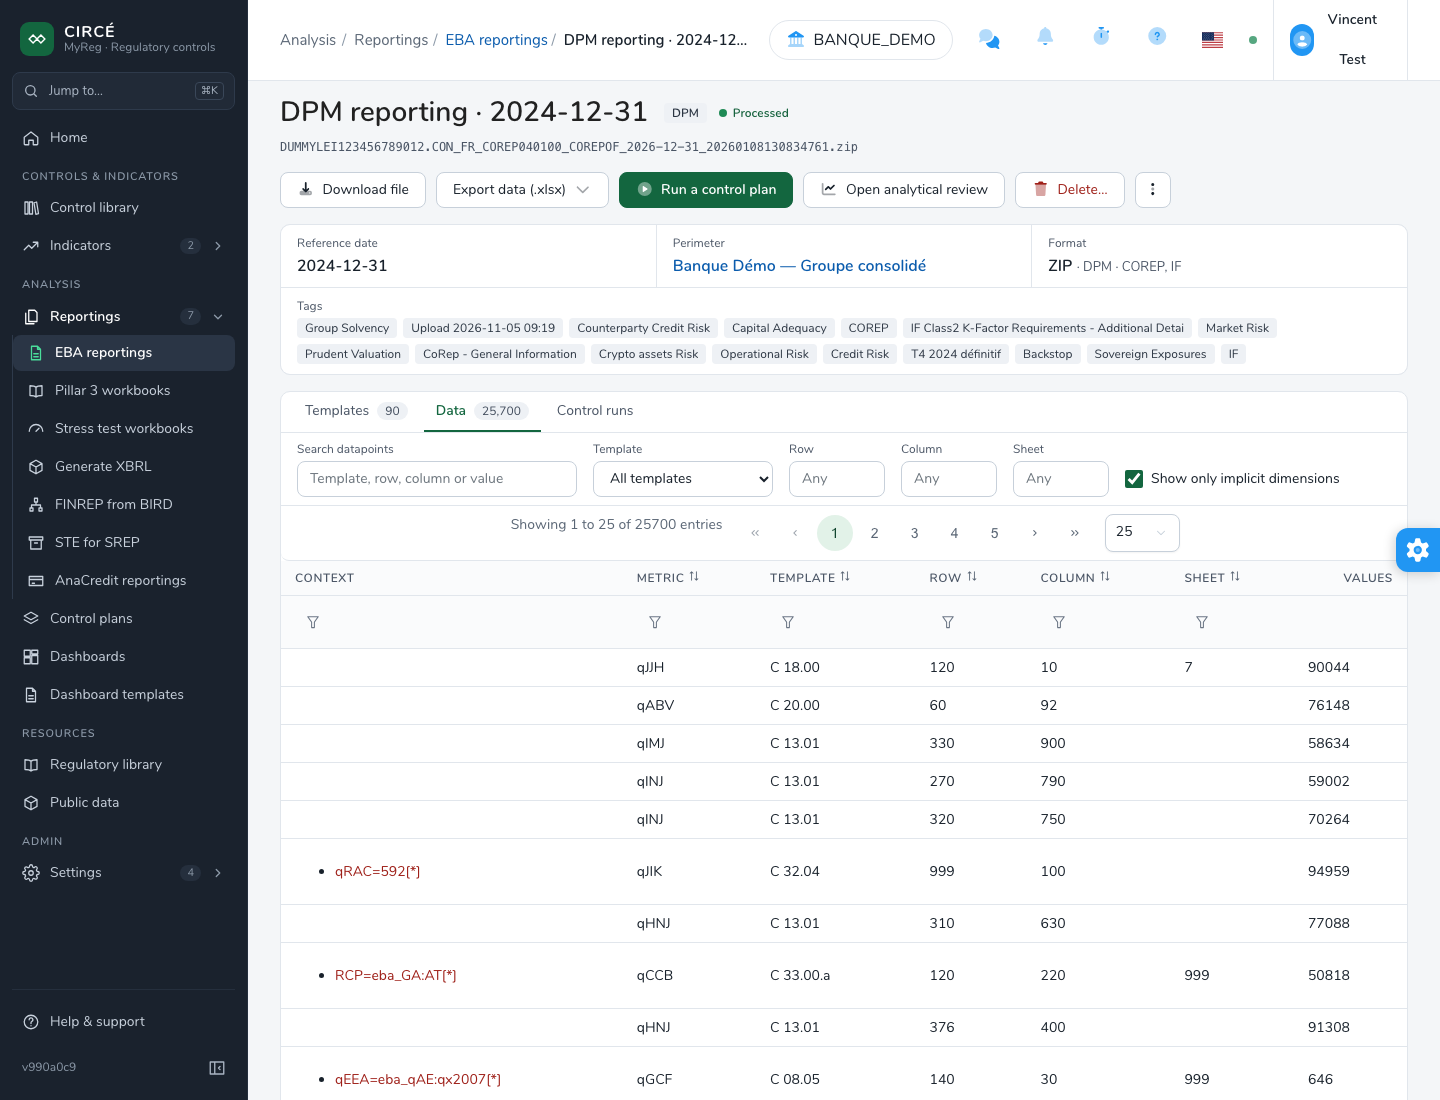
Data: all the data in the file, with for each item:
- the context, that is, the dimensions;
- the metric;
- the template, row, column and sheet;
- the value.
The toolbar offers Search datapoints, a Template list and the Row, Column and Sheet fields. These three fields accept digits only: they keep the data points whose number contains these digits. Each column also keeps its filter menu. Clear filters resets them all.
The Show only implicit dimensions checkbox, ticked by default, limits the Context column to additional dimensions. These dimensions appear in red with the
[*]marker.Control runs: the control plans run on this file, with the number of results per status. Open results shows the result of a run.
Unmatched data: present only if the extraction is incomplete. It lists the file data that could not be attached to a taxonomy cell.
While the file is being processed, the Templates and Data tabs show “Available once processing finishes”.
The template view shows the data of each cell.
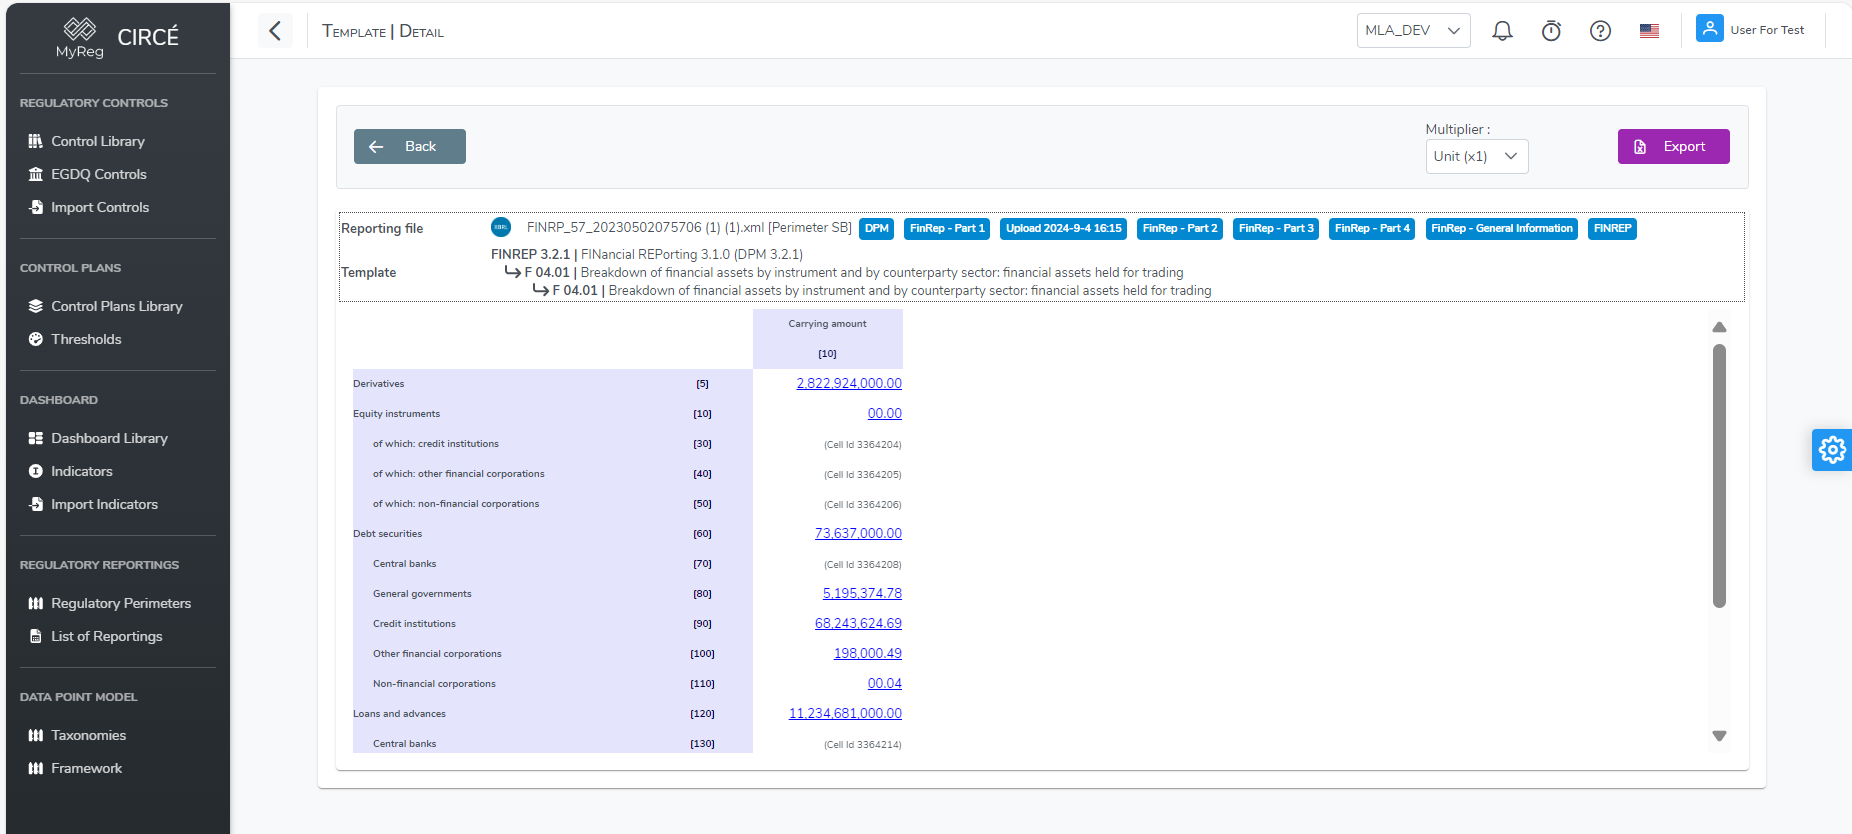
In this view:
- The header shows the table code, the taxonomy, the reference date, the Reporting file, with a link to its details, and its Perimeter.
- Column headers are nested and stay visible while scrolling. Row and column codes are the 4-digit EBA codes.
- Shaded cells are hatched, as the Not applicable (shaded) legend recalls.
- The Scale selector displays amounts in units, thousands (k) or millions (M).
- The Export button downloads the template filled with the file’s data.
- The Sheet selector changes the sheet. When the template has a single sheet axis, the selector bears the name of that axis and chooses its member.
- Back returns to the previous page.
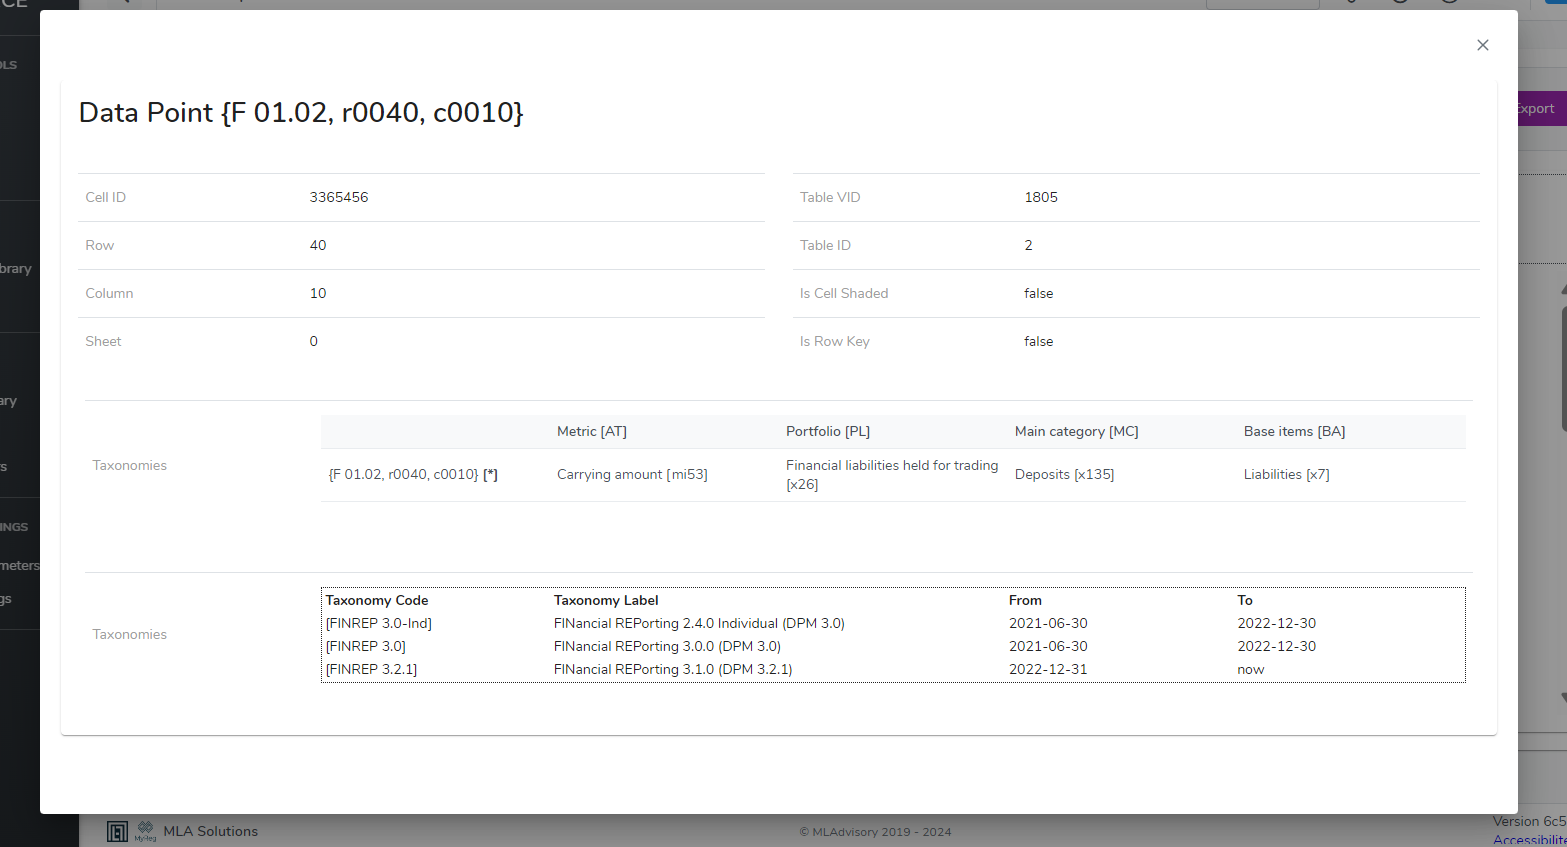
Click a cell to open the data point details. They show:
- the cell code and, where relevant, the Not applicable (shaded) and Is Row Key marks;
- the row, column and sheet, with their code and label;
- the Reported value;
- the cell’s Dimensions: for each, the domain and the member;
- the Taxonomies in which the cell exists, with their start and end dates. The taxonomy in force carries the “current” mark;
- at the bottom, the technical identifiers: Cell ID, Table VID and Table ID.
How to export the data of a file
From the details page, the Export data (.xlsx) button exports the file’s data to an Excel file:
- All data exports all data points.
- Filtered data exports only the data matching the filters of the Data tab: template, row, column, sheet and column filters. The Search datapoints field is not one of them. This entry is active only if a filter is set.
The button stays disabled until the file arrives, which avoids a double export.
The datapoints_export_…xlsx file contains:
- a Summary sheet, with the applied filters;
- a dataPoints sheet, with the cell code, template, row, column, sheet, context, value and metric.
Numbers are real numbers and dates real dates. The header is frozen and filterable.
How to delete one or more reporting files
On the list page, use the Delete entry of a file’s ⋯ menu.
A confirmation dialog names the file and lets you confirm or cancel your action. The file and its results are deleted.
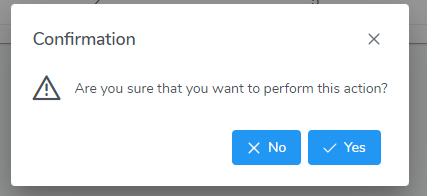
You can also delete several files at once: select them, then click Delete… in the bulk actions bar.
From the details page, the Delete… button also asks for confirmation. It lists the control runs that used the file. These runs can still be viewed: the file appears struck through in them.
Files being processed or in error are deleted from the Processing tab.
How to compare several reporting files
On the list page, select two to four files of the same nature, all DPM or all RUBA, then click Compare in the bulk actions bar. If the selection does not fit, the bar gives the reason: “Select 2 to 4 reportings to compare” or “Only reportings of the same nature can be compared”.
The Compare reportings page presents the compared files: reference, file name, type, perimeter, reporting date and Pivot.
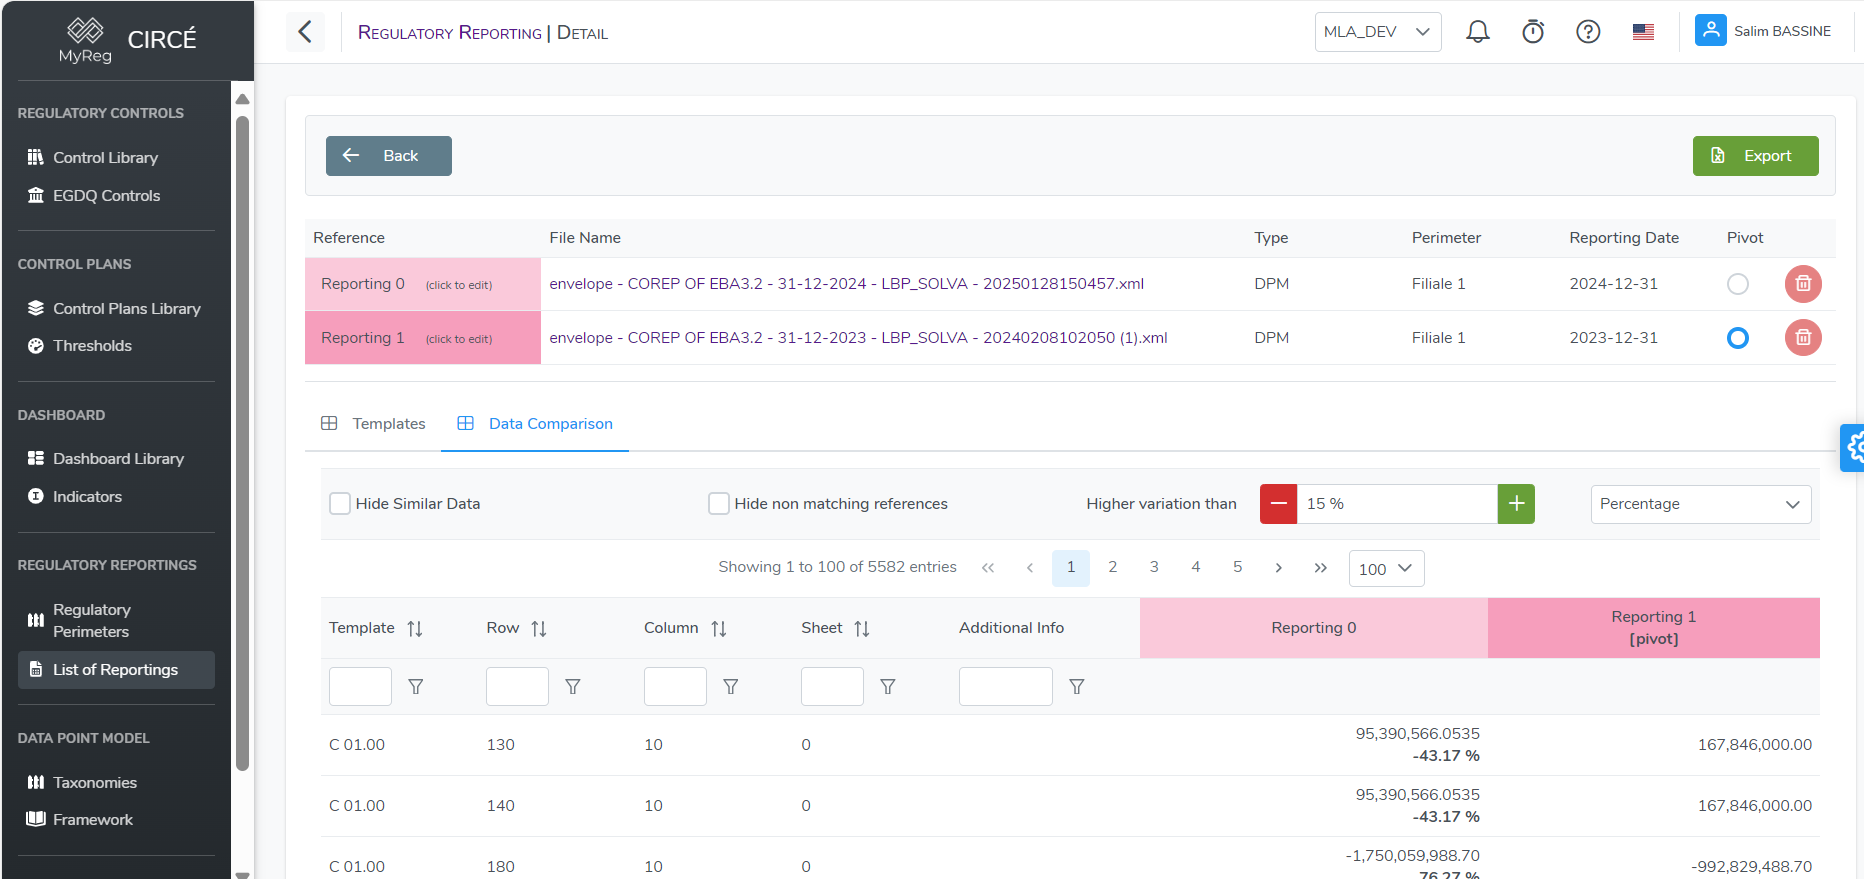
- The Pivot is the file used as the basis for differences. For a value A of the pivot and a value B of another file:
- the difference is (B − A) / A as a percentage;
- it is B − A as an amount.
- The Reference of each file (“Reporting 0”, “Reporting 1”, …) is edited by clicking it, then confirming with the check mark. It is used as the column header, including in the export, but is not saved.
- The trash icon removes a file from the comparison, as long as at least two remain.
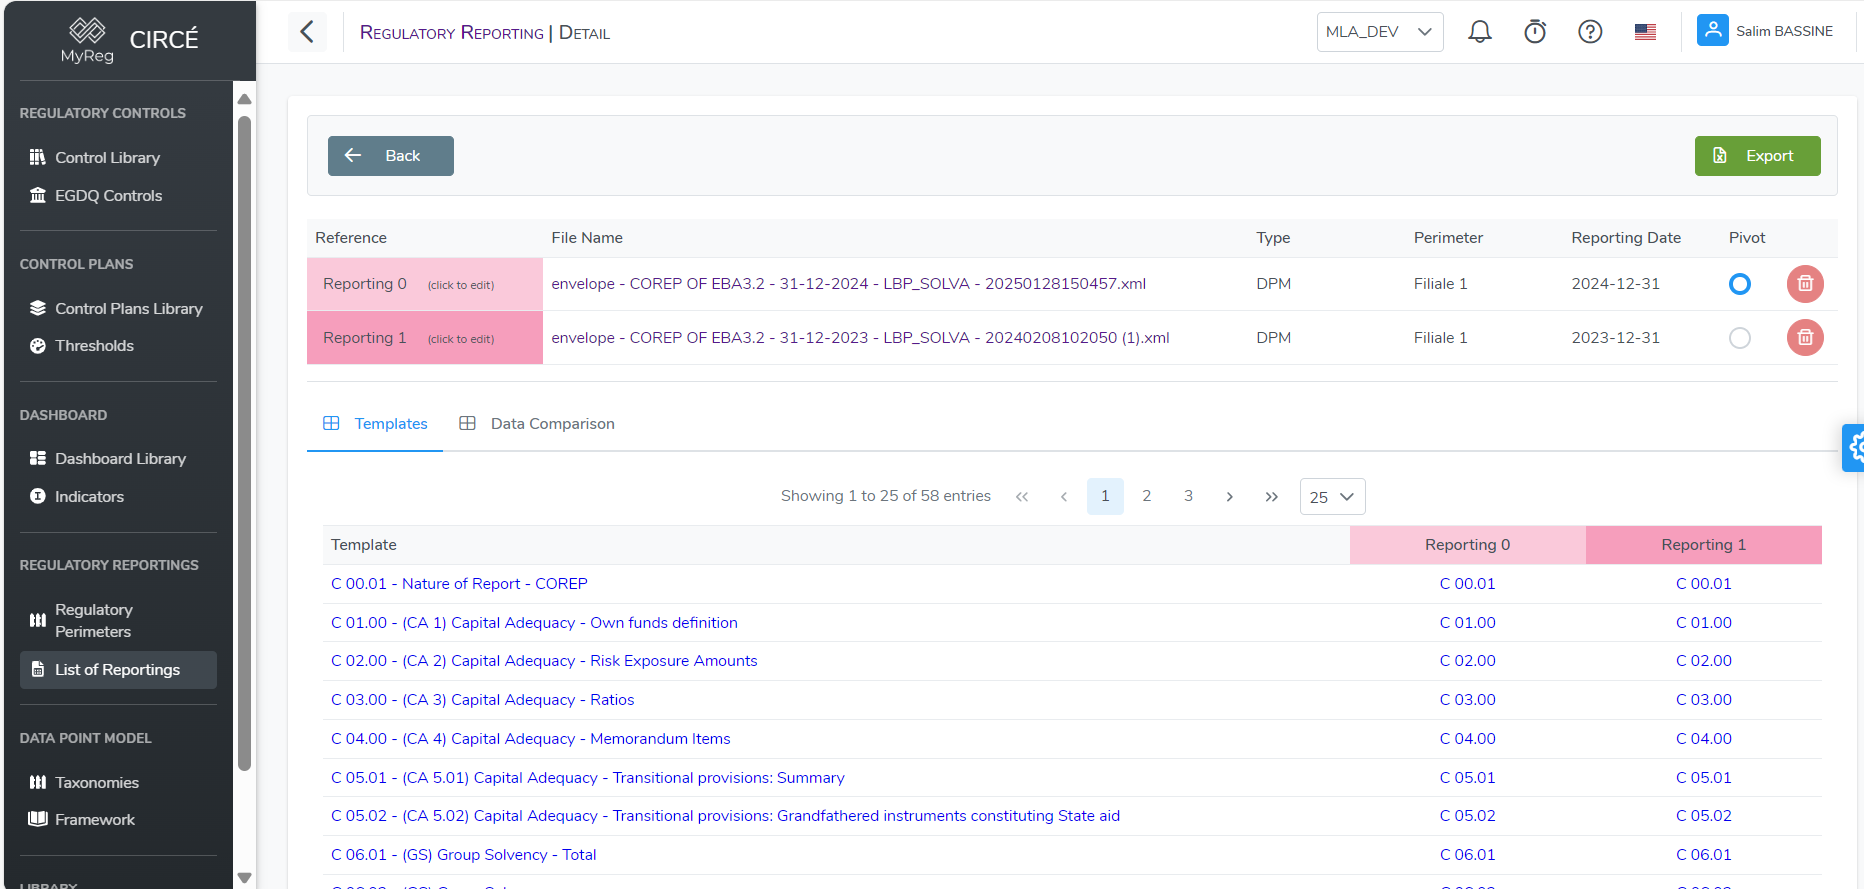
The page has two tabs.
The Templates tab lists the templates and indicates, for each file, whether it contains that template.
The Data Comparison tab lists all values present in at least one file. It offers several filters:
- Hide Similar Data;
- Hide unmatched refs: hides data missing from at least one file;
- Higher variation than: shows only data whose difference exceeds a given number, as a percentage or an amount. The threshold applies to the absolute value, and a row is kept if at least one file exceeds it;
- a filter menu on the Template, Row, Column, Sheet and Additional Info (dimensions) columns.
Clear Filters resets the column filters and the variation threshold. The total shown takes the filters into account.
The Export button produces an Excel file …_compare.xlsx with the following sheets:
- Templates;
- DataPoints: all data, with the differences from the pivot;
- PartiallyValuedDataPoints: data filled in only some files;
- FilteredDataPoints: the filtered data, if a filter is active. It applies the same rules as the screen: similar data, unmatched references and variation threshold;
- ReportingFiles.
The filter on additional information does not apply to the export.